Category Archives: Homemade

Sterling Silver Hammered Ring

I have been slowly adding to my metalsmithing supplies and have finally reached a point where I am able to make rings (well, almost, I do not have a ring mandrel yet). I made my very first 4mm sterling silver, hammered ring today. As it is my first attempt, I already see many things that I can improve upon, but for a first try, it isn’t half bad, especially since it fit from the beginning. I did not have to make any size adjustments. I will have no qualms about wearing it until I make a better one.

Sterling silver hammered ring

After putting my photo lights to rest, I realized that the inside of the ring could have used some polishing and the outside could have used some additional polishing, but you get the idea.

I have had this idea for a ring for years. It is to be my anniversary ring. I thought that it would be much more fun to make one rather than to buy one. No, this is not it, but it is the first step in my plans. Now, I just have to practice making rings. It is going to be a fun year getting everyone’s ring sizes for Christmas presents next year!

Happy Creating!

Kristin

Blue Coral Necklace and Earrings

I love matching earring and necklace sets. As far as I am concerned, you can never have too many.

I made the following earrings and necklace out of sterling silver for the earwires, wire hoops, and necklace hook, blue glass and zinc tube beads for the drops of the earrings, blue coral, blue glass, zinc tube beads and white seed beads for the necklace.

Blue Glass Earrings

You cannot see it, as it is the back of the necklace, but I used a small length of sterling silver chain to make the necklace a variable length. I wear a LOT of blue and wanted to be able to wear this with many different styles of shirt.

Blue Coral and Glass Necklace

Happy Creating!

Kristin

Winter Scarf and Earmuffs

I will probably ruminate on creativity a bit here when I have the time and the thoughts behind it. It may get a little rambly and may not always make sense, as it is a sort of stream of consciousness to rediscover and define my creativity.

For me, creativity can mean so much. It can be the act of making – whether it be new invention, remake, improvement, it doesn’t matter. It can be doing, I imagine before the year is out, I will figure out how it is a state of being. I have also discovered over the years that frequent small creative successes can be so much better for my psyche than one or two large successes, at least as far as crafting goes. So for today, I finished a scarf and earmuff set. I have had the earmuffs completed for over a year now, but the scarf started as a infinity scarf that was a pretty good failure. I ripped it apart and have recreated it for today. I am much happier with the second attempt and I hope you enjoy the result.

It wraps around me twice and ties in a single knot.

I made the scarf in single crochet in the back loop, crocheted in the long. This gives a false ribbed appearance.  I think it is approximately 210-250 stitches long and is nine rows, not counting the bouclé row. The scarf could be made with however many stitches and rows you prefer. I wanted a fairly chunky scarf, so this is two worsted weight wool yarns crocheted together. There is a blue yarn and a green yarn of the same type.

Here you can see the front of the boucle stitch that I used for the fringe.
Here you can see the front of the bouclé stitch that I used for the fringe.

The last row is a bouclé stitch that creates a nice fringe that runs the length of the scarf.

Here is the backside of the bouclestitch.
Here is the backside of the bouclé stitch.

You can read about how I made the earmuffs in a previous post here.

Matching set of earmuffs and scarf.

With the seriously cold weather that is imminent here in Indiana, I think that I will truly appreciate the scarf and earmuffs. I finished them just in time.

Happy Creating!

Kristin

Paper clip snowflakes

121513 001 121513 004

Cheri-I hope everyone is having a wonderful Holiday Season so far.

These are two ornament that I made from paper clips.

Supplies

Large paper clips

Round nose pliers

Grommets

Small gauge wire

Glue

I first started by experimenting  with different paperclip bends.  I knew that I wanted to make a snowflake so I made sure that I would have a way to connect them to each other. After I had a pattern I liked, I began to work on the connection. The grommets worked great for the 2nd snowflake as I had a loop to affix it to. The top one I decided to wire, after I wired it I put a drop of E-6000 on each wire. This stabilized the connection.

Hope you are enjoying our Christmas countdown and again Happy Holildays.


Close up of Christmas ball earrings.

Christmas Advent: Tree Pendant and Christmas Ball Earrings

I had to make a necklace and earring set for myself for Christmas this year. I realized that I do not have any holiday jewelry and that just seemed to be a very strange oversight on my part. So, here are my Christmas ball earrings and tree pendant. I am really happy with how they turned out. I did a happy dance!

Pic of tree pendant and Christmas ball earrings

I used sterling silver 18 gauge wire for the tree and ball shapes, 26 gauge for the garlands, and 21 gauge for the ear wires. I have some really pretty glass red florets, glass green diamond shapes, and silver delicas that I used to make the garlands.

Close up of tree pendant

The pendant was a lot of fun to make. I just used a pair of flat-nose pliers to make the shape, bending it until I liked the general style.

Close up of Christmas ball earrings.

I just love the Christmas ball earrings. I did hammer the 18-gauge wire after I made the ball shapes.

I am so happy with how these turned out and will be wearing them to work tomorrow (probably every other day until Christmas too).

Happy Crafting,

Kristin

Easy Scrapbook Paper Star Garland

garland2

Loryn:  This scrapbook paper garland is so easy to make! All you need is a few sheets of paper, a star-shaped punch, glue, and fishing line, nylon thread, or any other white/clear cord to glue your paper to (even dental floss if you’re crafting late at night and grab the first thing you can find!).

garlandall

The first step is to cut stars out with your punch.

garlandstep1

Then fold two in half and glue the halves together. For this garland, I used two pieces of the same color and an accent for each bauble.

garlandstep2-a

Then put your thread or fishing line into the fold and glue the third star onto the first two. That’s it! Just repeat to make the garland as long as you want. I don’t know how many stars I used for this. A lot!

— Loryn

garlandgkr 

Christmas Ornament Advent Countdown

20131207-115213.jpg

20131207-115229.jpg

Lynne : This is my second ornament for our 2013 countdown. I am in love with trees right now and have been drawing them over and over so it seemed natural to find an ornament that looked like a tree. I was browsing through google images and I found this article from Just Something I Made by Cathe Holden about how to make bottle brush trees. Since I do not have much need for bottle brushes any more I was delighted to find that she uses rope and wire for her trees and shapes them with scissors. And as a bonus I could use my Copic airbrush system to color the trees.

Cathe Holden website:
Just Something I Made by Cathe Holden

Here is the tutorial:
Handmade Colorful Bottle Brush Trees

You will need these things:
Wire
Wire cutters
Rope (sisal, jute, or any twisted fiber)
Drill
Hook (shaped from a wire coat hanger or from a small S-hook)
Vise (or something that will hold the wires securely when twisting them with the drill)
Pliers
Copic airbrush (optional)

20131207-114727.jpg

I already had some jute, but when I untwisted the fibers I thought they were too fuzzy and too fragile. I made a trip to the hardware store and found some thick rope that is used on farms. (I remember swinging on the hay ropes as a child. When my grandparents weren’t looking of course.) I cut my rope into lengths of 3 to 4 inches and then began to untwist the fibers. When I had an amount that looked like it would make a full Christmas tree I laid the fiber between the wires as described in the tutorial. It is so nice that you can make two at once by cutting on the diagonal.

I didn’t have a wire coat hanger to make into a hook for the drill because I don’t like the sound they make rattling in the closet. So I took an S-hook and straightened one end so that it would fit into the drill. You can see it in the drill in the photo. I put the wire ends in my vise and inserted the hook in the top of the wire and the wire began to spiral just like it was supposed to. I noticed that the fiber also tangles and you do need to spend some time straightening and combing the fibers to approximate the shape of your tree. Then I used small scissors to cut the final shape. It’s best to do this over something you can throw away because the fibers are very small and sticklish.

When I had the shape I wanted I looked for something to hold them while I spray painted them and found an empty Kleenex box. The wires poked in easily and the setup worked, but I think I’d rather have had a piece of styrofoam. I’m sure we’ll have some after unwrapping presents and I intend to save a piece for a painting stand.

To color the trees I used mostly blues and yellows and finished with a dark green. I start with the lightest yellow and spray the whole tree. Then I concentrate yellow on the ends of the branches using what yellows look good on the fibers. I then use blues from the lightest to the darkest making sure that the lightest yellows remain as free as possible of the blues. The yellows and blues make a lovely variety of shades of green as they are sprayed one on top of the other. I use a dark green to deepen the shadows between the branches to create more depth in the tree. I touch up the yellow and the tree is almost done.

I bent the stem wire with pliers into an X-shape for the bases, but you could use cork or wood or just about anything for a base.

These trees look so good and once you have everything laid out, they work up very quickly. I hope you have as much fun making them as I did.

Paper Punch Ornament

Okay, I am 2 days late with this post, but you will have to forgive me, between class, a major migraine, and a massive snowstorm, I have been a little bogged down.

In my last post, I used this wonderful paper punch and I just have not been able to resist using it again. This time, I used gift-wrap for the paper cut-outs. I have discussed before my one-time hobby of making temari balls. I have massive amounts of supplies left over from this hobby and I raid it regularly for other projects. For this project, I nabbed a wrapped ball that I had already made. I use stuffing and wrap it with loads of sewing thread. I was a little more proactive this time and added my hanger before I got started adding the paper punch-outs.

Paper ornament with paper punches

I cut out loads of the paper punch-outs and used beading pins and sequins to attach them to the ball. I started at the bottom of the ball and went around in a spiral adding paper punch-outs as I went around and up the ball.

Paper ornament close up

It is a really easy ornament to make and only took me about a 1/2 hour. This does not include the time it took me years ago to make the thread-wrapped ball, but that only took me about 20 minutes at most. You could also use a foam ball for your base as well.

I am really happy with how the ornament turned out.

Happy Crafting!

Kristin

Small photo of paper ornament.


Side view of wreath

2013 Christmas Advent: Paper Wreath

Happy Holidays!

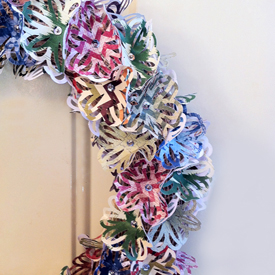
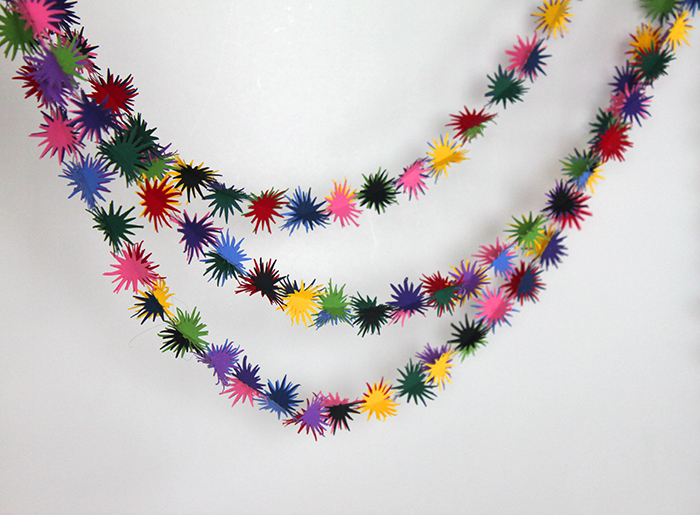
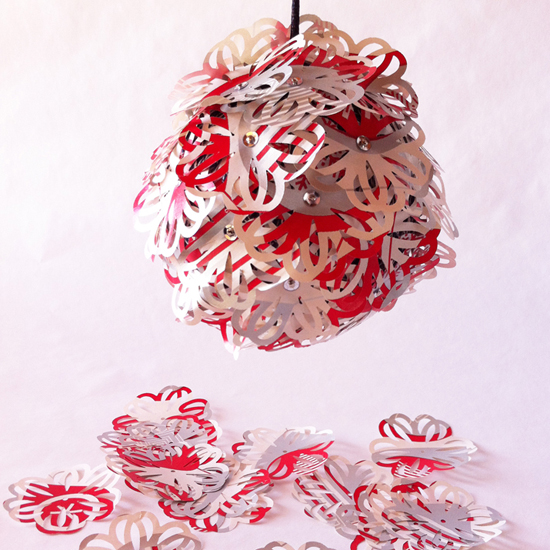
Hello, and yes we are still alive. We are doing our annual Christmas Advent. This year we are covering Christmas Decorations. I decided to to do a Christmas wreath and have been playing with paper lately and thus my Christmas Paper Wreath was made.

Finished paper wreath

For supplies:

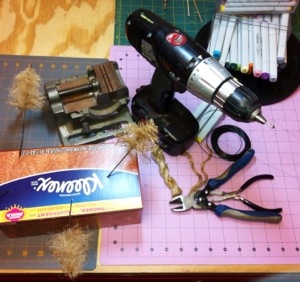
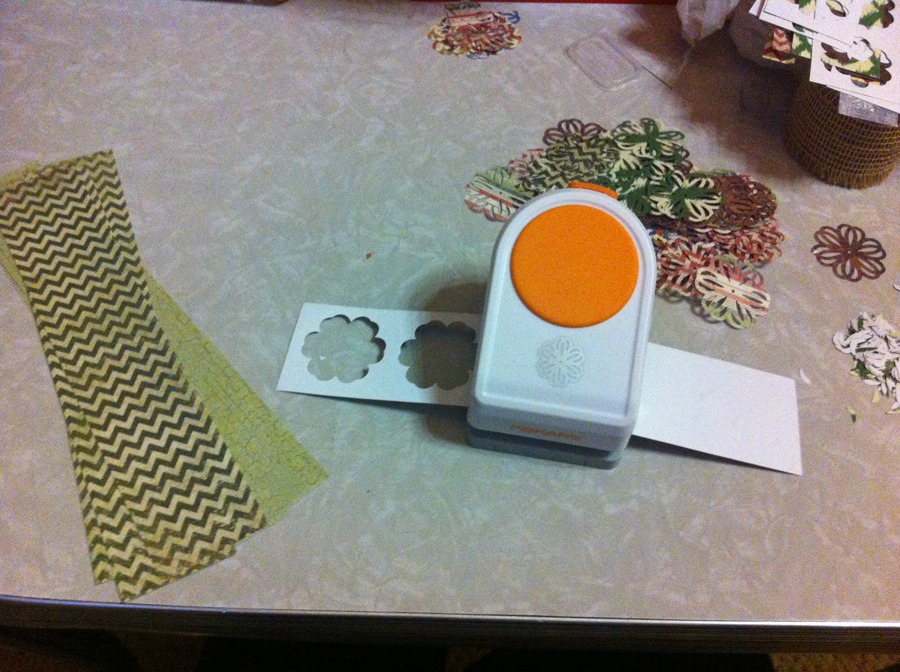
Foam wreath shape, burlap ribbon, scrapbook paper (paper cutter optional), pins, sequins, paper punch (twine and bells optional)

Supplies needed for paper wreath

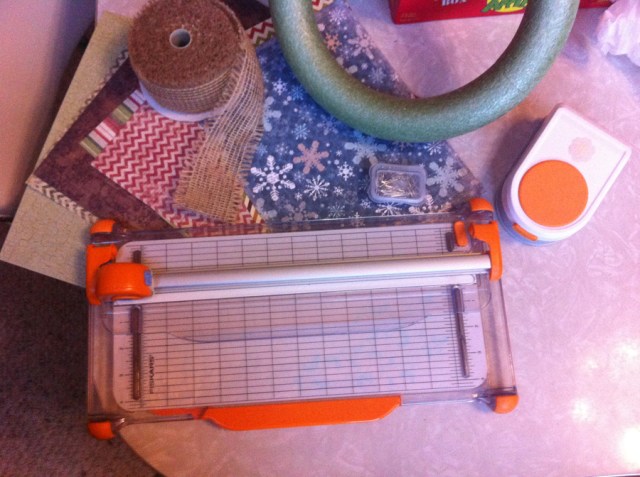
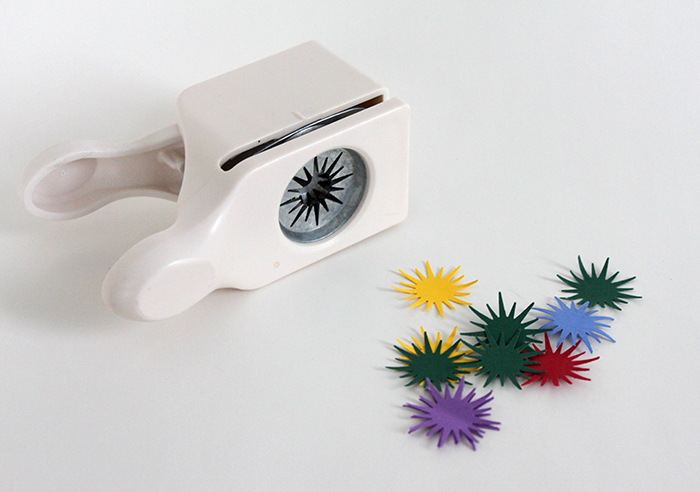
The paper punch I chose cuts out a 2 1/2″ shape, so I cut my scrapbook paper into 3″ swathes. This I then ran through my paper punch and cut out my florets.

Paper punch

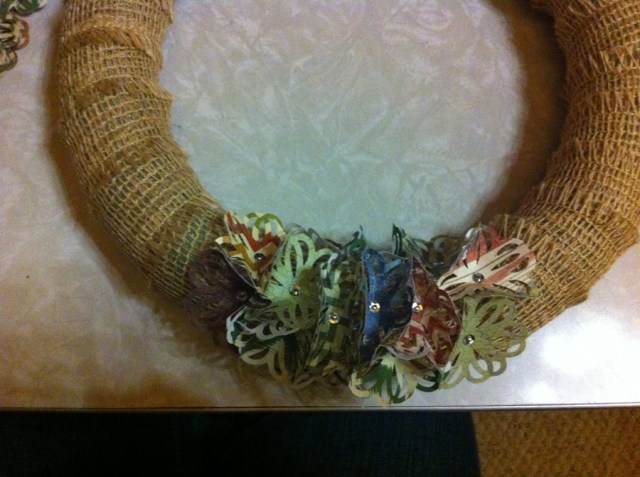
Once I had all my florets, I wrapped the foam wreath with the burlap ribbon. I used pins to hold the burlap in place (I was trying to keep my supplies to a minimum, but you could use hot glue here if you preferred).

Burlap wrapped foam wreath

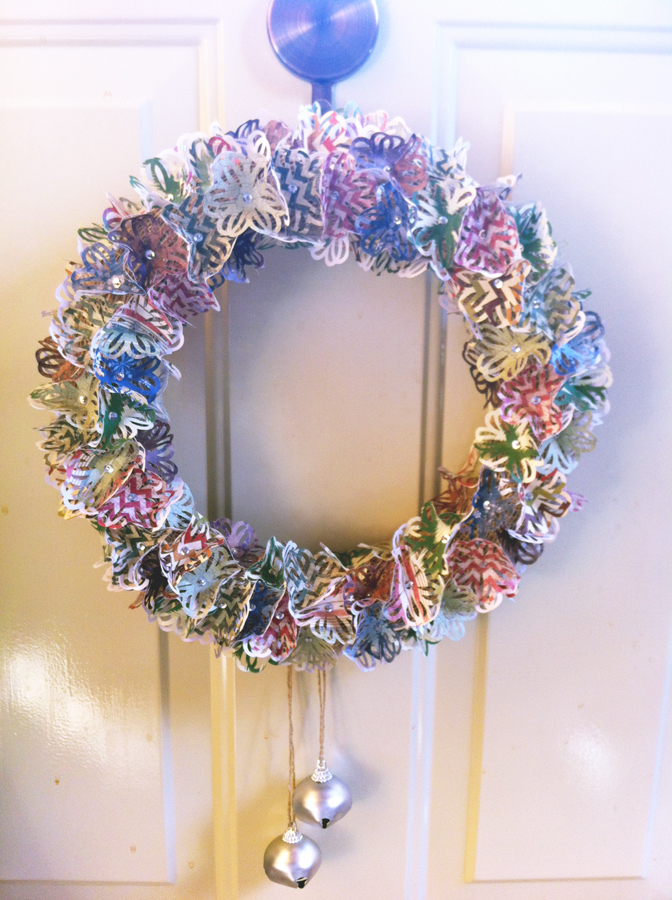
I attached the hanger and bells at the very end, but realistically, this would have been the best time. It worked just fine adding these at the end of the project, but I could have hidden them better had I tied them around the wreath before adding the florets.

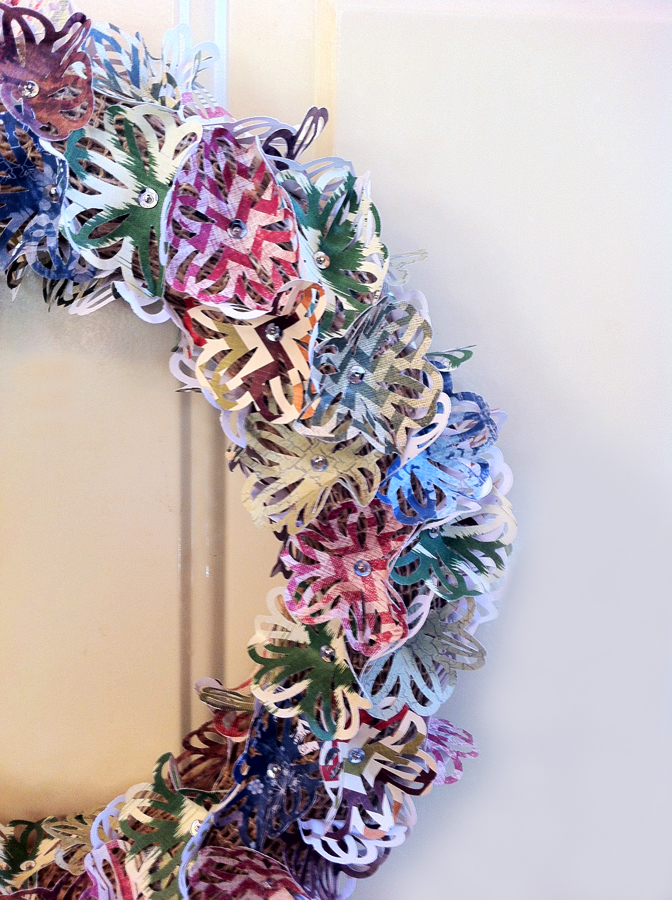
Next, I started attaching the florets. I have to tell you about my error now. I bought large head beading pins for this project and thought they would be large enough that they would hold the florets by themselves. However, once I tried to hold the florets in place with the pins I discovered that I was wrong. I needed something to go between the pinheads and the florets. You could use just about anything, I chose to use silver sequins. I imagine that small beads would also have been lovely.

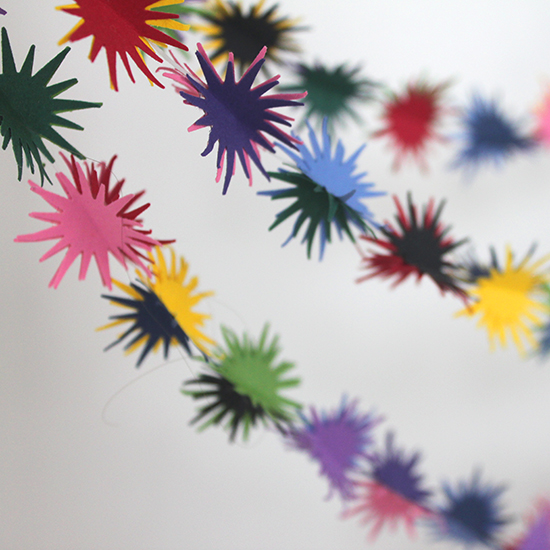
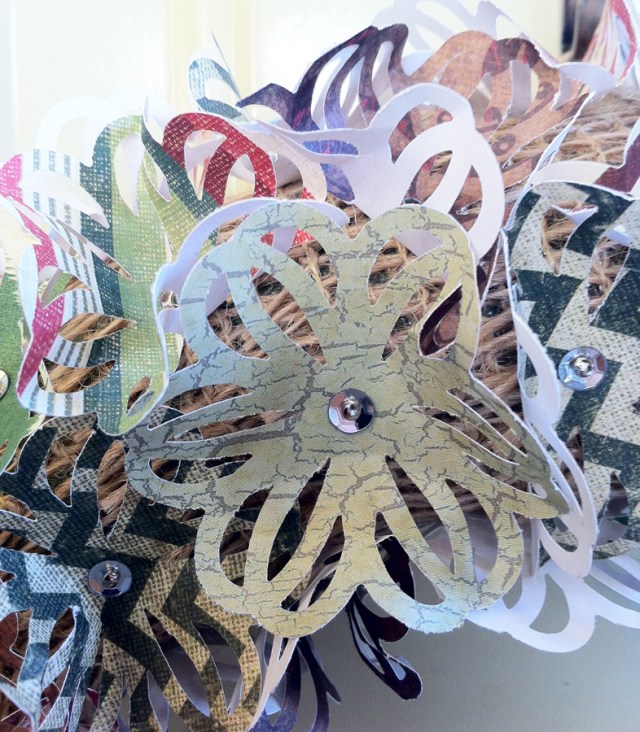
Once you put the pin through the floret, use your fingers to bend the floret up into a flower cup shape. This is what gives the florets three dimensions.

Attaching florets to wreath

Just keep pinning the florets to the wreath all the way around, being sure to cover the inside and outside of the wreath.  I made sure that none of the florets were flat on the wreath. I would pull up the edges of the nearby florets so that the edges were all up and none were flat.

Here you can see the burlap ribbon under the florets, but once the wreath is complete, you cannot see the burlap from a regular distance away.

Paper Wreath Close Up with Burlap2

I love the way it turned out. It looks great hanging on my front door.

Side view of wreath

Finished paper wreath

Happy crafting!

Kristin

Paper Wreath Close Up CG

Gourdy Birds

Gordy Birds

A few years ago I had the pleasure of finding a large bag of dried gourds. I have kept these gourds and stored and restored them. Keep in mind that these are not easy items to store. They take up a lot of room and are very unwieldy. After a few years of storing them I decided that I was going to give them away, since they were laying around doing nothing. I put the bag in my car.

The gourds traveled with me for a few months and I still couldn’t bring myself to get rid of them. Why wouldn’t inspiration hit me?

It finally did!

The gourds reminded me of birds. Not beautiful birds necessarily, but goofy, rather klutzy birds. Birds that might have been related to the Coo Coo Bird.

I started by washing the gourds, just enough to get the crud off, I used sculpey to make the beaks and eyes, cooked them for the time necessary and glued them with E-6000 to the gourds.

The eyes and beaks were a jumping off point. I painted them with bright colors and bent wire to make legs. I used a small knife to make a hole in the gourds and glued the legs in.

The birds turned out to be so much fun, and I am thanking my lucky stars that I kept them. I hope you enjoy them, and I will post photos from time to time as I make new ones.

022313 014 022313 016 022313 015