Whenever I come across vintage metal hardware organizer chests at garage sales, I try to pick them up. I’ve been obsessed with cabinets with lots of little drawers since I read about them in Pippi Longstocking when I was little. These cabinets usually run about $5 at garage sales around here, so they’re a cheap way to fulfill my childhood dream of having lots of little drawers!
They have usually been sitting in a garage for the last 30 or 40 years, so it takes a bit of elbow grease to clean them up. The effort is worth it!
The multiple drawers and dividers are perfect for keeping jewelry stored without tangling. I thought about making velvet liners for the drawers, and maybe I’ll get around to it eventually. The chest does a great job of storing my jewelry.
If you see these old chests at garage sales, don’t hesitate to pick them up. I just purchased two taller ones that I’ll be using in my craft room to hold sewing and office supplies.
I had an old earring display that I made several years ago that had some really bad fabric on it. I was in a hurry at the time and just wanted somewhere to hang my earrings. I decided that it needed to be updated. I also figured in the process that I would show you how it is made. I have a larger version of the earring display on the other side of my sink where I hang my necklaces. It is done in the same new fabric, but does not have the ribbon embellishment.
Materials:
Ceiling Tile (cut to size needed, I used a utility knife to cut my tile)
Fabric (enough to cover ceiling tile)
Ribbon (or any embellishment)
Scissors or Rotary Cutter
Staple Gun
Pins
My tile board was already cut from the previous version of the display, I just took the old fabric off.
I ironed my fabric and rolled it for dust, lint and pet fur. The fabric has been sitting out for a while and needed a quick lint-rolling.
Here I used a rotary cutter to cut the fabric to size.
I left about 2 inches of extra fabric on each edge to wrap around my tile board.
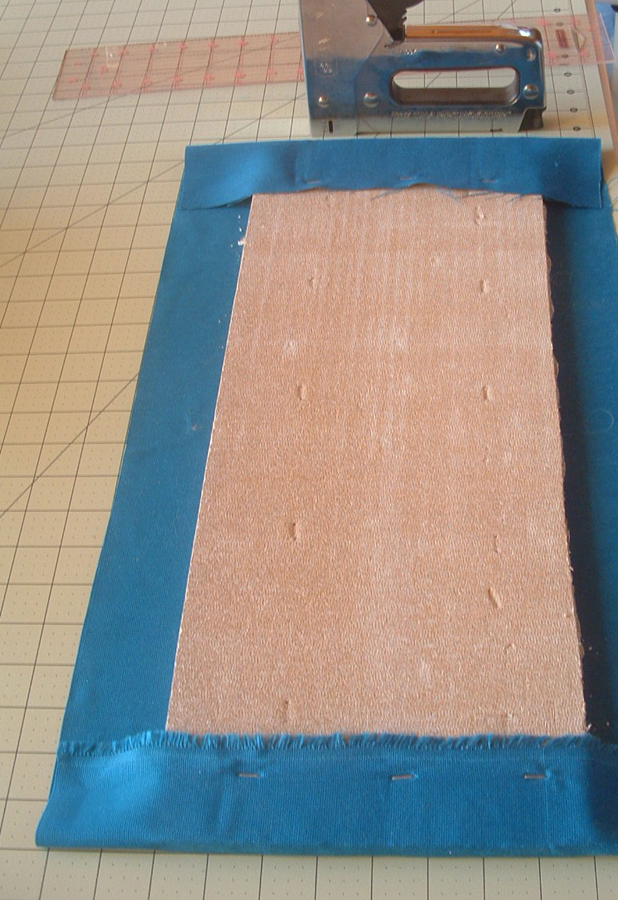
Sides stapled.
I stapled the sides of the board first. It really doesn’t matter if you do the sides or top/bottom first.
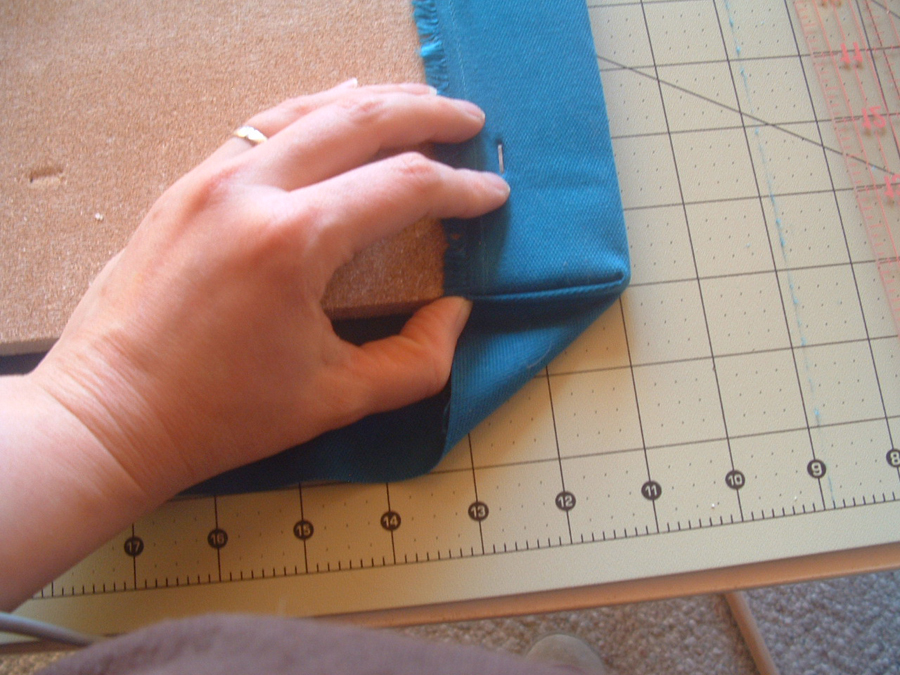
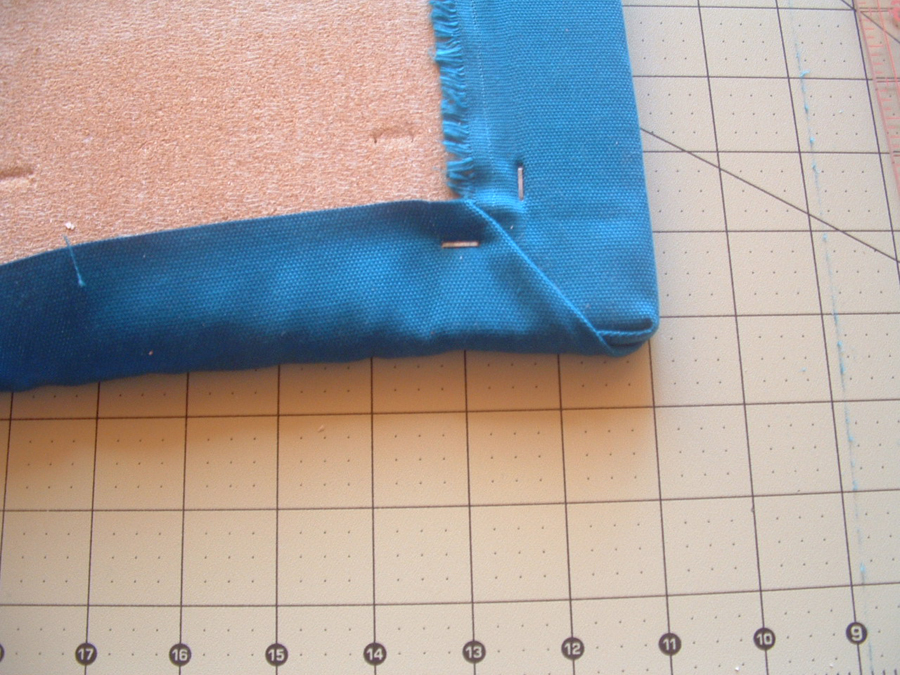
First step in corner fold. (What an odd view of my hand.)
I folded the corners like you would a present. I am sure there are fancier or neater ways to do this, but I like the end result.
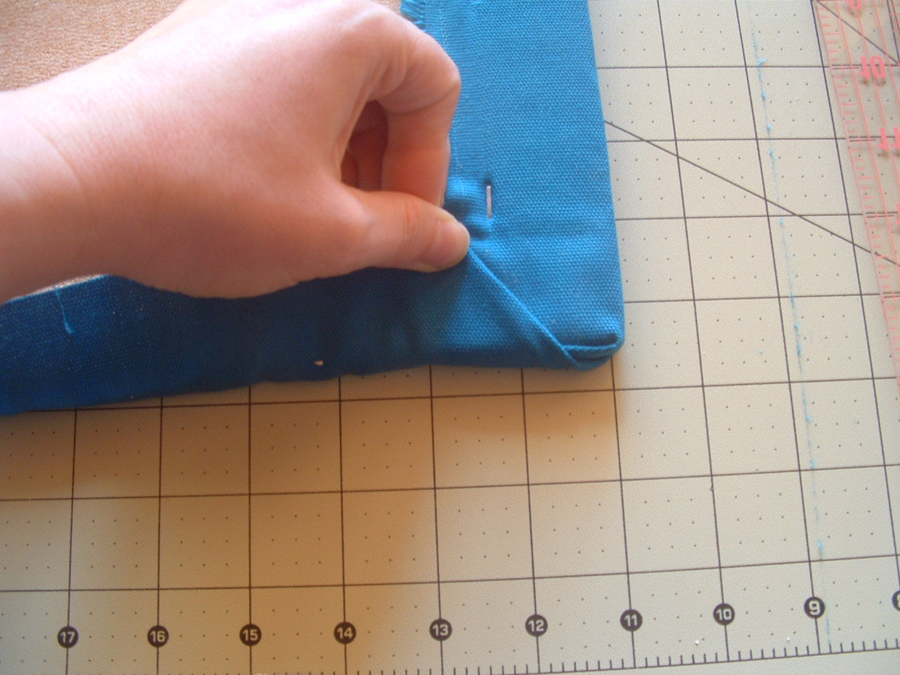
Second step in folding corners.
Fold up the bottom edge and hold to staple.
Nicely stapled.
Repeat this same procedure for the other three corners, then staple the rest of the top/bottom fabric.
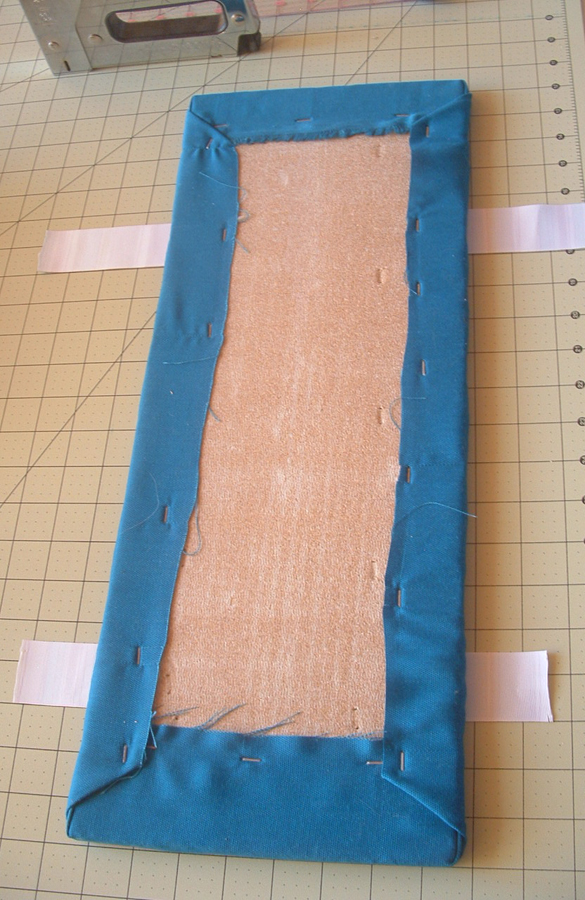
Fabric now attached to tile board.
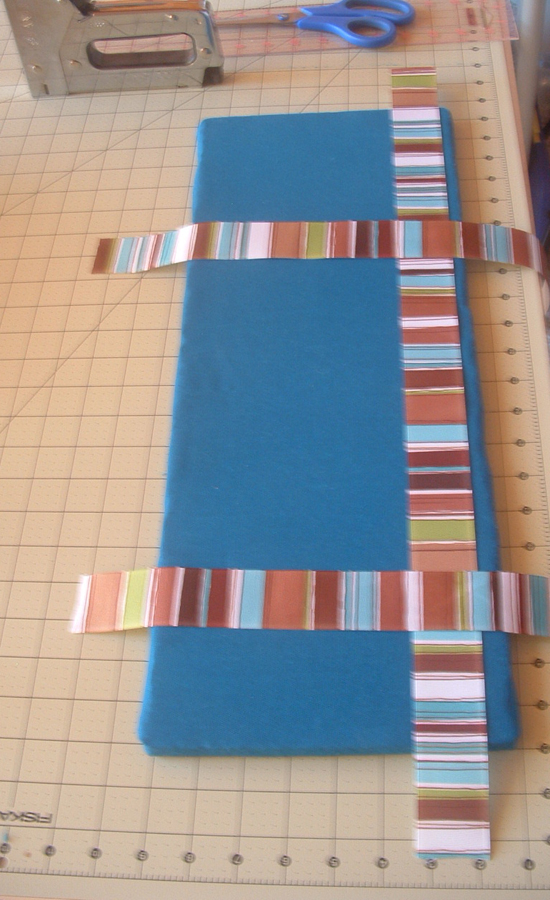
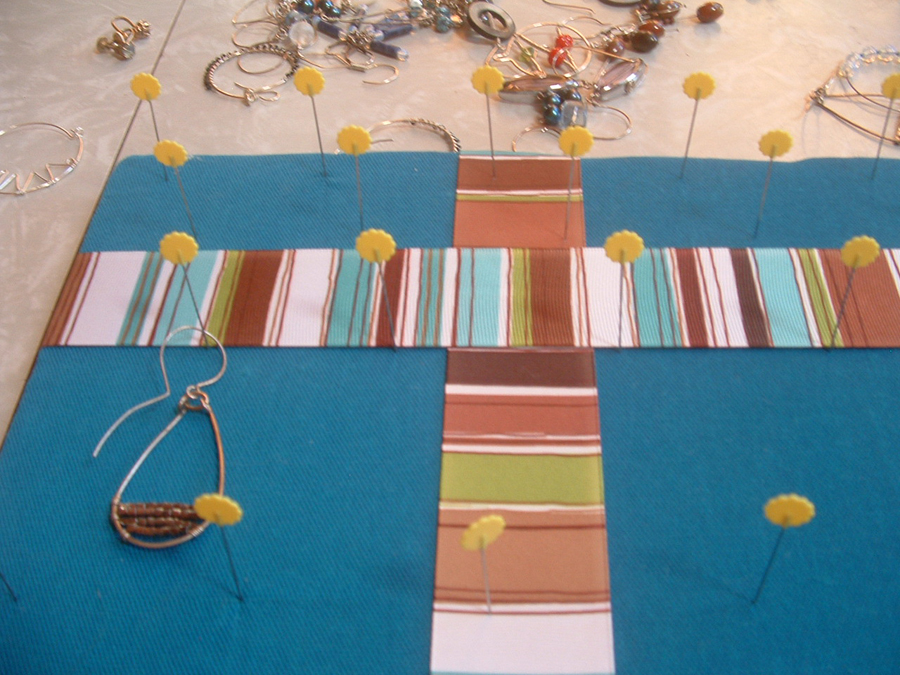
I decided that I wanted to have a bit of embellishment to my display, so I chose some ribbon I had left over from a previous project and cut it to fit my tile board.
Again I left about 2 inches of extra ribbon on each edge to wrap around the board.
Once I had decided on my placement, I used my cutting mat to make sure my ribbon would be level and even on my board.
The cutting mat made the alignment very easy.
I stapled the two vertical ribbons to the board and then added the horizontal ribbon in the same manner.
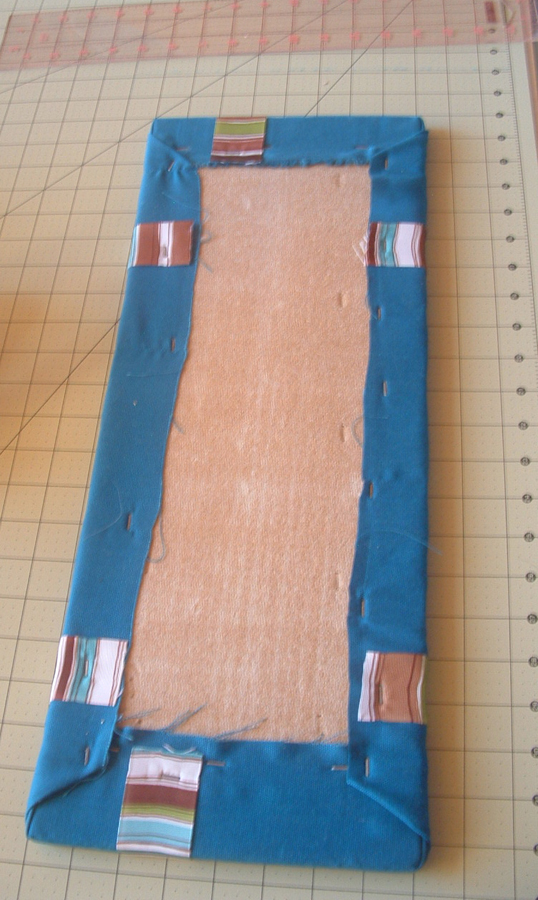
All ribbon is stapled to the display.
And here is the board all ready to go. I just need to add the pins and earrings!
All done with the staple gun!
I had been working in the loft at my craft table, but as all the pins and earrings were downstairs, the project shifted to the dining table.
I used flower headed pins to hang my earrings.
I used a wide earring and a long earring to help decide the placement of my pins. I have a lot of earrings and needed to be able to display long and short earrings.
I ended up adding another row of pins after this photo as I more earrings than I thought.
Now the display is ready to go. I pushed it in place and hung my earrings!
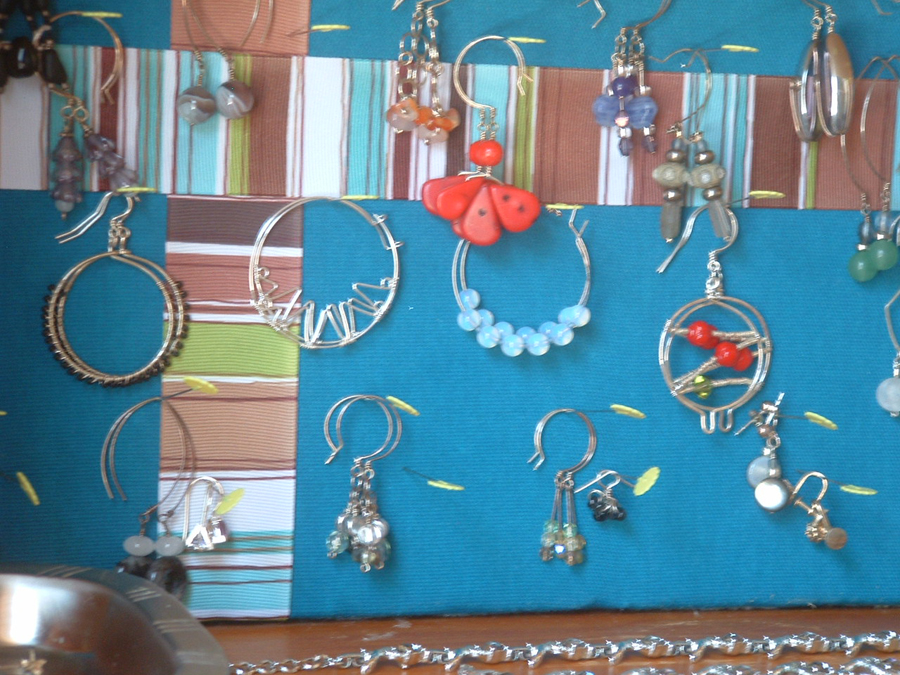
Completed earring display in place and full.
If you cannot tell, the earring display is in the over the toilet shelf. I have more necklaces hanging all over the shelf itself as my other necklace display is already full, another project?
I like the color, I have lots of stained pine in my house (a LOT of it) and the more color I can add, the happier I am. As I cannot paint, I will add color wherever possible.
I am really happy with my finished Tile Board Earring Display!
After much whining (and an exhaustive search), I have realized that however convenient it may be, I just cannot take photos of my projects that I like with my iPhone. Some people may be able to do it, I am just not one of them. I did have to search my house pretty thoroughly for my real camera, it was in hiding. It is fairly old (Fujifilm FinePix), but it still takes good photos. I am much happier with the results for today.
If you have been watching the news, you would have seen the massive cold weather system that tromped all over the Midwest yesterday and the extreme cold that has followed it. Due to this, my place of employment closed for the day and I have had a wonderful day at home, staying out of the cold. After a big breakfast and some lazing around, I made these wonderful hoop earrings with a zigzag in the center.
I am really happy with how these turned out. They are made out of 21 gauge sterling silver wire. I wrapped the hoop around a mandrel to make the main frame of the earrings. Then I used a 4″ piece of the same wire to make the zigzag which is connected to the hoop frame with 26 gauge sterling silver wire. After the zigzag was wrapped to the frame, I used a plastic mallet to harden the hoop and zigzag so that they wouldn’t get bent too easily.
I have been slowly adding to my metalsmithing supplies and have finally reached a point where I am able to make rings (well, almost, I do not have a ring mandrel yet). I made my very first 4mm sterling silver, hammered ring today. As it is my first attempt, I already see many things that I can improve upon, but for a first try, it isn’t half bad, especially since it fit from the beginning. I did not have to make any size adjustments. I will have no qualms about wearing it until I make a better one.
After putting my photo lights to rest, I realized that the inside of the ring could have used some polishing and the outside could have used some additional polishing, but you get the idea.
I have had this idea for a ring for years. It is to be my anniversary ring. I thought that it would be much more fun to make one rather than to buy one. No, this is not it, but it is the first step in my plans. Now, I just have to practice making rings. It is going to be a fun year getting everyone’s ring sizes for Christmas presents next year!
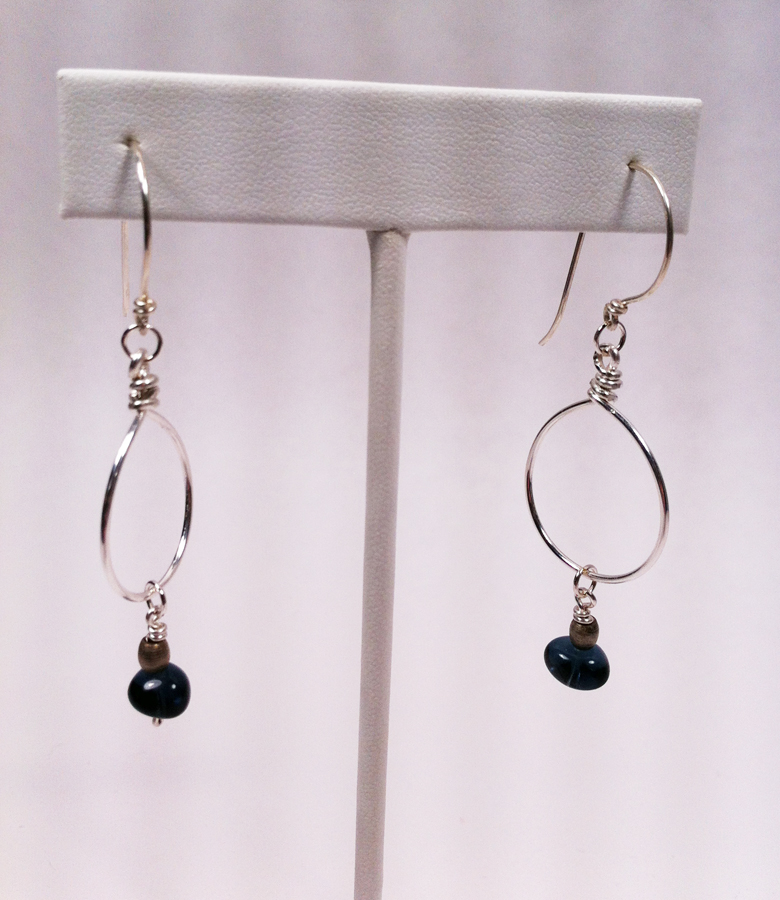
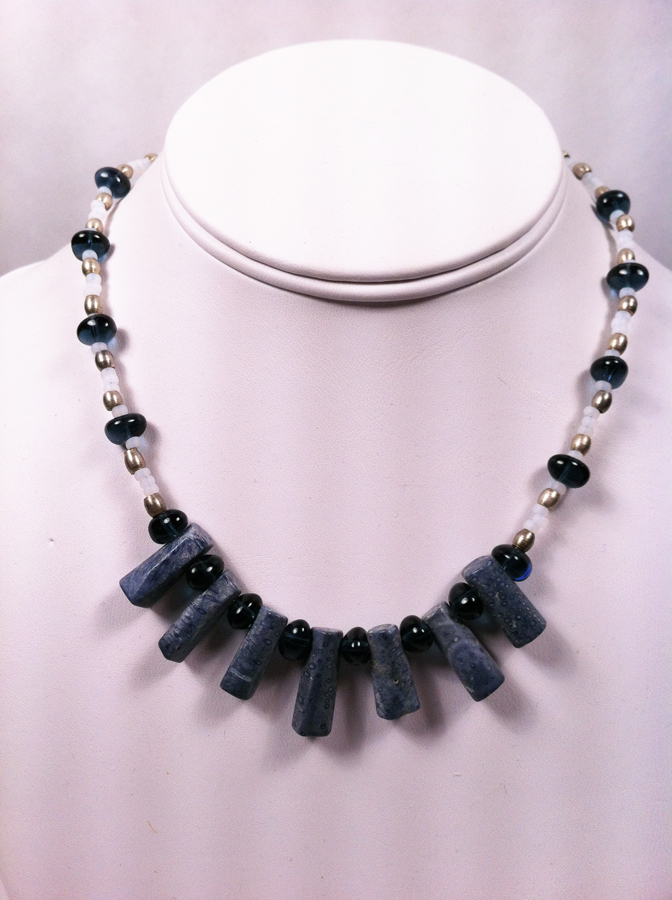
I love matching earring and necklace sets. As far as I am concerned, you can never have too many.
I made the following earrings and necklace out of sterling silver for the earwires, wire hoops, and necklace hook, blue glass and zinc tube beads for the drops of the earrings, blue coral, blue glass, zinc tube beads and white seed beads for the necklace.
You cannot see it, as it is the back of the necklace, but I used a small length of sterling silver chain to make the necklace a variable length. I wear a LOT of blue and wanted to be able to wear this with many different styles of shirt.
I had to make a necklace and earring set for myself for Christmas this year. I realized that I do not have any holiday jewelry and that just seemed to be a very strange oversight on my part. So, here are my Christmas ball earrings and tree pendant. I am really happy with how they turned out. I did a happy dance!
I used sterling silver 18 gauge wire for the tree and ball shapes, 26 gauge for the garlands, and 21 gauge for the ear wires. I have some really pretty glass red florets, glass green diamond shapes, and silver delicas that I used to make the garlands.
The pendant was a lot of fun to make. I just used a pair of flat-nose pliers to make the shape, bending it until I liked the general style.
I just love the Christmas ball earrings. I did hammer the 18-gauge wire after I made the ball shapes.
I am so happy with how these turned out and will be wearing them to work tomorrow (probably every other day until Christmas too).
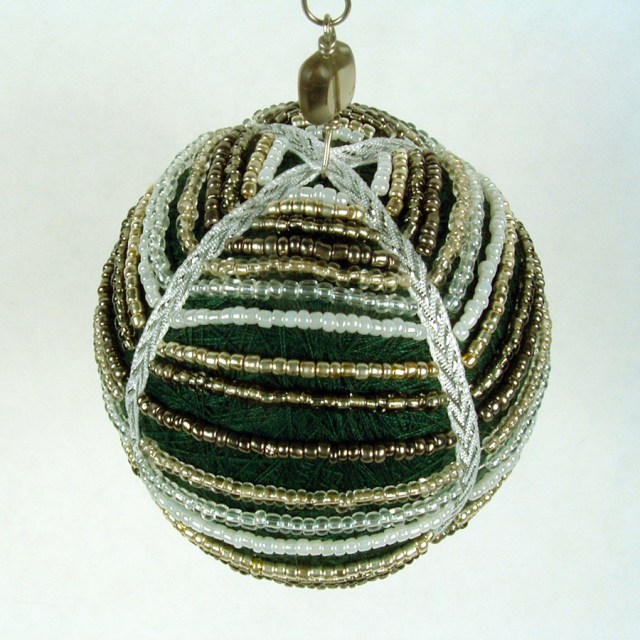
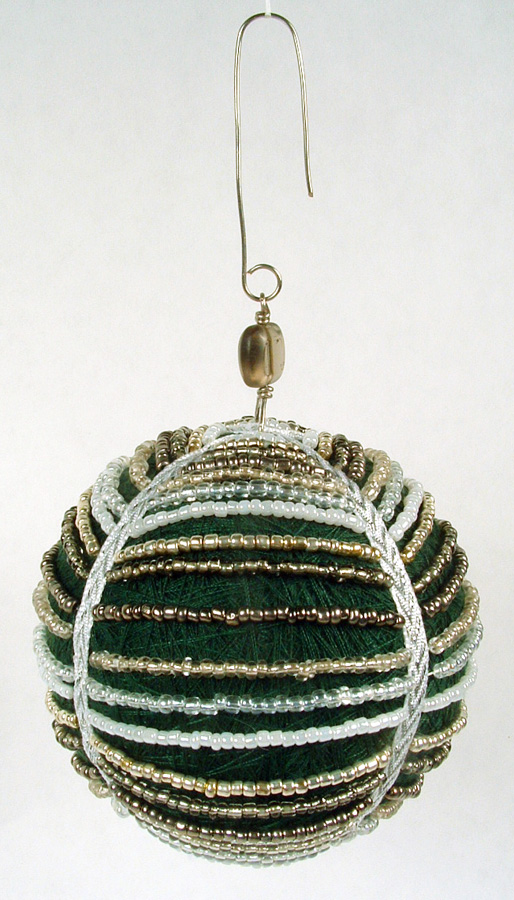
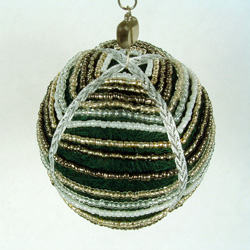
So, I was not feeling at all well this weekend and missed my Saturday post for the Ornament Advent. To make up for it, I decided to splurge and make a slightly more difficult ornament. For this ornament, I once again raided my temari ball stash and used one of the green balls for the base. It is around 3″ in diameter. I then wrapped the ribbon around the ball tacking it down first with pins and then with basting stitches.
The beads are from the giant spinner of seed beads that Mom and I bought to take with us when we went camping (yes, we like to craft while camping). I strung the beads and crossed under the ribbon, trying to make a slight draping effect while doing so. It was interesting how much heavier the ball got by the time I was finished. All those glass beads weigh more than you would think.
I then decided that I needed a bead topper and found a lovely smoky gray glass bead in my oddments and leftovers drawer that looks great. I made the hook and I was ready to go.
I liked this challenge, but it seemed to me that I couldn’t get the idea of jewelry out of my head. It just seemed to speak to me and say, “I should be a piece of jewelry”. So, naturally, that is what I made.
I felt that the colors were a factor in what I made. To me they felt like Fall, and what else is more like fall than a leaf. I made a base and then I wired the resistors as veins of the leaf. I like how the colors filled in the base. I make a lot of pendants normally, so this time I decided it would be a bracelet. Kind of like a bangle bracelet. I curved the leaf around a glass to give it the right feel on a wrist. I took a piece of 16 gauge German Silver and made a loop in each end. I curved the wire to conform around my wrist.
For the ring, I formed a loop in the wire about 12″ from the end and then wrapped the wire around a mandrel 3 times. I curled the wire around the loop and cut off the excess. I cut off one end of the wire next to the base of the resistor and formed a loop. These small loops were attached to the larger loop to give a star- burst effect.
I am pretty thrilled with how they came out. I hope you like them too.
So some of our Crafty Sisters have been a little distracted lately and it took an extra week to get our projects posted this week. (I cannot complain as it has been me a couple of times who has been distracted.)
Our found item that must be used in our challenge was resistors. Out of the Crafty Sister storage came a canister full of old resistors. We divided them up and got to work.
Resistors just seem to lend themselves towards jewelry and I was inclined to follow. My foremost concern was an interesting pendant.
My entire necklace is made of resistors, even the hook and eye clasp. The wired ends make wire-wrapping a breeze.
This is a very simple necklace to make and only took me about 2 hours. Most of that time was spent messing with the style and shape of the pendant.
I am pleased with how this turned out and will probably wear it from time to time.
Mom (Craftysister Lynne) and I went camping in Georgia a few weeks ago. While there, we got lost driving and found this amazing little store. It was called Rocks, Relics and Beads. This place was packed with so much stuff that it was completely overwhelming. The owner was such a character. He seemed to delight in making up stuff on the fly (you know, in a true Grandfatherly way). Mom even posted some photos on Facebook of our visit to this wonderland. It only seemed fair as I posted pics of her version of wonderland (an art store) during our camping trip to the Indiana Dunes last year.
So, below are two of the finds I made at this amazing wonderland:
I just love tourmaline. It comes in such an amazing array of colors and I love all of them. This is a slice of a chrome tourmaline crystal and I just fell for it the minute I saw it. It took me awhile to decide how I wanted to display and mount this piece, but I am very satisfied with the finished pendant.
The front piece of the necklace where the pendant hangs, is strung on 18 gauge sterling silver wire. The rest of the necklace is strung on beading wire. I like to do necklaces like this as I think it brings more focus to the pendant.
I cannot say it enough that I just love this pendant and the necklace. I wrapped the tourmaline very gently with 21 gauge sterling silver wire that just comes around the sides of the stone and rises in back of the stone to form the wrapped bail.
And of course, I made earrings to go along with this piece. I had some fun this time around doing some sterling silver findings and various wigjig type forms for these earrings and for the next necklace below.
No tourmaline in the earrings, but I use some really pretty green crystal and glass beads.
I cannot wait to wear this set. Below you can see the almond shaped clasp that I made for this necklace. It is made from 18 gauge sterling silver wire.
Here you can see the entire necklace!
The next piece has an Italian art bead for the pendant. I just love the contrast of the orange and teal swirls.
It doesn’t show up as well in the photo, but the teal beads and the teal swirls in the pendant are actually the same color. I love the way the one teal bead above the pendant looks like it is smiling at you and showing his fangs. It made me laugh when I noticed it.
The orange beads are agate and the white beads are quartz crystal composite beads. I used seed beads for the back portion of the necklace as I wanted the entire focus to be on the front double strands. I again used 18 gauge sterling silver wire to make the bail for the pendant as well as the findings that connect the double strands of the front part to the single strand of the back portion of the necklace.
The earrings are made of more agate and the findings are made of 21 gauge sterling silver wire.
This is a very colorful piece and I am very happy with how it turned out. This is a great summer necklace and earrings set.
I hope everyone had a wonderful Memorial Day and I look forward to posting some more of my recent projects!