After much whining (and an exhaustive search), I have realized that however convenient it may be, I just cannot take photos of my projects that I like with my iPhone. Some people may be able to do it, I am just not one of them. I did have to search my house pretty thoroughly for my real camera, it was in hiding. It is fairly old (Fujifilm FinePix), but it still takes good photos. I am much happier with the results for today.
If you have been watching the news, you would have seen the massive cold weather system that tromped all over the Midwest yesterday and the extreme cold that has followed it. Due to this, my place of employment closed for the day and I have had a wonderful day at home, staying out of the cold. After a big breakfast and some lazing around, I made these wonderful hoop earrings with a zigzag in the center.
I am really happy with how these turned out. They are made out of 21 gauge sterling silver wire. I wrapped the hoop around a mandrel to make the main frame of the earrings. Then I used a 4″ piece of the same wire to make the zigzag which is connected to the hoop frame with 26 gauge sterling silver wire. After the zigzag was wrapped to the frame, I used a plastic mallet to harden the hoop and zigzag so that they wouldn’t get bent too easily.
Cheri-I hope everyone is having a wonderful Holiday Season so far.
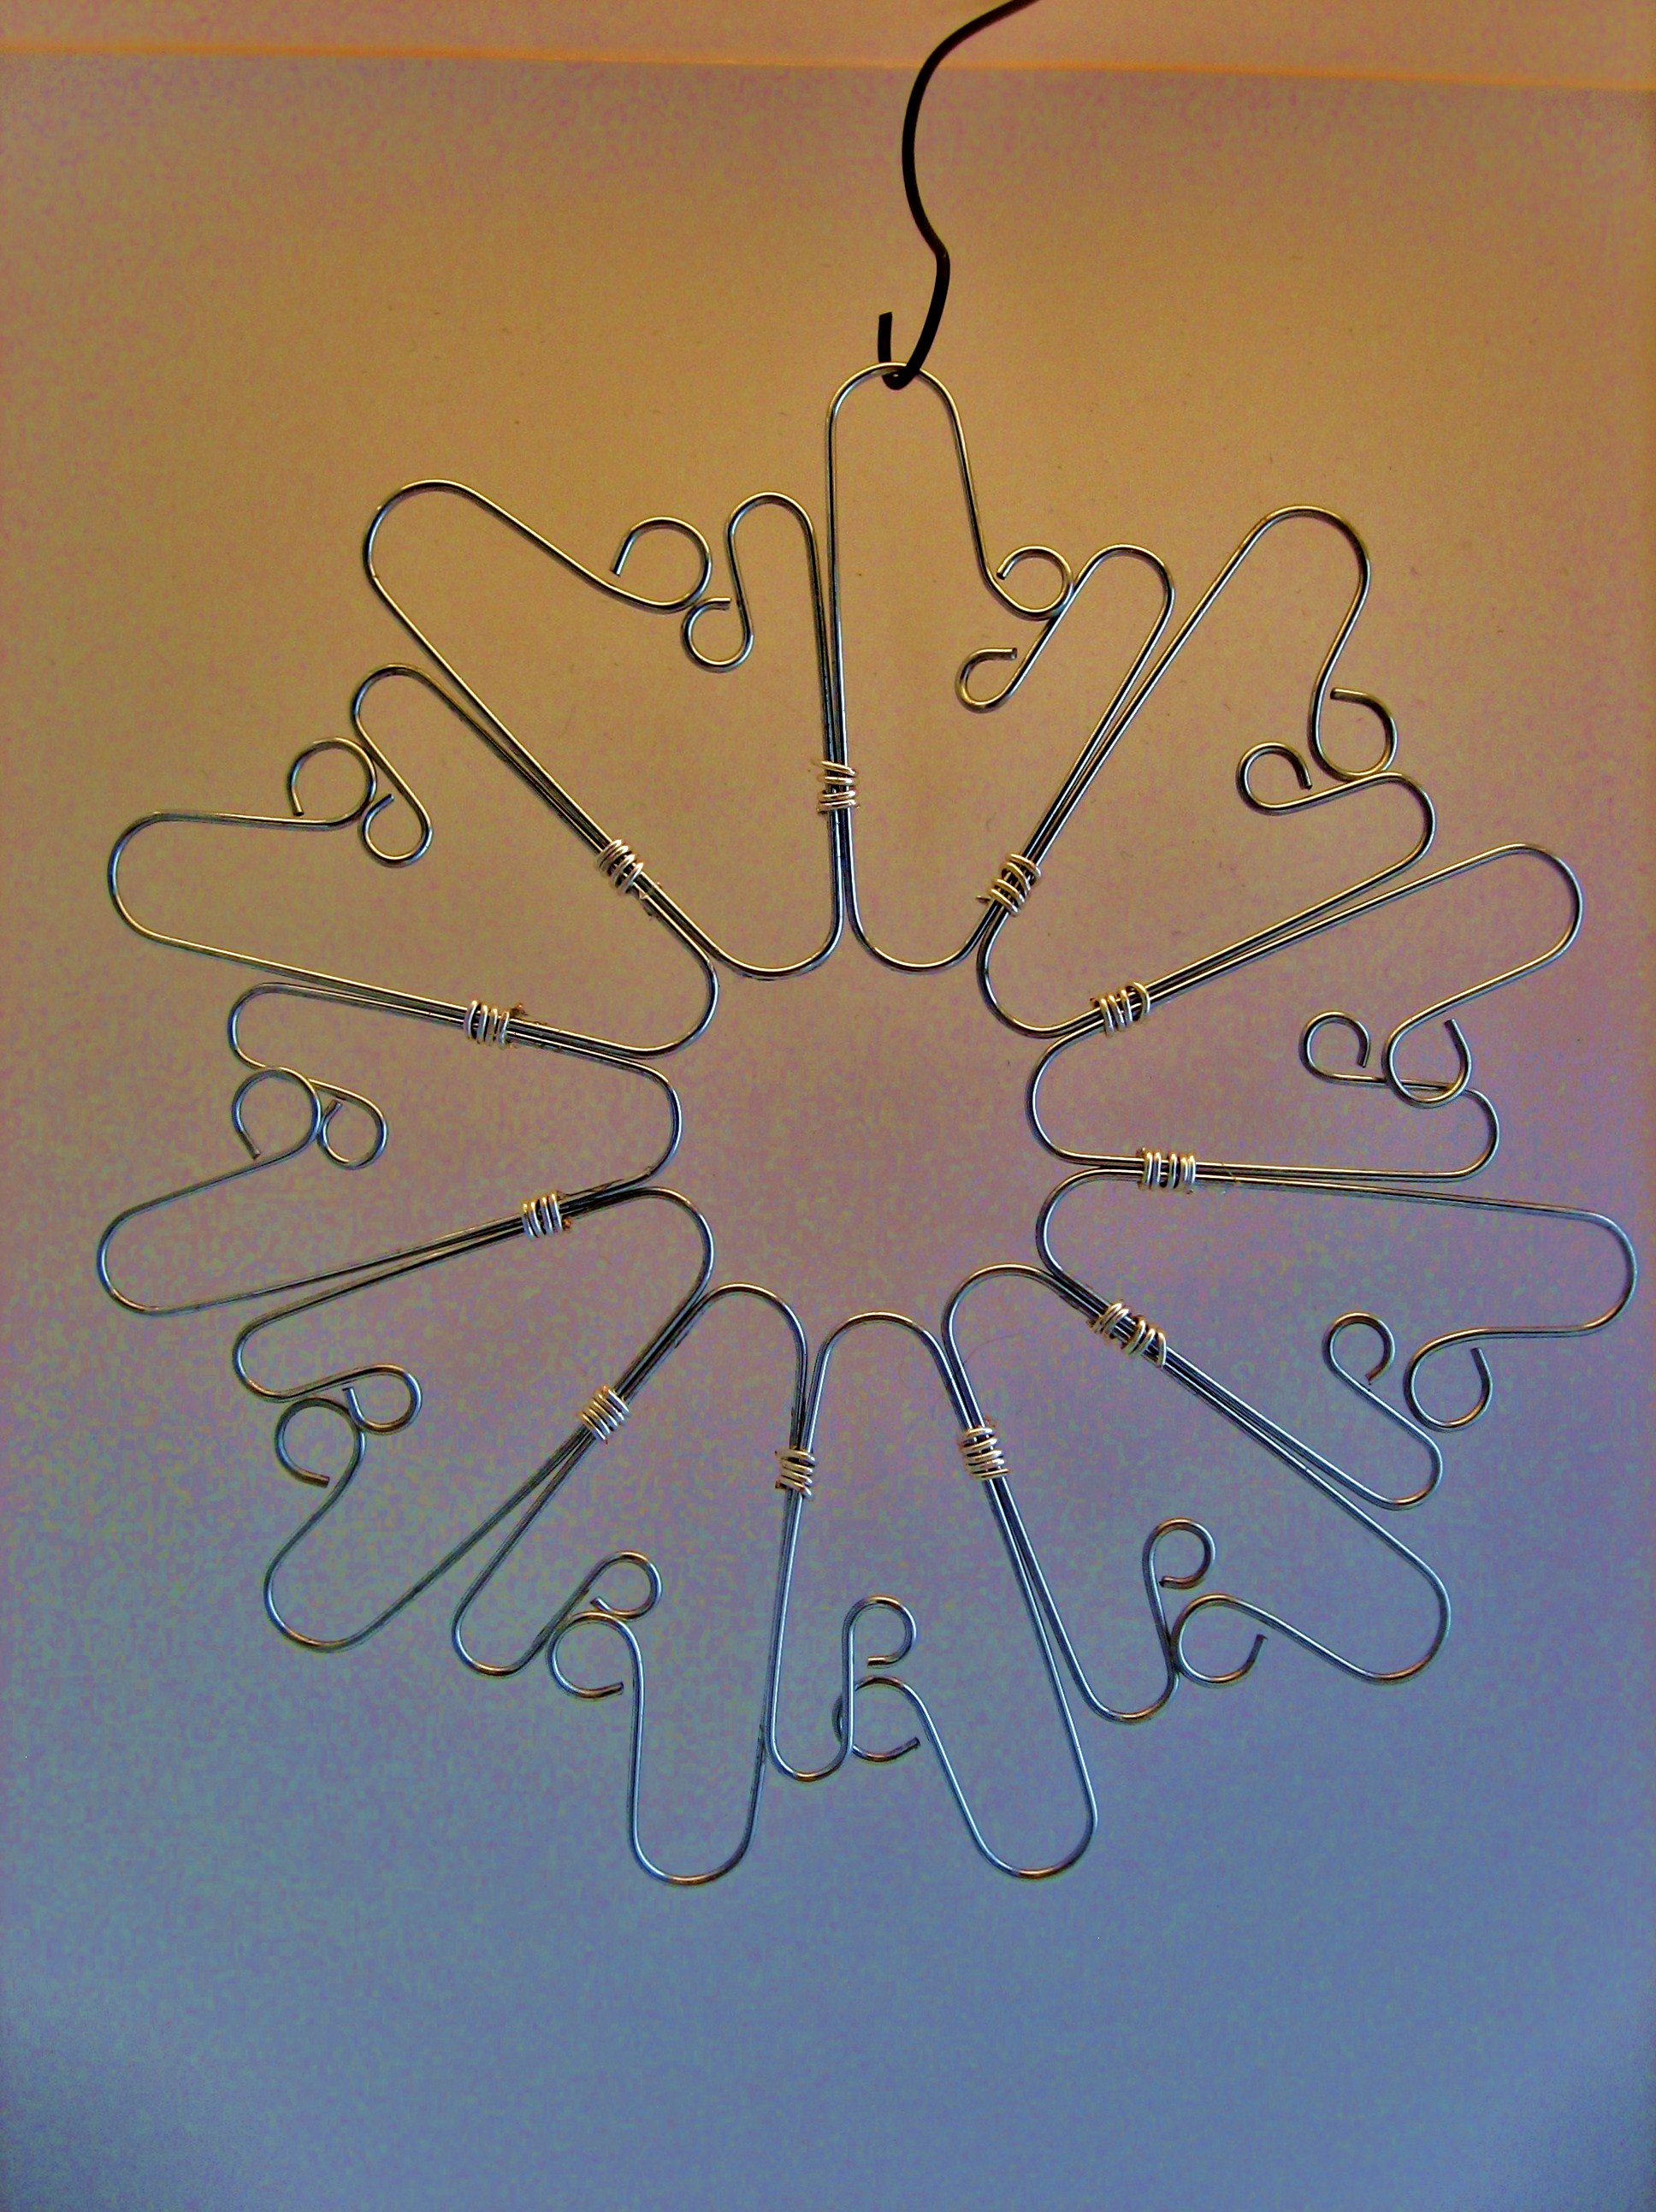
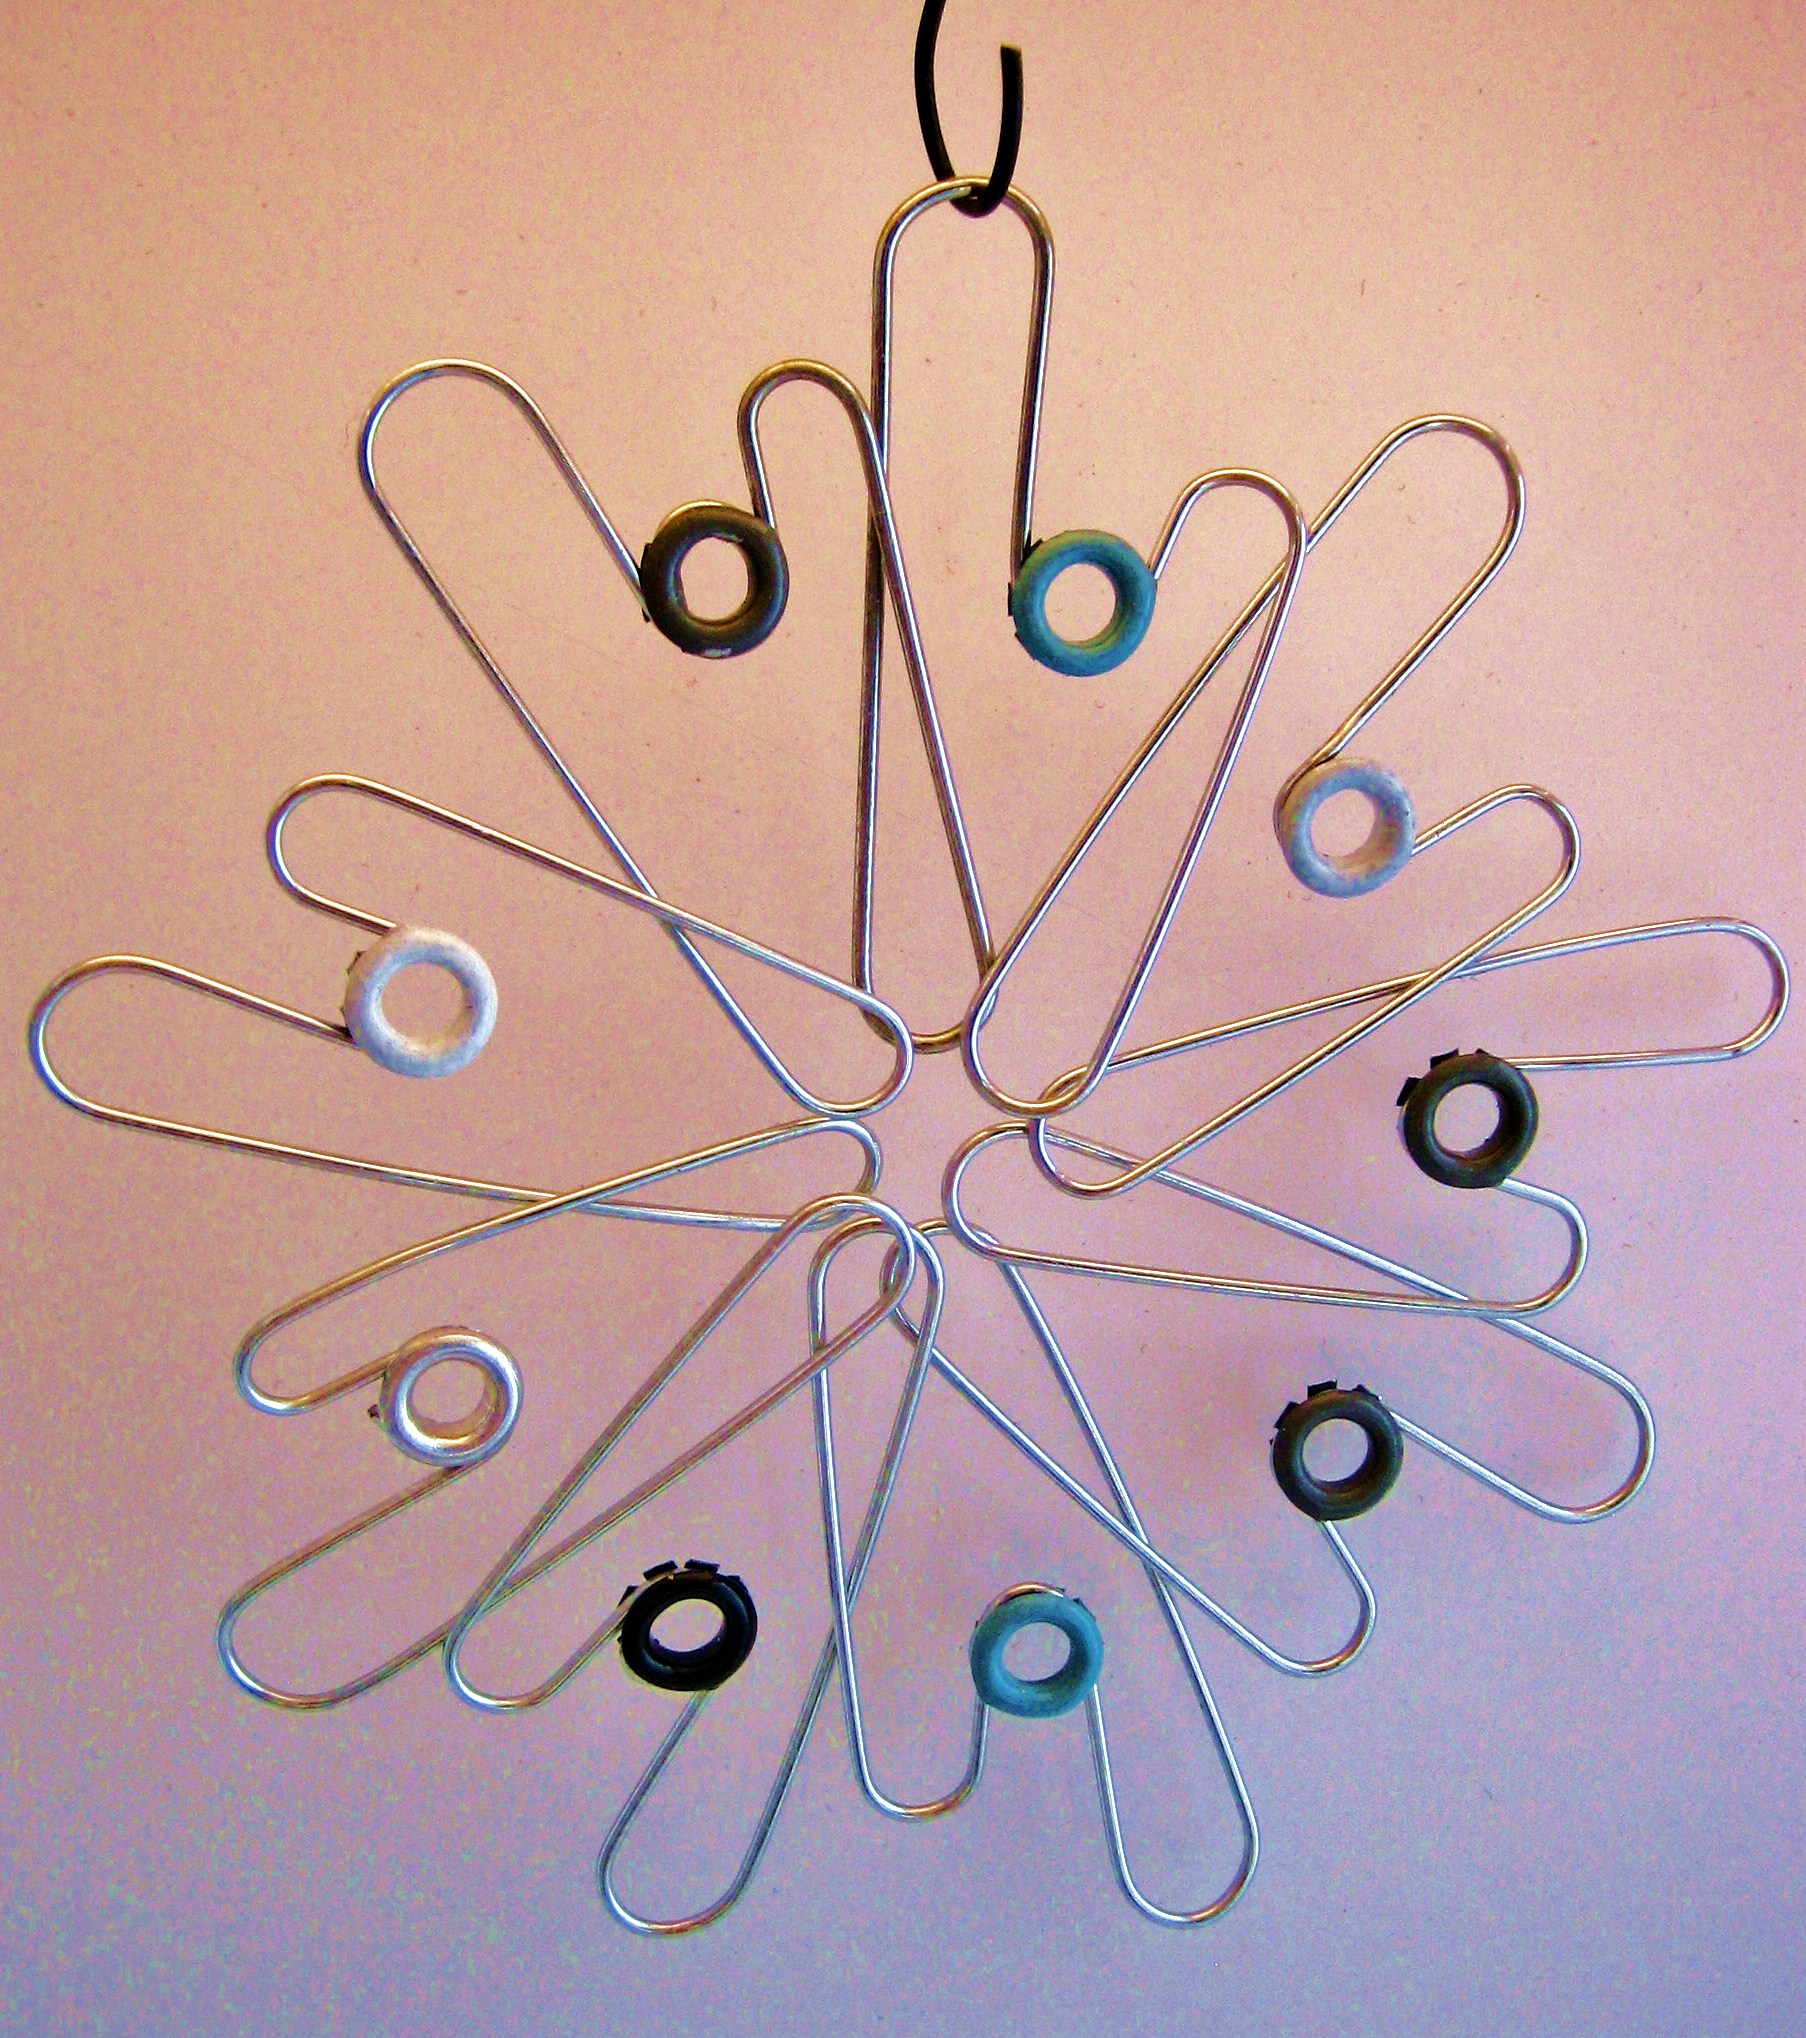
These are two ornament that I made from paper clips.
Supplies
Large paper clips
Round nose pliers
Grommets
Small gauge wire
Glue
I first started by experimenting with different paperclip bends. I knew that I wanted to make a snowflake so I made sure that I would have a way to connect them to each other. After I had a pattern I liked, I began to work on the connection. The grommets worked great for the 2nd snowflake as I had a loop to affix it to. The top one I decided to wire, after I wired it I put a drop of E-6000 on each wire. This stabilized the connection.
Hope you are enjoying our Christmas countdown and again Happy Holildays.
I had to make a necklace and earring set for myself for Christmas this year. I realized that I do not have any holiday jewelry and that just seemed to be a very strange oversight on my part. So, here are my Christmas ball earrings and tree pendant. I am really happy with how they turned out. I did a happy dance!
I used sterling silver 18 gauge wire for the tree and ball shapes, 26 gauge for the garlands, and 21 gauge for the ear wires. I have some really pretty glass red florets, glass green diamond shapes, and silver delicas that I used to make the garlands.
The pendant was a lot of fun to make. I just used a pair of flat-nose pliers to make the shape, bending it until I liked the general style.
I just love the Christmas ball earrings. I did hammer the 18-gauge wire after I made the ball shapes.
I am so happy with how these turned out and will be wearing them to work tomorrow (probably every other day until Christmas too).
Lynne : This is my second ornament for our 2013 countdown. I am in love with trees right now and have been drawing them over and over so it seemed natural to find an ornament that looked like a tree. I was browsing through google images and I found this article from Just Something I Made by Cathe Holden about how to make bottle brush trees. Since I do not have much need for bottle brushes any more I was delighted to find that she uses rope and wire for her trees and shapes them with scissors. And as a bonus I could use my Copic airbrush system to color the trees.
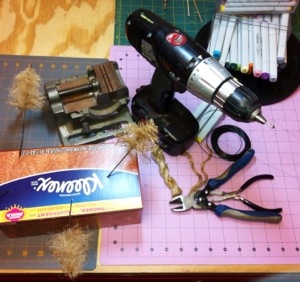
You will need these things:
Wire
Wire cutters
Rope (sisal, jute, or any twisted fiber)
Drill
Hook (shaped from a wire coat hanger or from a small S-hook)
Vise (or something that will hold the wires securely when twisting them with the drill)
Pliers
Copic airbrush (optional)
I already had some jute, but when I untwisted the fibers I thought they were too fuzzy and too fragile. I made a trip to the hardware store and found some thick rope that is used on farms. (I remember swinging on the hay ropes as a child. When my grandparents weren’t looking of course.) I cut my rope into lengths of 3 to 4 inches and then began to untwist the fibers. When I had an amount that looked like it would make a full Christmas tree I laid the fiber between the wires as described in the tutorial. It is so nice that you can make two at once by cutting on the diagonal.
I didn’t have a wire coat hanger to make into a hook for the drill because I don’t like the sound they make rattling in the closet. So I took an S-hook and straightened one end so that it would fit into the drill. You can see it in the drill in the photo. I put the wire ends in my vise and inserted the hook in the top of the wire and the wire began to spiral just like it was supposed to. I noticed that the fiber also tangles and you do need to spend some time straightening and combing the fibers to approximate the shape of your tree. Then I used small scissors to cut the final shape. It’s best to do this over something you can throw away because the fibers are very small and sticklish.
When I had the shape I wanted I looked for something to hold them while I spray painted them and found an empty Kleenex box. The wires poked in easily and the setup worked, but I think I’d rather have had a piece of styrofoam. I’m sure we’ll have some after unwrapping presents and I intend to save a piece for a painting stand.
To color the trees I used mostly blues and yellows and finished with a dark green. I start with the lightest yellow and spray the whole tree. Then I concentrate yellow on the ends of the branches using what yellows look good on the fibers. I then use blues from the lightest to the darkest making sure that the lightest yellows remain as free as possible of the blues. The yellows and blues make a lovely variety of shades of green as they are sprayed one on top of the other. I use a dark green to deepen the shadows between the branches to create more depth in the tree. I touch up the yellow and the tree is almost done.
I bent the stem wire with pliers into an X-shape for the bases, but you could use cork or wood or just about anything for a base.
These trees look so good and once you have everything laid out, they work up very quickly. I hope you have as much fun making them as I did.
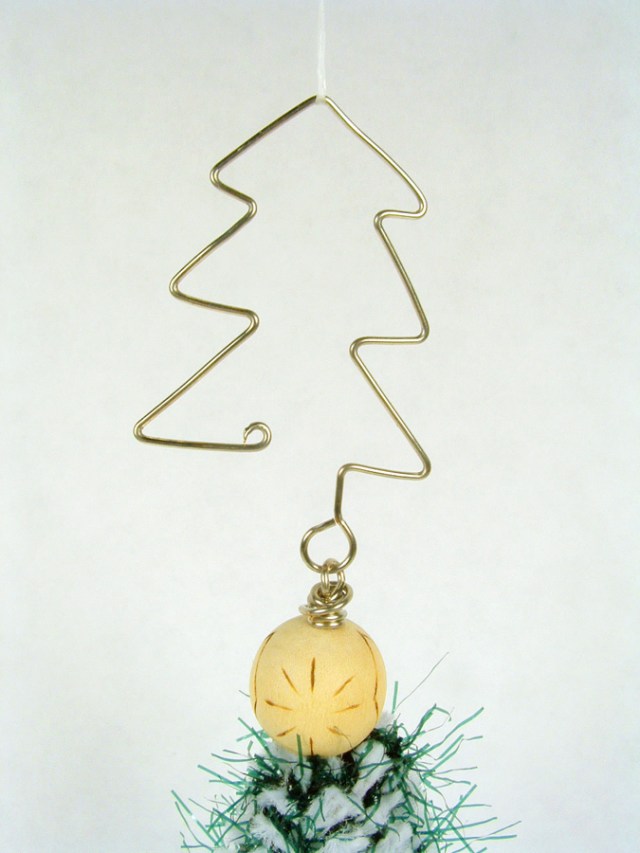
I knew from the beginning that I would just have to make a tree ornament for this Christmas advent. I have had one in mind, but I had no idea to execute it. I watched Loryn’s and Cheri’s tree ornaments get posted and loved each of them. My goal was to keep the ornament very simple and easy to make. This whole ornament probably took me about 30 minutes and I was Google Talking (can I use that that way?) with Mom which slows me down as we each share what we are project we are working on.
I used chenille pipe cleaners, cut in half, then wrapped candy cane style for the form of my tree. I know I keep mentioning temari lately, but I have a ton of supplies leftover and so I used some really cool fuzzy green thread from my temari stash to wrap around the chenille pipe cleaners. I really liked how the fuzzy thread looks like the needles on a pine tree. I tied the ends of the thread and glued my knots to ensure that they wouldn’t come loose.
I grabbed all the thread wrapped pipe cleaners in one group. ran some silver wire down the middle, and approximately 1″ in on the pipe cleaners, wrapped the silver wire around the group to hold it together. Then I bent all the wires down over the silver wrapping so that just the wire stuck out the top. I used this bit of wire to string the wooden star bead and make the loop for the hanger. At this point, it you didn’t put the hanger on the ornament, it actually looks really cool just as a decoration for your table, although I would recommend putting something under it as the pipe cleaners are a bit scratchy.
I love the hanger I made for this ornament. Whoever said that you needed to have plain hooks for your ornaments? I made the hanger out of more silver wire, just bending it into shape and curling the end so you didn’t poke yourself with it.
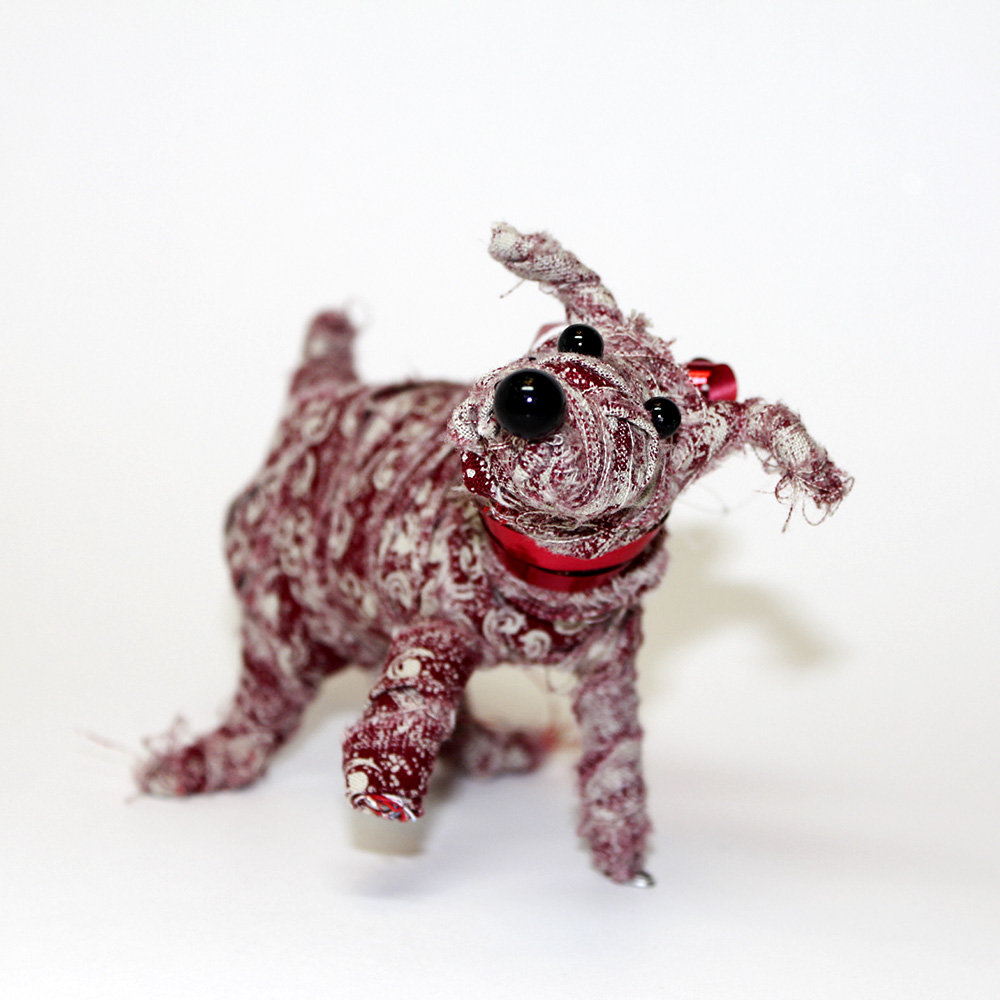
Lynne: I made this ornament “Puppy Under the Christmas Tree” from a wire armature stuffed with fabric scraps and then covered the figure with more fabric strips to get the finished shape.
I had so much fun doing this ornament. I love wire armature figures but I was sure that I could never make one. However I happened to see a book by Carla Sonheim called Drawing and Painting Imaginary Animals and found a photo of a figure done with wire and fabric. I draw my own imaginary animals called Squiggles and I told myself to make a figure just like I drew a squiggle. And it worked.
I used ordinary, hardware store galvanized wire (a gauge soft enough to work with your hands) to make the armature. One long piece made up the legs, body and tail. I used a shorter piece to shape the head and ears. I had to add more volume to the body and head to hold the fabric stuffing so I wired on some spiral shapes. Just keep adding and shaping, until you’re satisfied.
Then I stuffed and covered the armature with torn fabric scraps. Their frayed edges look like fur and give the ornament a vintage look. I used strips 1/4 inch to 1/2 inch wide and about 8 inches long. The strips need to be narrow to follow the contours of the body without sagging open in a curve. If I needed longer strips I just tied two or three of the shorter strips together. The knots disappear into the wrapped fabric. I did not use any glue or stitching to hold the strips on. I used scissors to poke the ends under the previous strips and tried to make sure loose ends were started and finished in places that would be covered over. Small scissors are perfect for stuffing the ends under earlier layers.
I had old hat pins in my stash and I used them for the eyes and ears, but you could use buttons or embroidery. I used a small scrap of Christmas ribbon to make the collar and bow and fishing line to make an ornament loop, but I have to warn you that one look in those puppy eyes and it will be very difficult to stick the needle and fishing line through.
I’m keeping this puppy out of the ornament box after Christmas. He’s going to sit on the table right beside my favorite chair.
I liked this challenge, but it seemed to me that I couldn’t get the idea of jewelry out of my head. It just seemed to speak to me and say, “I should be a piece of jewelry”. So, naturally, that is what I made.
I felt that the colors were a factor in what I made. To me they felt like Fall, and what else is more like fall than a leaf. I made a base and then I wired the resistors as veins of the leaf. I like how the colors filled in the base. I make a lot of pendants normally, so this time I decided it would be a bracelet. Kind of like a bangle bracelet. I curved the leaf around a glass to give it the right feel on a wrist. I took a piece of 16 gauge German Silver and made a loop in each end. I curved the wire to conform around my wrist.
For the ring, I formed a loop in the wire about 12″ from the end and then wrapped the wire around a mandrel 3 times. I curled the wire around the loop and cut off the excess. I cut off one end of the wire next to the base of the resistor and formed a loop. These small loops were attached to the larger loop to give a star- burst effect.
I am pretty thrilled with how they came out. I hope you like them too.
Cheri: I find it really interesting that every project we do, I always think that it is the best one yet, but this project was one of the best. I like working with paper. It has endless possibilities and can be made into practically anything. I knew I wanted to make a tree with a nest and a bird, as this is a theme that I have been exploring lately.
To begin, I made a base for the tree with paper covered wire. To make the base, I cut about nine lengths of wire around 9 inches long. I took a longer piece of wire and wrapped it around the base and slowly coiled my way up the tree. I left some of the wire sticking out of the bottom to make the roots and some sticking out of the top to make the limbs.
I then took some pages from an old book, (Gone with the Wind), and ripped them into strips. I paper-mached the strips onto the tree, the bird and the branches.
For the nest, I cut very thin slices of paper and formed them with glue using the bottom of a small bowl as a form. I let it dry and when I took it out it looked amazingly like a real nest. At this point I was not really sure if I wanted to paint it or not, but after talking it over with my son, Justin, we felt that it would look nice if I did a light watercolor wash on it. This really made the text pop and was just the right touch.
I was very pleased with how it looked when it was completed and it really came out how I wanted it to look. And somehow it seems fitting to turn paper back into a tree.
Tree with nest removed.Close up of nest and bird.Another view.Nesting bird and tree.
Hammered copper necklace with verdigris patina.Hammered copper pendant necklace.
Cheri: It felt so good to get back to a challenge after our winter hiatus. And this challenge couldn’t have been better. I think we were all a little excited and a bit apprehensive when this project was initiated. After playing with the copper for awhile, knew whatever I made, it would most likely be jewelry. This is when I let the metal do the talking. I had a ball peen hammer and a small vice with a flat edge and I went to town banging on some copper. I was pleasantly surprised with how pretty the copper became after being hammered. Metal can lose what small elasticity it has in it after it has been work-hardened so I really wanted to make sure that I did not overdo the hammering or it would become brittle. After I had mastered the shape I wanted, I decided to do some research on adding a patina. I came across an article that said I could add blue to the copper by suspending the piece over a bowl of ammonia in a closed container. This was super easy, just be careful with the odor, it can be a bit overwhelming. The patina on my piece took about 12 hours to achieve and I think it came out pretty nice.
Hammered copper rings with button-hole style closure-clasp.
I punched holes with a hole punch and used copper wire to embellish the pendant and make the chain. I also hammered the copper wire to give it a rustic look. The rings were made by hammering a small strip of copper and then coiling it around a mandrel. I put two holes in the upper end and two holes in the under part. This had a button hole effect when I used a bead to bring the two pieces together and basically tied them with brass wire.
The copper turned out to be an awesome material to work with and I look forward to making many more pieces.
After an additional week due to some time constraints, our Copper Crafty Challenge is complete. We had our final reveal among the Crafty Sisters this afternoon, and boy, we really seem to be at the top of our game for this challenge. I cannot wait for you to see all the projects. We are going to post one project a day, so keep coming back!
I waffled quite a bit on this challenge. I make a lot of jewelry and I wasn’t sure if that was where I wanted to go with this particular project. After a week and a half of indecision, I decided, why mess with a good thing, jewelry it would be.
Using a compass I played Spirograph on a copper disc and cut out the star burst pendant. Amazingly, the copper is thin and soft enough that you can cut the discs with heavy duty scissors. I hammered the star on both sides to give it some depth. I then curled the points of the star (I couldn’t see any other way to really blunt the points. Those suckers were sharp!) to keep from puncturing anyone wearing it or snagging your clothes. I attached the light green crystal bead in the middle with wire and did some wire-wrapped crystals (also light green in color) for the dangles at the bottom of the pendant.
The chain is made up of hammered copper ovals and more wire-wrapped crystals. I did make all the jump rings and the clasp out of wire as well. The wire is standard 18 gauge copper wire from the hardware store.
All the hammering was done on an anvil that my dad made me for Christmas several years ago and with a series of hammers that he made for me 2 years ago. I started all the holes with a punching awl then enlarged then with a Dremel tool and a diamond tipped drill bit. I filled all the edges with a mini file to be sure that you wouldn’t slice yourself open on the sharp edges caused by the scissors.
The star-burst was actually the second pendant I made for this necklace. I wasn’t all that happy with the first one I had made. I showed it around and the other Crafty Sisters and my M-I-L (who joined us from my house this week) thought it was great, which just goes to show how hyper-critical I can be about my own work.
This pendant is made of a copper plumbing pipe fitting.
I did make a pair of earrings to go along with the necklace (my usual M.O.) and I think they turned out rather well.
I really like how the hammered ovals came out looking like leaves. The hammering causes the copper to curl a little and I liked the affect so much that I left it and used the same affect in the star-burst pendant.
That is my completed project! It was a fairly easy process all in all and one that I found rather fun (until my arm got tired of all the hammering). I cannot wait for the next challenge. In the meantime, I have promised this necklace to my M-I-L and and am going to take the earrings apart to make a matching bracelet instead as she does not have pierced ears. So, back to my craft table to work on some more copper!