Tag Archives: jewelry

close up of earring display

Earring Display

close up of earring display
Close up of completed display.

I had an old earring display that I made several years ago that had some really bad fabric on it. I was in a hurry at the time and just wanted somewhere to hang my earrings. I decided that it needed to be updated. I also figured in the process that I would show you how it is made. I have a larger version of the earring display on the other side of my sink where I hang my necklaces. It is done in the same new fabric, but does not have the ribbon embellishment.

Materials:

Ceiling Tile (cut to size needed, I used a utility knife to cut my tile)

Fabric (enough to cover ceiling tile)

Ribbon (or any embellishment)

Scissors or Rotary Cutter

Staple Gun

Pins

Materials needed to get started.
My tile board was already cut from the previous version of the display, I just took the old fabric off.

I ironed my fabric and rolled it for dust, lint and pet fur. The fabric has been sitting out for a while and needed a quick lint-rolling.

cut material to fit tile
Here I used a rotary cutter to cut the fabric to size.

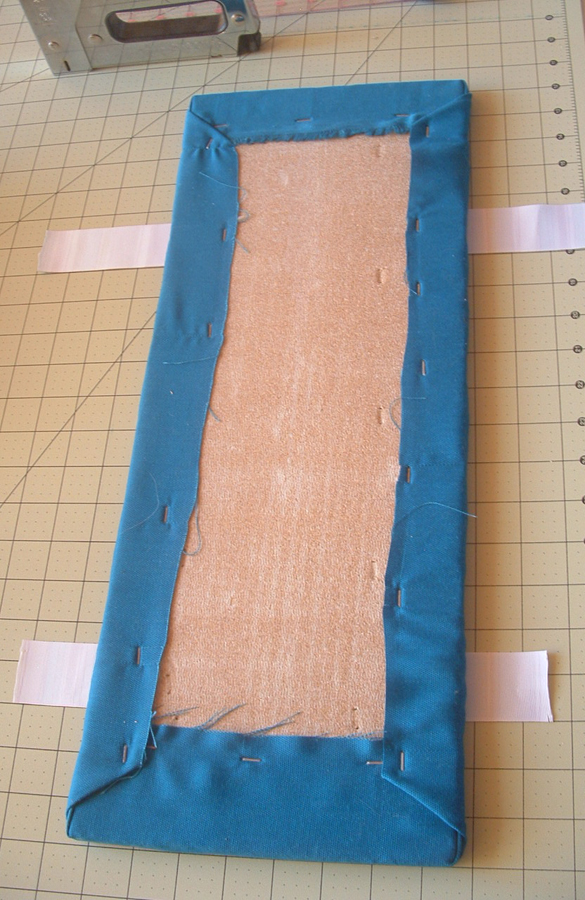
I left about 2 inches of extra fabric on each edge to wrap around my tile board.

staple the sides of tile board
Sides stapled.

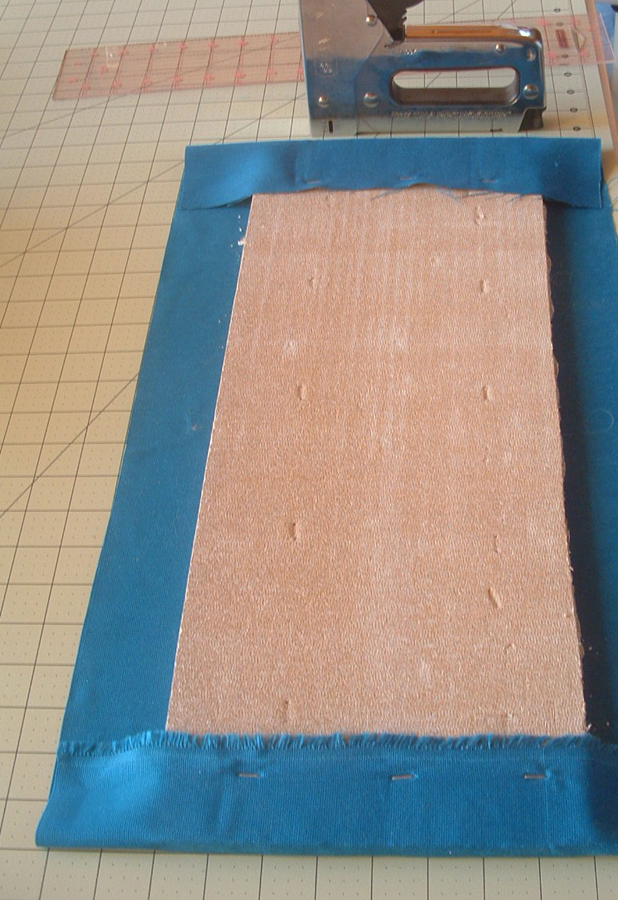
I stapled the sides of the board first. It really doesn’t matter if you do the sides or top/bottom first.

First step in corner fold.
First step in corner fold. (What an odd view of my hand.)

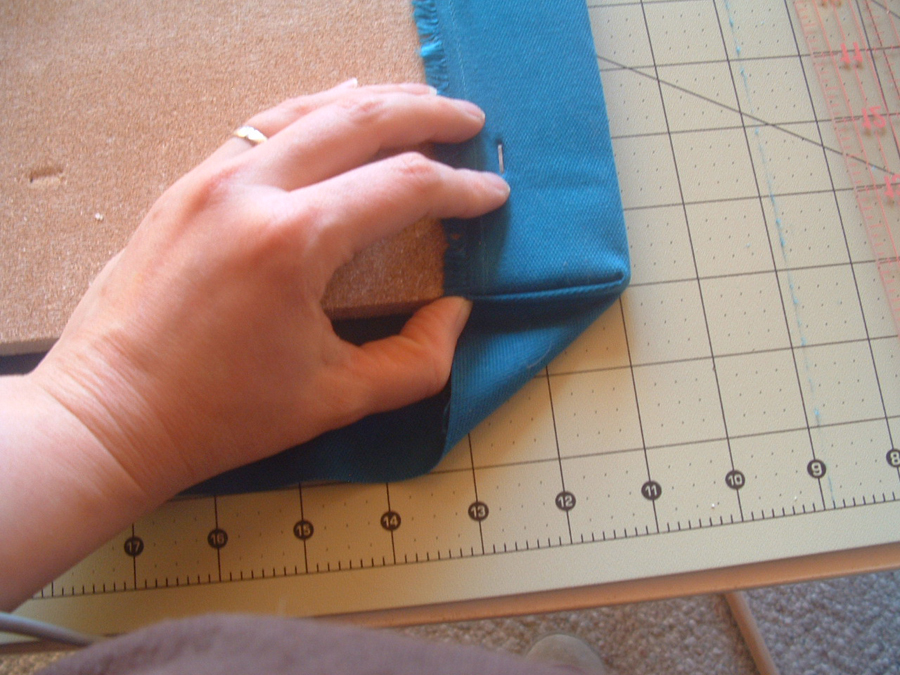
I folded the corners like you would a present. I am sure there are fancier or neater ways to do this, but I like the end result.

Second step in folding corners.

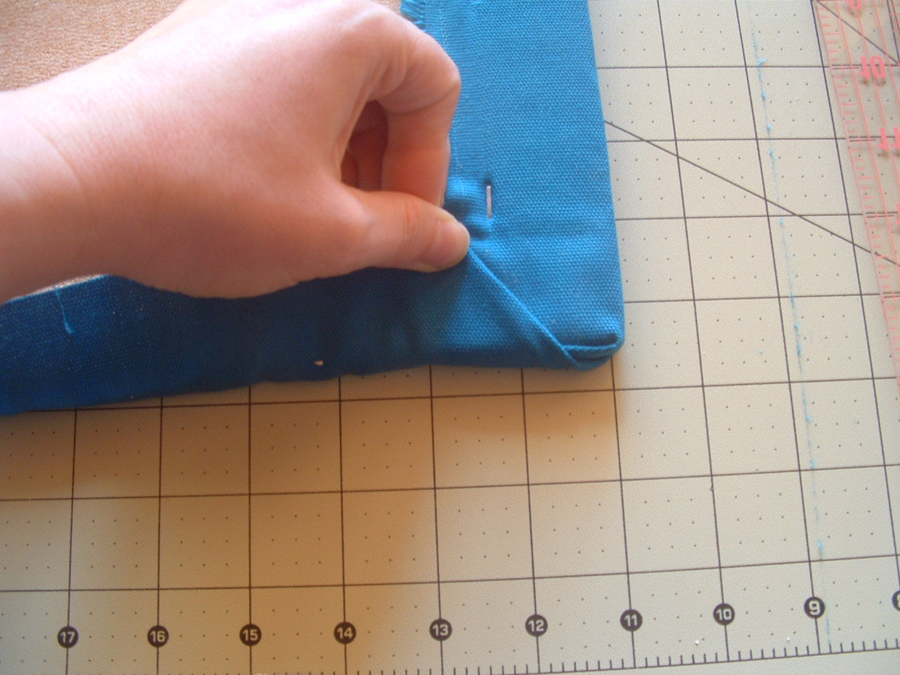
Fold up the bottom edge and hold to staple.

Nicely stapled.
Nicely stapled.

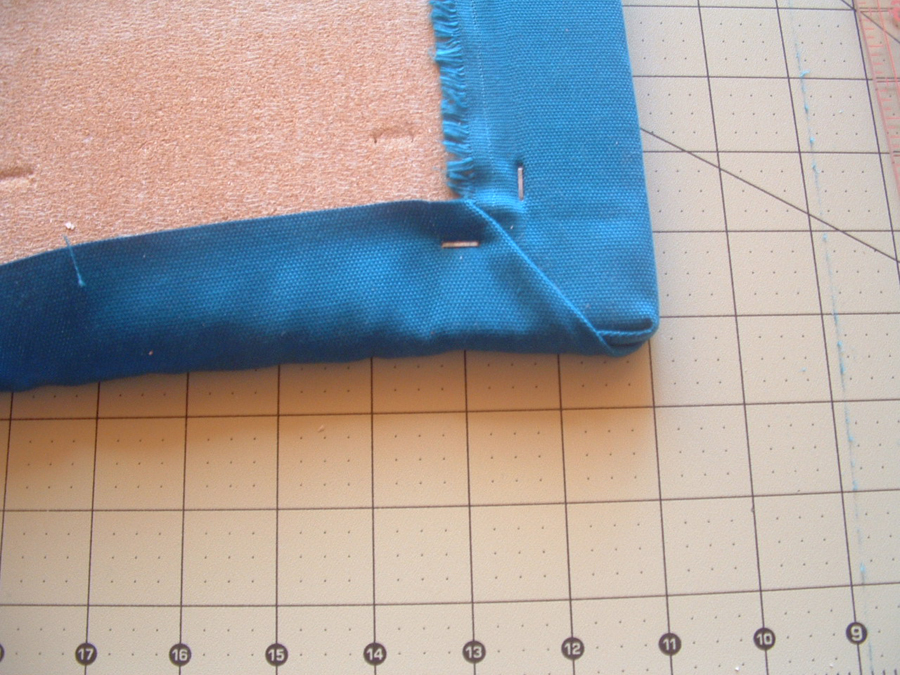
Repeat this same procedure for the other three corners, then staple the rest of the top/bottom fabric.

all sides and corners are now stapled to board
Fabric now attached to tile board.

I decided that I wanted to have a bit of embellishment to my display, so I chose some ribbon I had left over from a previous project and cut it to fit my tile board.

9_CutRibbon
Again I left about 2 inches of extra ribbon on each edge to wrap around the board.

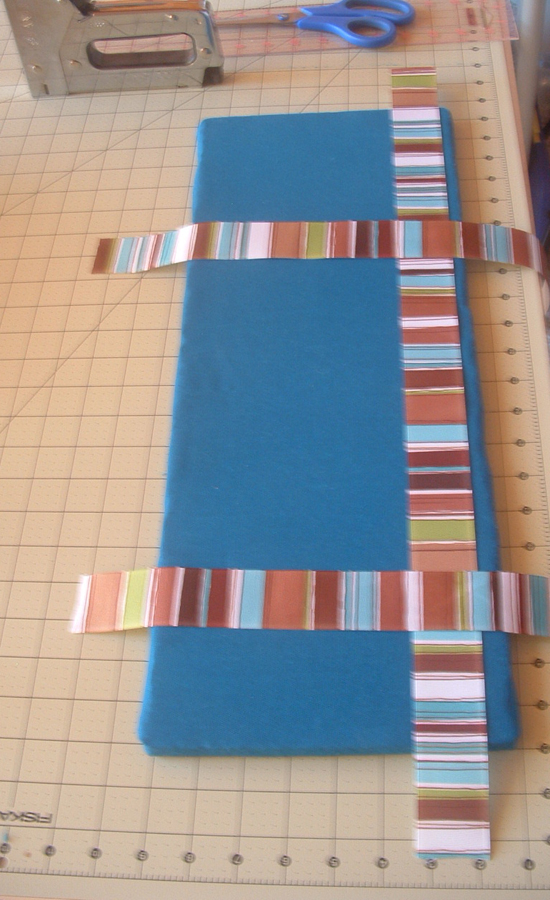
Once I had decided on my placement, I used my cutting mat to make sure my ribbon would be level and even on my board.

10_AlignRibbon
The cutting mat made the alignment very easy.

I stapled the two vertical ribbons to the board and then added the horizontal ribbon in the same manner.

All ribbon is stapled to the display.

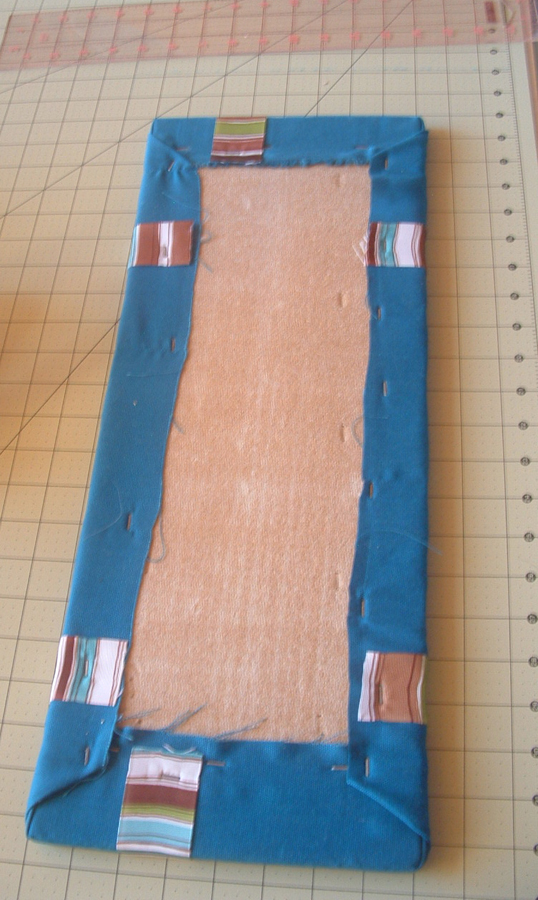
And here is the board all ready to go. I just need to add the pins and earrings!

12_FinishedBoard
All done with the staple gun!

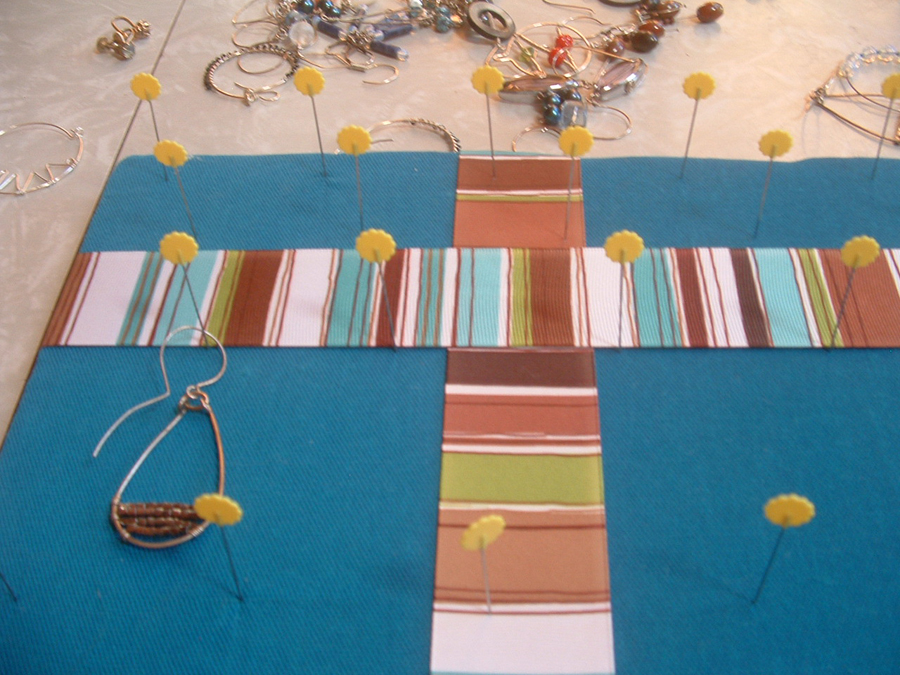
I had been working in the loft at my craft table, but as all the pins and earrings were downstairs, the project shifted to the dining table.

board, earrings, and pins all ready to be put together
I used flower headed pins to hang my earrings.

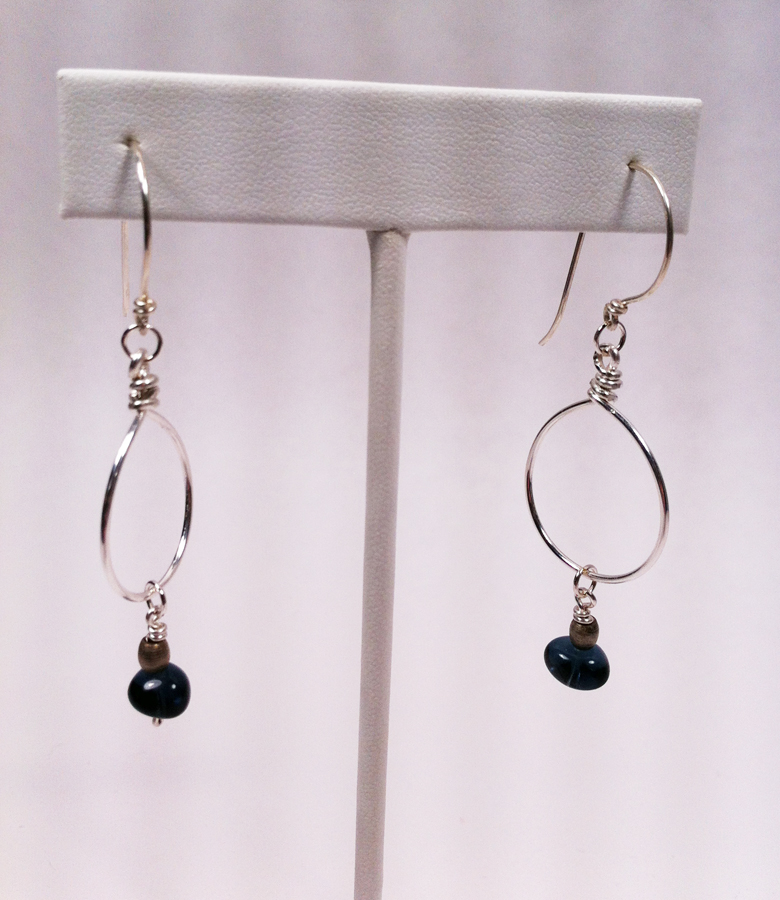
I used a wide earring and a long earring to help decide the placement of my pins. I have a lot of earrings and needed to be able to display long and short earrings.

pins added to board
I ended up adding another row of pins after this photo as I more earrings than I thought.

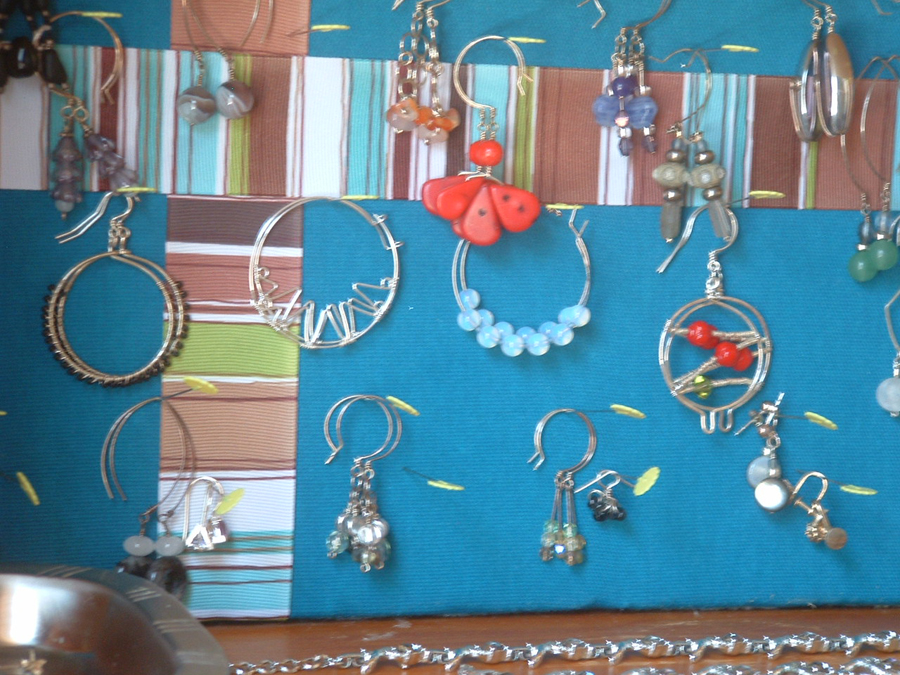
Now the display is ready to go. I pushed it in place and hung my earrings!

Completed earring display in place and full.

If you cannot tell, the earring display is in the over the toilet shelf. I have more necklaces hanging all over the shelf itself as my other necklace display is already full, another project?

I like the color, I have lots of stained pine in my house (a LOT of it) and the more color I can add, the happier I am. As I cannot paint, I will add color wherever possible.

I am really happy with my finished Tile Board Earring Display!

Happy Creating!

Kristin

sterling silver zigzag hoop earrings

ZigZag Hoop Earrings

After much whining (and an exhaustive search), I have realized that however convenient it may be, I just cannot take photos of my projects that I like with my iPhone. Some people may be able to do it, I am just not one of them. I did have to search my house pretty thoroughly for my real camera, it was in hiding. It is fairly old (Fujifilm FinePix), but it still takes good photos. I am much happier with the results for today.

If you have been watching the news, you would have seen the massive cold weather system that tromped all over the Midwest yesterday and the extreme cold that has followed it. Due to this, my place of employment closed for the day and I have had a wonderful day at home, staying out of the cold. After a big breakfast and some lazing around, I made these wonderful hoop earrings with a zigzag in the center.

sterling silver zigzag hoop earrings

I am really happy with how these turned out. They are made out of 21 gauge sterling silver wire. I wrapped the hoop around a mandrel to make the main frame of the earrings. Then I used a 4″ piece of the same wire to make the zigzag which is connected to the hoop frame with 26 gauge sterling silver wire. After the zigzag was wrapped to the frame, I used a plastic mallet to harden the hoop and zigzag so that they wouldn’t get bent too easily.

close up of the sterling silver zigzag hoop earrings

Have a great day and stay warm!

Happy Creating,

Kristin

Blue Coral Necklace and Earrings

I love matching earring and necklace sets. As far as I am concerned, you can never have too many.

I made the following earrings and necklace out of sterling silver for the earwires, wire hoops, and necklace hook, blue glass and zinc tube beads for the drops of the earrings, blue coral, blue glass, zinc tube beads and white seed beads for the necklace.

Blue Glass Earrings

You cannot see it, as it is the back of the necklace, but I used a small length of sterling silver chain to make the necklace a variable length. I wear a LOT of blue and wanted to be able to wear this with many different styles of shirt.

Blue Coral and Glass Necklace

Happy Creating!

Kristin

Rocking the resistors

I liked this challenge, but it seemed to me that I couldn’t get the idea of jewelry out of my head. It just seemed to speak to me and say, “I should be a piece of jewelry”. So, naturally, that is what I made.

I felt that the colors were a factor in what I made. To me they felt like Fall, and what else is more like fall than a leaf. I made a base and then I wired the resistors as veins of the leaf. I like how the colors filled in the base. I make a lot of pendants normally, so this time I decided it would be a bracelet. Kind of like a bangle bracelet. I curved the leaf around a glass to give it the right feel on a wrist. I took a piece of 16 gauge German Silver and made a loop in each end. I curved the wire to conform around my wrist.

For the ring, I formed a loop in the wire about 12″ from the end and then wrapped the wire around a mandrel 3 times. I curled the wire around the loop and cut off the excess. I cut off one end of the wire next to the base of the resistor and formed a loop. These small loops were attached to the larger loop to give a star- burst effect.

I am pretty thrilled with how they came out. I hope you like them too.

Pendant made of resistors.

Crafty Challenge 8: Resistor Necklace and Pendant

So some of our Crafty Sisters have been a little distracted lately and it took an extra week to get our projects posted this week. (I cannot complain as it has been me a couple of times who has been distracted.)

Our found item that must be used in our challenge was resistors. Out of the Crafty Sister storage came a canister full of old resistors. We divided them up and got to work.

Resistors just seem to lend themselves towards jewelry and I was inclined to follow. My foremost concern was an interesting pendant.

Pendant made of resistors.

My entire necklace is made of resistors, even the hook and eye clasp. The wired ends make wire-wrapping a breeze.

Necklace made up entirely of electronic resistors.

This is a very simple necklace to make and only took me about 2 hours. Most of that time was spent messing with the style and shape of the pendant.

I am pleased with how this turned out and will probably wear it from time to time.

Happy Crafting!

Kristin

Tourmaline necklace.

Necklaces and Earrings: My Camping Finds

Mom (Craftysister Lynne) and I went camping in Georgia a few weeks ago. While there, we got lost driving and found this amazing little store. It was called Rocks, Relics and Beads. This place was packed with so much stuff that it was completely overwhelming. The owner was such a character. He seemed to delight in making up stuff on the fly (you know, in a true Grandfatherly way). Mom even posted some photos on Facebook of our visit to this wonderland. It only seemed fair as I posted pics of her version of wonderland (an art store) during our camping trip to the Indiana Dunes last year.

So, below are two of the finds I made at this amazing wonderland:

Tourmaline, crystal, glass and sterling silver necklace.

I just love tourmaline. It comes in such an amazing array of colors and I love all of them. This is a slice of a chrome tourmaline crystal and I just fell for it the minute I saw it. It took me awhile to decide how I wanted to display and mount this piece, but I am very satisfied with the finished pendant.

The front piece of the necklace where the pendant hangs, is strung on 18 gauge sterling silver wire. The rest of the necklace is strung on beading wire. I like to do necklaces like this as I think it brings more focus to the pendant.

Close up view of tourmaline pendant.

I cannot say it enough that I just love this pendant and the necklace. I wrapped the tourmaline very gently with 21 gauge sterling silver wire that just comes around the sides of the stone and rises in back of the stone to form the wrapped bail.

And of course, I made earrings to go along with this piece. I had some fun this time around doing some sterling silver findings and various wigjig type forms for these earrings and for the next necklace below.

Earrings that match the tourmaline necklace.
No tourmaline in the earrings, but I use some really pretty green crystal and glass beads.

I cannot wait to wear this set. Below you can see the almond shaped clasp that I made for this necklace. It is made from 18 gauge sterling silver wire.

Almond shaped sterling silver clasp.

Tourmaline necklace.
Here you can see the entire necklace!

The next piece has an Italian art bead for the pendant. I just love the contrast of the orange and teal swirls.

Necklace made with an Italian art bead for the pendant.

It doesn’t show up as well in the photo, but the teal beads and the teal swirls in the pendant are actually the same color. I love the way the one teal bead above the pendant looks like it is smiling at you and showing his fangs. It made me laugh when I noticed it.

The orange beads are agate and the white beads are quartz crystal composite beads. I used seed beads for the back portion of the necklace as I wanted the entire focus to be on the front double strands. I again used 18 gauge sterling silver wire to make the bail for the pendant as well as the findings that connect the double strands of the front part to the single strand of the back portion of the necklace.

Agate earrings that match the Italian art bead necklace.

The earrings are made of more agate and the findings are made of 21 gauge sterling silver wire.

This is a very colorful piece and I am very happy with how it turned out. This is a great summer necklace and earrings set.

Close up view of the double strands of the front portion of the necklace.

I hope everyone had a wonderful Memorial Day and I look forward to posting some more of my recent projects!

Happy Crafting,

Kristin

Blue Cube and Pearl Necklace Set

Finishing Projects: Blue Cube and Pearl Necklace and Earring Set

I have so many unfinished projects. I was looking through the pile of them with my mother-in-law last weekend and I couldn’t believe how much material I had there. So much of it needed to be cut up completely. However, some of it just needed to be finished. I pulled a few pieces out and am really making an effort to get them finished and here is the first finished project!

Blue Cube and Pearl Necklace Set

The necklace is made with sterling silver for the wraps and clasp, dark blue/teal pearl beads for the front part of the necklace and clear blue cube beads for the back part of the necklace.

I just loved the clear blue cube beads and knew when I bought them that I wanted to wire wrap them in a strand. I started this necklace about 2 years ago and since then, I add another cube bead every now and then, but I was never quite happy with how simplistic the blue cube beads looked by themselves. I bought the blue/teal pearls last year and looked at them a lot with no real idea what to do with them. I started putting them together and just love how the finished necklace turned out! The contrast of the dark pearl with the light blue cubes just pleases me immensely.

Blue Cube and Pearl Necklace Set

Of course, I had to make earrings to go with the necklace. I like making matching sets of jewelry. I really like the trio of pearls below the cube bead. They swing and bounce quite happily when worn.

Blue Cube and Pearl Necklace Clasp

I also made the clasp. I decided I wanted something with a little more oomph than my standard clasp and made an almond-shaped clasp that had a blue cube bead wrapped in the eye half of the the clasp. I really liked how it turned out and will probably make more clasps like this one in the future.

So, one unfinished project down, an infinite more to go. Mom (Craftysister Lynne) suggested I make a list and cross off my newly finished project, but I said that would just remind me of how many unfinished projects I still have yet to complete.

Blue Cube and Pearl Necklace

Happy crafting,

Kristin

Copper Bracelet Hammered Crafty Sisters

Crafty Challenge 6: Hammered Cuff Bracelet

Copper Bracelet Hammered Crafty Sisters
Hand-hammered cuff bracelet.

Lynne:

I have been accused of shooting down the last few ideas for crafty challenges, so when Loryn came up with the idea of using some scrap copper discs in the garage I couldn’t very well argue. I have had those discs for the last 20 years and had never been able to find a good use for them and now I was backed into using them in a challenge.

I searched the internet and found this video on YouTube. The most exciting thing to me was the minimal need for specialty tools. Of course, when you are not using many tools, skill is always a bigger factor in the finished project. I pulled out a vise, a wrench and a ball peen hammer and set to. I will tell you now that ear plugs are a very good idea.

We have another sister who lives out of state and she was here visiting. She had brought some tools and a willingness to hammer out some ideas. Together the two us managed to hammer a small bowl with turned edges. Turning that outer edge under is not so easy but I found that brute strength is not the best idea. A small hammer with a light touch goes a long way as a hard hammer hit will put a tear in the copper.

Copper Craft Challenge Crafty Sisters Hammered
The diameter of our discs was jut 3" so the bowl is very small.
Copper Craft Challenge Crafty Sisters Hammered
Here is the bowl as seen from the bottom showing the turned edge.

I folded copper, hammered copper, cut copper and cursed copper, but I could not manage to make any progress until last Saturday. I just seemed to make one good hit with the hammer and the copper began to do what I wanted it to do. Failure does lead one to success as long as you keep trying.

I ended up cutting a rectangle from two copper discs for the two halves of a cuff bracelet. I turned the long edges under and then hammered the finished rectangles into a roughly oval wrist-fitting shape.

One of my failed projects was a ring that was too wide for my finger and I had tossed it into the growing scrap heap. However, when I needed a bridge to hold the two bracelet halves together the too wide ring was perfect. All I had to do was hammer the ring flat, punch holes in it, punch matching holes in the other two pieces and connect them all with paper fasteners (not really sturdy but the deadline was twenty minutes away) and there was my bracelet.

For my first piece of hammered metal work I was extremely happy, and despite all my complaining I have become intrigued with the process and am going to do some more work with copper.
Lynne

Hammered Copper Cuff Bracelet Crafty Sisters
Hammered copper cuff bracelet.
Hammered Copper Pendant Necklace Crafty Sisters

Crafty Challenge 6: Verdigris Copper Pendant and Hammered Chain

Hammered Copper Pendant Necklace Crafty Sisters
Hammered copper necklace with verdigris patina.
Copper Necklace Pendant Hammered Crafty Sisters
Hammered copper pendant necklace.

Cheri: It felt so good to get back to a challenge after our winter hiatus. And this challenge couldn’t have been better. I think we were all a little excited and a bit apprehensive when this project was initiated. After playing with the copper for awhile, knew whatever I made, it would most likely be jewelry. This is when I let the metal do the talking. I had a ball peen hammer and a small vice with a flat edge and I went to town banging on some copper. I was pleasantly surprised with how pretty the copper became after being hammered. Metal can lose what small elasticity it has in it after it has been work-hardened so I really wanted to make sure that I did not overdo the hammering or it would become brittle. After I had mastered the shape I wanted, I decided to do some research on adding a patina. I came across an article that said I could add blue to the copper by suspending the piece over a bowl of ammonia in a closed container. This was super easy, just be careful with the odor, it can be a bit overwhelming.  The patina on my piece took about 12 hours to achieve and I think it came out pretty nice.

Copper Rings Hammered Crafty Sisters
Hammered copper rings with button-hole style closure-clasp.

I punched holes with a hole punch and used copper wire to embellish the pendant and make the chain. I also hammered the copper wire to give it a rustic look. The rings were made by hammering a small strip of copper and then coiling it around a mandrel. I put two holes in the upper end and two holes in the under part. This had a button hole effect when I used a bead to bring the two pieces together and basically tied them with brass wire.

The copper turned out to be an awesome material to work with and I look forward to making many more pieces.

Cheri

Crafty Sisters Hammered Copper Pendant Necklace
Hammered verdigris copper pendant and necklace.
View of copper star-burst necklace from the bottom of the pendant.

Crafty Challenge Six: Copper Star-burst Necklace

View of copper star-burst necklace from the bottom of the pendant.

We are back, baby!

After an additional week due to some time constraints, our Copper Crafty Challenge is complete. We had our final reveal among the Crafty Sisters this afternoon, and boy, we really seem to be at the top of our game for this challenge. I cannot wait for you to see all the projects. We are going to post one project a day, so keep coming back!

I waffled quite a bit on this challenge. I make a lot of jewelry and I wasn’t sure if that was where I wanted to go with this particular project. After a week and a half of indecision, I decided, why mess with a good thing, jewelry it would be.

Copper star-burst pendant and leaf chain.

Using a compass I played Spirograph on a copper disc and cut out the star burst pendant. Amazingly, the copper is thin and soft enough that you can cut the discs with heavy duty scissors. I hammered the star on both sides to give it some depth. I then curled the points of the star (I couldn’t see any other way to really blunt the points. Those suckers were sharp!) to keep from puncturing anyone wearing it or snagging your clothes. I attached the light green crystal bead in the middle with wire and did some wire-wrapped crystals (also light green in color) for the dangles at the bottom of the pendant.

Close-up of the star-burst pendant.

The chain is made up of hammered copper ovals and more wire-wrapped crystals. I did  make all the jump rings and the clasp out of wire as well. The wire is standard 18 gauge copper wire from the hardware store.

All the hammering was done on an anvil that my dad made me for Christmas several years ago and with a series of hammers that he made for me 2 years ago. I started all the holes with a punching awl then enlarged then with a Dremel tool and a diamond tipped drill bit. I filled all the edges with a mini file to be sure that you wouldn’t slice yourself open on the sharp edges caused by the scissors.

The star-burst was actually the second pendant I made for this necklace. I wasn’t all that happy with the first one I had made. I showed it around and the other Crafty Sisters and my M-I-L (who joined us from my house this week) thought it was great, which just goes to show how hyper-critical I can be about my own work.

First copper pendant I made.
This pendant is made of a copper plumbing pipe fitting.

Side view of the alternate copper pendant.

I did make a pair of earrings to go along with the necklace (my usual M.O.) and I think they turned out rather well.

Copper leaf earrings.

I really like how the hammered ovals came out looking like leaves. The hammering causes the copper to curl a little and I liked the affect so much that I left it and used the same affect in the star-burst pendant.

Close-up of the hammered copper leaf.

That is my completed project! It was a fairly easy process all in all and one that I found rather fun (until my arm got tired of all the hammering). I cannot wait for the next challenge. In the meantime, I have promised this necklace to my M-I-L and and am going to take the earrings apart to make a matching bracelet instead as she does not have pierced ears. So, back to my craft table to work on some more copper!

Happy Crafting!

Kristin

This post is featured on Todays Creative Blog.