Tag Archives: paper punch

Paper Punch Ornament

Okay, I am 2 days late with this post, but you will have to forgive me, between class, a major migraine, and a massive snowstorm, I have been a little bogged down.

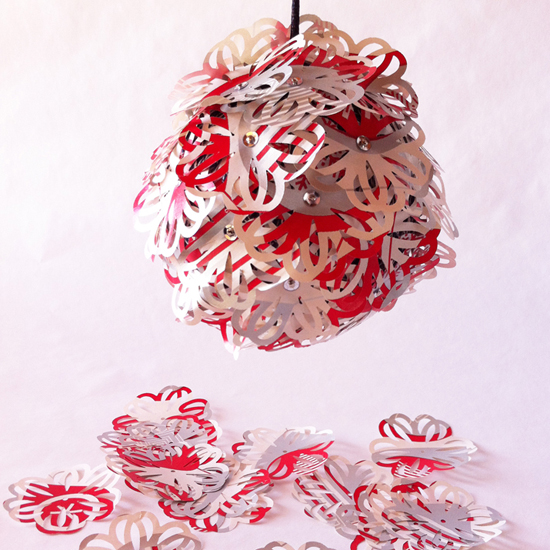
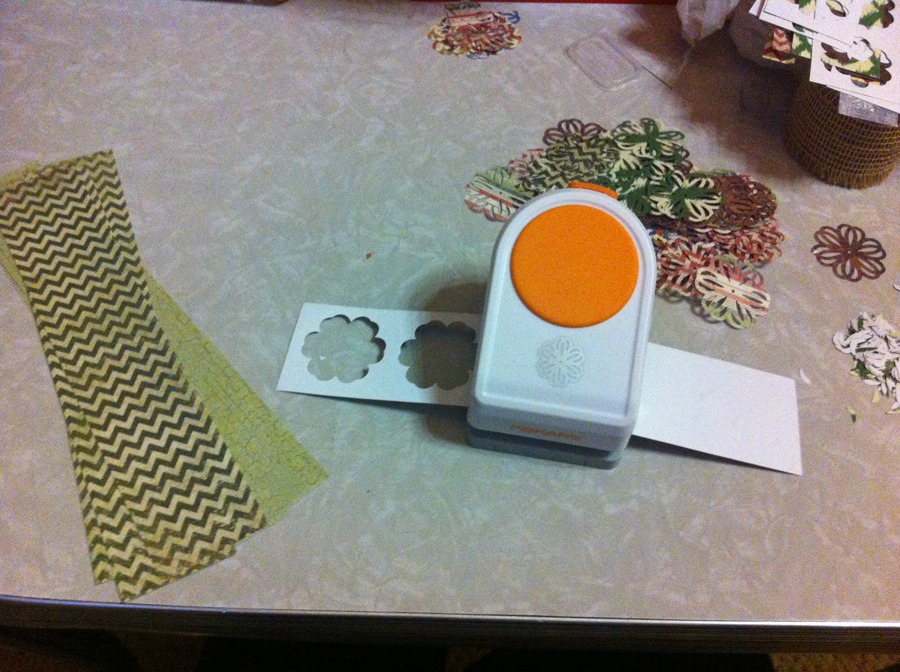
In my last post, I used this wonderful paper punch and I just have not been able to resist using it again. This time, I used gift-wrap for the paper cut-outs. I have discussed before my one-time hobby of making temari balls. I have massive amounts of supplies left over from this hobby and I raid it regularly for other projects. For this project, I nabbed a wrapped ball that I had already made. I use stuffing and wrap it with loads of sewing thread. I was a little more proactive this time and added my hanger before I got started adding the paper punch-outs.

Paper ornament with paper punches

I cut out loads of the paper punch-outs and used beading pins and sequins to attach them to the ball. I started at the bottom of the ball and went around in a spiral adding paper punch-outs as I went around and up the ball.

Paper ornament close up

It is a really easy ornament to make and only took me about a 1/2 hour. This does not include the time it took me years ago to make the thread-wrapped ball, but that only took me about 20 minutes at most. You could also use a foam ball for your base as well.

I am really happy with how the ornament turned out.

Happy Crafting!

Kristin

Small photo of paper ornament.


Side view of wreath

2013 Christmas Advent: Paper Wreath

Happy Holidays!

Hello, and yes we are still alive. We are doing our annual Christmas Advent. This year we are covering Christmas Decorations. I decided to to do a Christmas wreath and have been playing with paper lately and thus my Christmas Paper Wreath was made.

Finished paper wreath

For supplies:

Foam wreath shape, burlap ribbon, scrapbook paper (paper cutter optional), pins, sequins, paper punch (twine and bells optional)

Supplies needed for paper wreath

The paper punch I chose cuts out a 2 1/2″ shape, so I cut my scrapbook paper into 3″ swathes. This I then ran through my paper punch and cut out my florets.

Paper punch

Once I had all my florets, I wrapped the foam wreath with the burlap ribbon. I used pins to hold the burlap in place (I was trying to keep my supplies to a minimum, but you could use hot glue here if you preferred).

Burlap wrapped foam wreath

I attached the hanger and bells at the very end, but realistically, this would have been the best time. It worked just fine adding these at the end of the project, but I could have hidden them better had I tied them around the wreath before adding the florets.

Next, I started attaching the florets. I have to tell you about my error now. I bought large head beading pins for this project and thought they would be large enough that they would hold the florets by themselves. However, once I tried to hold the florets in place with the pins I discovered that I was wrong. I needed something to go between the pinheads and the florets. You could use just about anything, I chose to use silver sequins. I imagine that small beads would also have been lovely.

Once you put the pin through the floret, use your fingers to bend the floret up into a flower cup shape. This is what gives the florets three dimensions.

Attaching florets to wreath

Just keep pinning the florets to the wreath all the way around, being sure to cover the inside and outside of the wreath.  I made sure that none of the florets were flat on the wreath. I would pull up the edges of the nearby florets so that the edges were all up and none were flat.

Here you can see the burlap ribbon under the florets, but once the wreath is complete, you cannot see the burlap from a regular distance away.

Paper Wreath Close Up with Burlap2

I love the way it turned out. It looks great hanging on my front door.

Side view of wreath

Finished paper wreath

Happy crafting!

Kristin

Paper Wreath Close Up CG