A few years ago I had the pleasure of finding a large bag of dried gourds. I have kept these gourds and stored and restored them. Keep in mind that these are not easy items to store. They take up a lot of room and are very unwieldy. After a few years of storing them I decided that I was going to give them away, since they were laying around doing nothing. I put the bag in my car.
The gourds traveled with me for a few months and I still couldn’t bring myself to get rid of them. Why wouldn’t inspiration hit me?
It finally did!
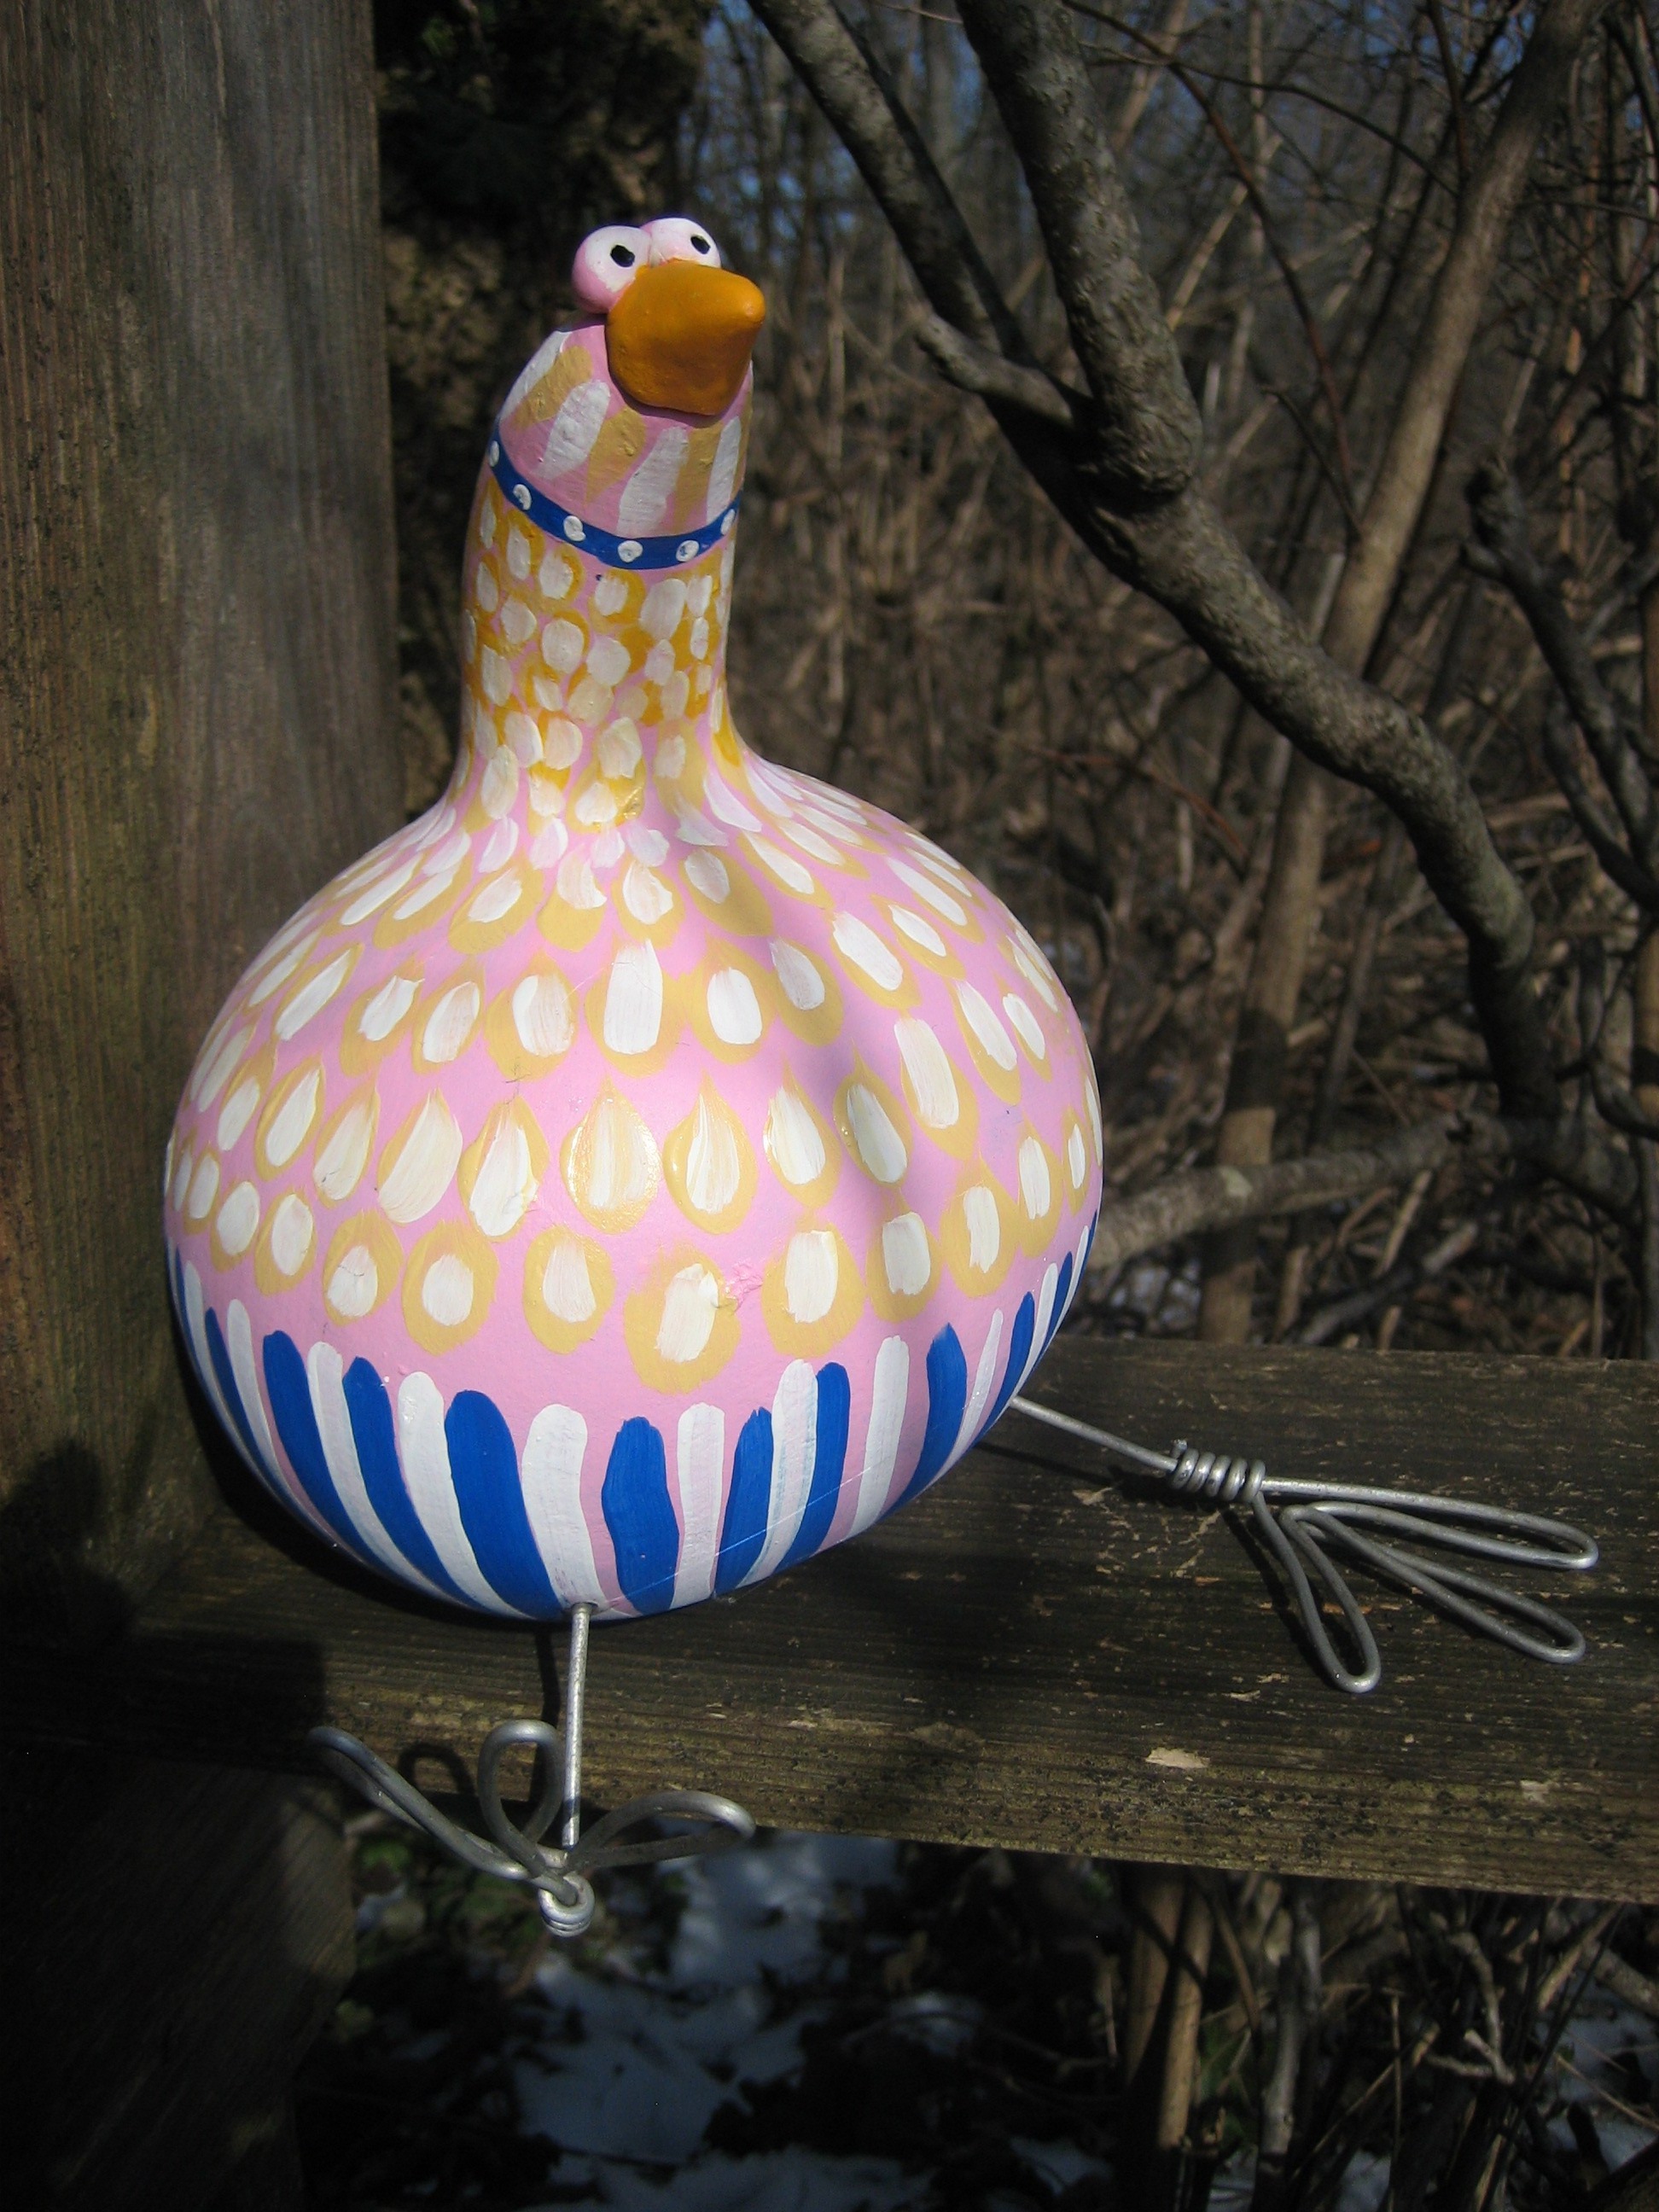
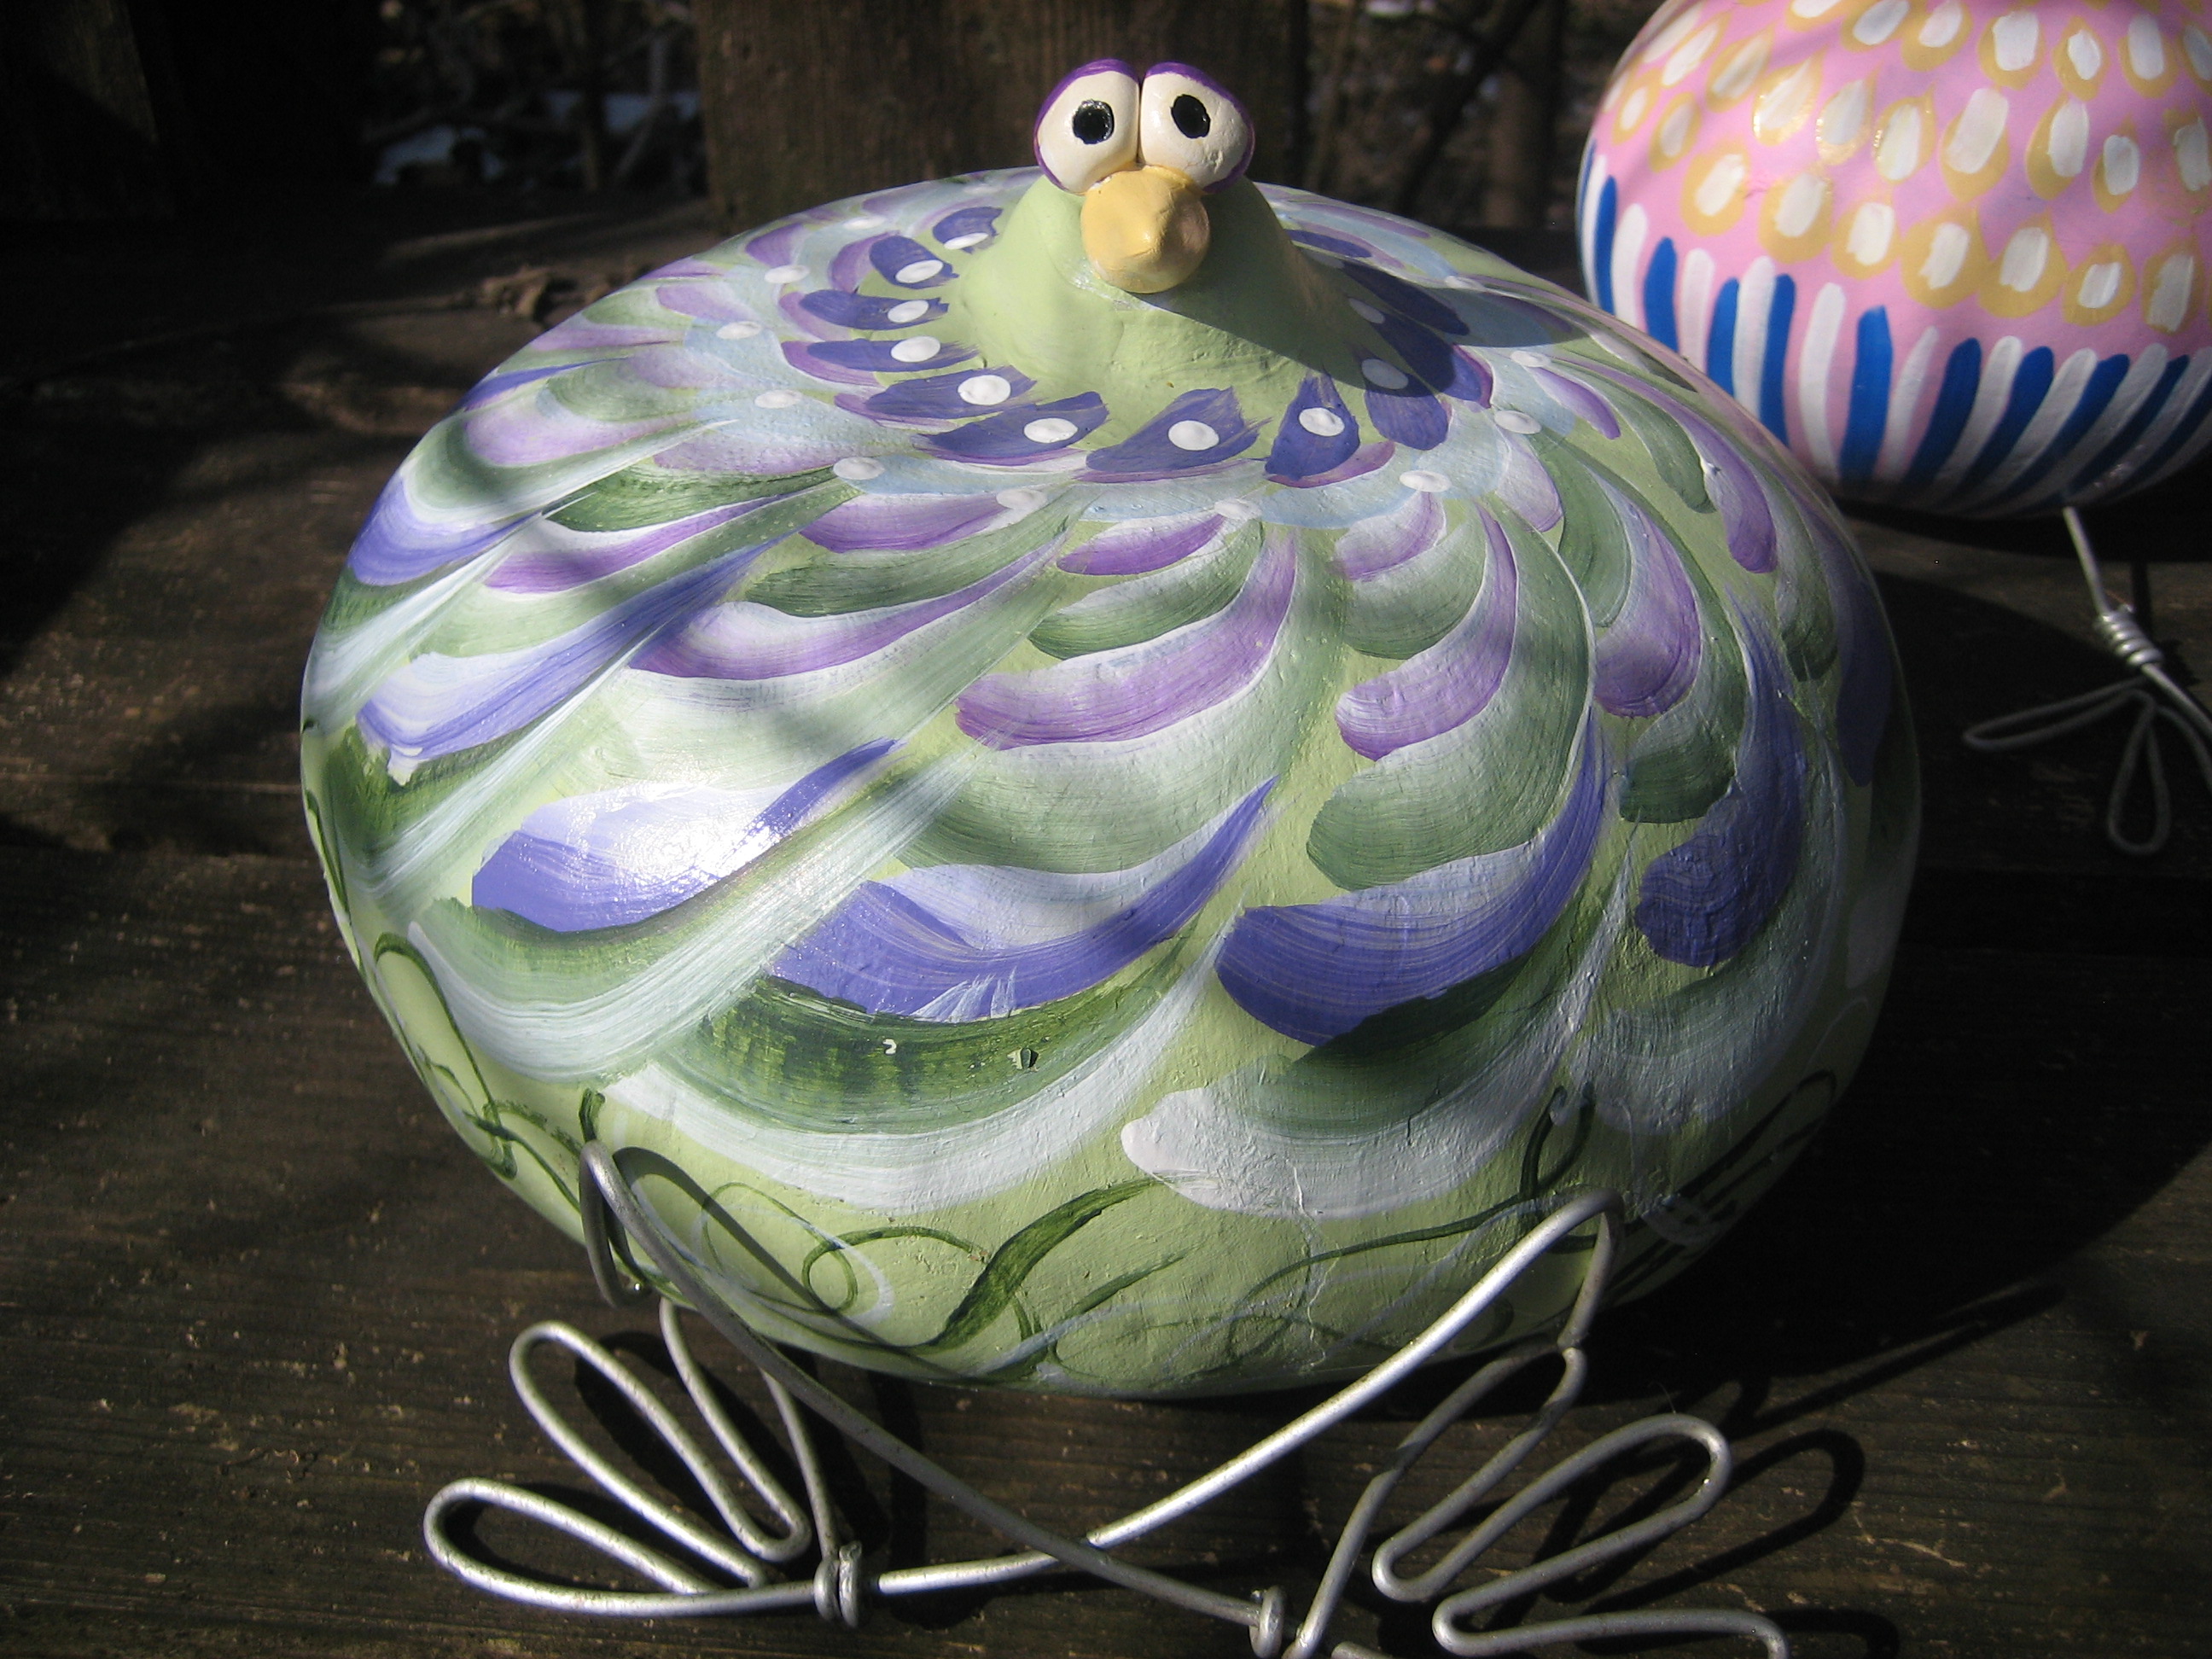
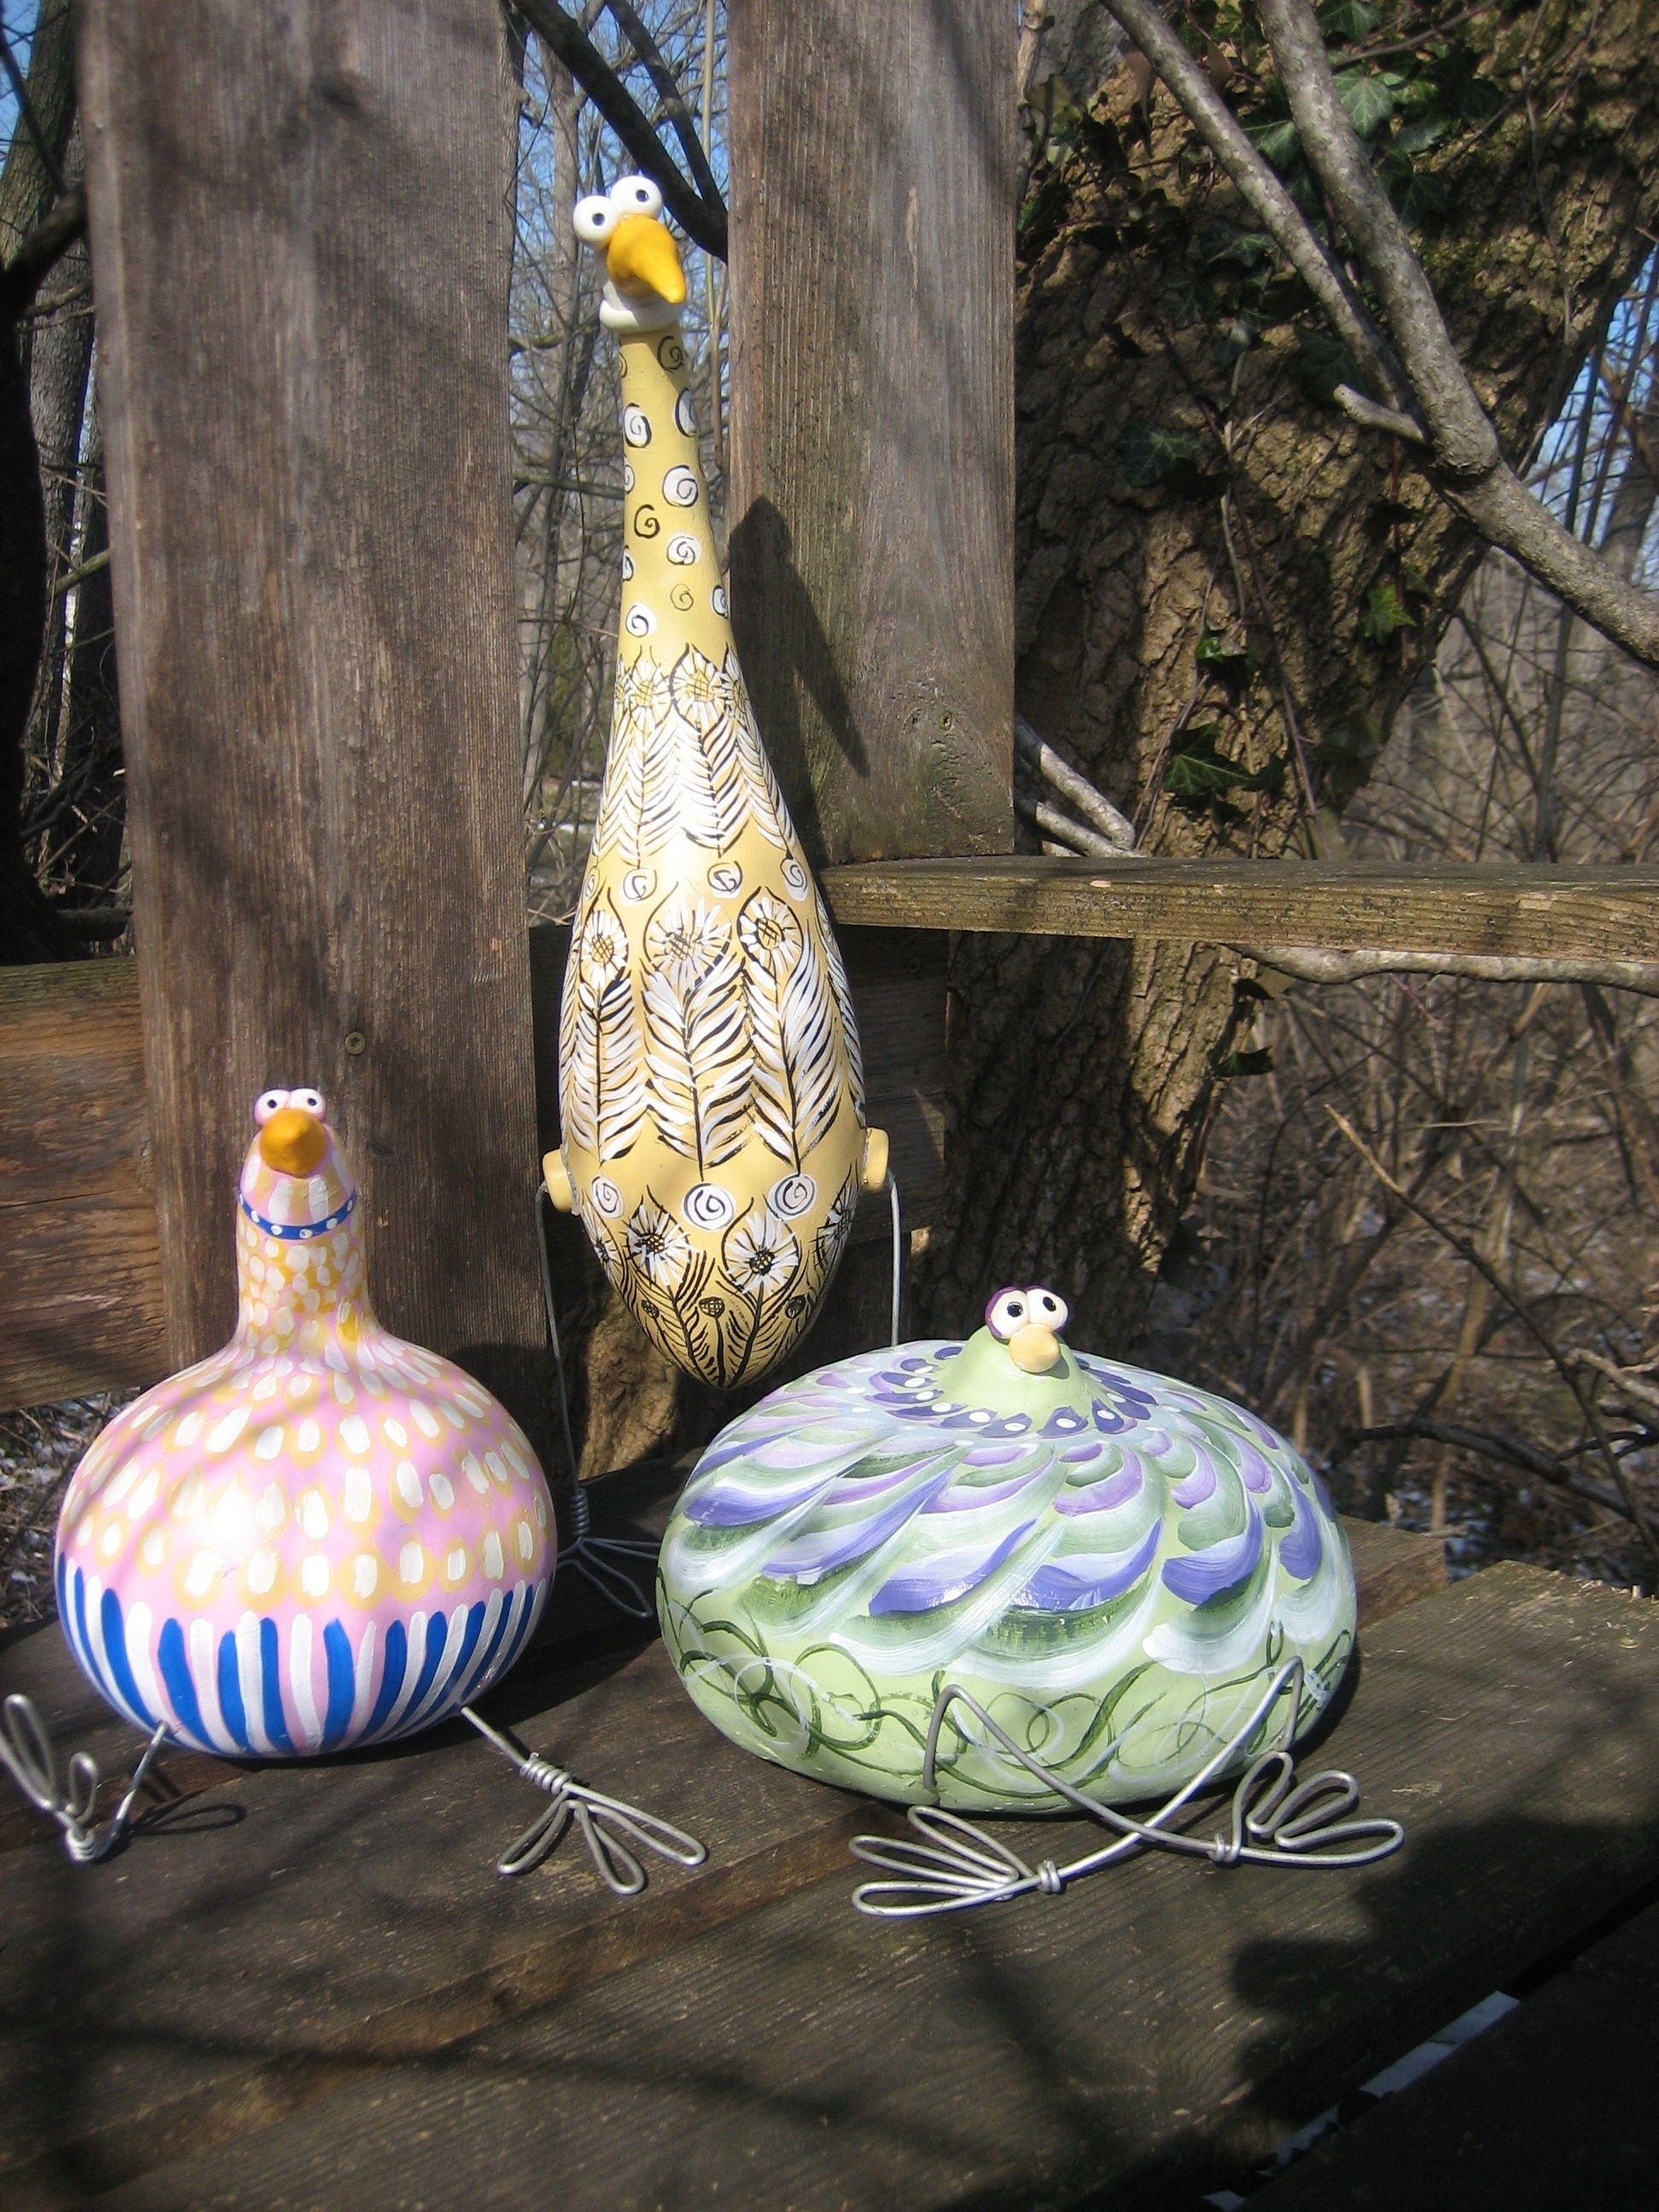
The gourds reminded me of birds. Not beautiful birds necessarily, but goofy, rather klutzy birds. Birds that might have been related to the Coo Coo Bird.
I started by washing the gourds, just enough to get the crud off, I used sculpey to make the beaks and eyes, cooked them for the time necessary and glued them with E-6000 to the gourds.
The eyes and beaks were a jumping off point. I painted them with bright colors and bent wire to make legs. I used a small knife to make a hole in the gourds and glued the legs in.
The birds turned out to be so much fun, and I am thanking my lucky stars that I kept them. I hope you enjoy them, and I will post photos from time to time as I make new ones.
Cheri-December 12, 2012. Day two of “The Crafty Sisters Advent Ornaments“.
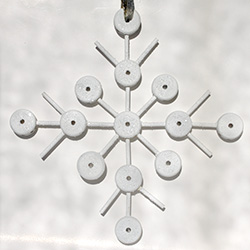
Snowflake ornament made with Tinker Toys
This is a super simple ornament to make and it really is pretty neat. It may not make the best ornament as it is a little large but it would be a great tree topper or a wall hanging.
All you need to do is get some Tinker Toys and pegs. I found some orphaned ones at a garage sale last summer and decided to give them a new life.
The design fell in to place pretty easily and then, I just hot glued the pieces together.
The hard part for me was the painting. Spray paint seemed to be the best way to go, but the paint soaked right in to the Tinker Toys. After several coats (and a patchy finish), eventually I finished painting it with acrylic paint and glittered it.
This was a fun project and the possibilities are endless.
Cheri- It doesn’t seem to matter how much time we have for a challenge, I seem to always wait until the last minute to complete it.
Over the years, I’ve collected several chairs that need to be painted/redone. I started with 3 chairs that I’ve had for a while and decided to try a different technique on each one. If I didn’t like how my chair was coming along, I’d move on to a different one.
The camp chair was my third try. It was a garage sale find and was a lot more unique than my other attempts. The bad part of the project, was that the canvas needed to be replaced. For a folding chair, this is a pretty major fix as the chairs stability depends on the canvas seat and the back.
After pulling off the canvas, I was amazed by the wonderful wooden skeleton the chair had. of course now I was faced with the daunting task of showing off the chair without covering it up too much.
After mulling it over in my head for a bit, I decided that something transparent would be best for the back. It just happened that I picked up some unused medical tubing at another garage sale that would be perfect for the back of the chair. I dremelled about 12 holes on each side of the back. Then I took the tubing and wrapped it around the chair, tacking it in each place that had previously been drilled.
The back of the chair looked great, next came the seat. I first tried to use the tubing again, but the tubing needs to be held tight and this chair folds. I had some leather in my material stash and dug it out. It was a perfect fit to replace the canvas seat of the chair.
It needs a few more tweaks, but the finished product came out pretty cool.
Framed cootie scientific specimen box to hang on your walls.
Cheri:
I picked up a box of Cooties last year at a garage sale. I had a plan and it didn’t involve playing the game. I like the look of insect displays, but I don’t want to have a real insect display. I could have a Cootie display though.
After inspecting the cootie, I felt that I should split the thorax and head. There is a seam that runs along the two pieces and if you carefully insert a flat screwdriver into it, it will pop apart with a little effort. I took the front pieces of the thorax and head and worked with them in the specimen box and chose the placement.
I did have a bit of difficulty when it came time to attach the legs to the thorax, so I decided to hot glue the legs on to the thorax and glued it in place. I then hot glued the head, antenna and the tongue in place. I then cut a scrap of paper and hand wrote “Cootie” to make it look like it was a real insect specimen and pinned it in place.
This was such a fun project. I think I really like it because it is unexpected yet it is expected.
Cheri: Well, another project come and gone. This one did not freak me out too much. I am always making little projects.
Sometimes I will see an object that I really like because it stirs up memories of being a kid. That is what happened when I bought these Christmas tree light bulbs at a garage sale a few months ago. I was drawn to the color, (pink) and I really liked the vintage feel of them too.
I knew that I would never use bulbs like these on a lighted string (who could trust them), but I still liked the look of them. They were the kind of lights we had on our tree when I was a kid. I don’t even know if these are sold anymore. They do have a tendency to get hot and really the newer, small lights are brighter.
When I saw them for 50 cents, I couldn’t think of anything to do with them at the time so I tucked them away for when an idea came. When this project was discussed, I felt that I could possibly use the light bulbs for something. I was pretty sure what I wanted to do and I was also sure that the idea would work pretty well. All I really needed was hot glue, ( I am the Queen of hot glue).
For the 14 point star ornament, I started out with glue on the metal tips and then I put one light bulb in the center on each side. I tried to do this mathematically but as I am math challenged, I decided to go by sight. It came out pretty well the first time and I knew that I really didn’t want to press my luck so I decided it looked pretty symmetrical.
For the eight point stars, I just glued 4 together and glued 4 more together and attached them. I hot-glued buttons onto them to cover the glue in the center.
I then decided I needed a hanger that was not very noticeable. In the box were 2 bulb clips, so I took one bulb off the star, attached the clip and then glued the bulb back on. This way I can attach a hook to it.
All in all I was quite pleased with the outcome and I think it will look terrific on a tree. The best thing is it was really simple and cheap. I just love it when a plan comes together.
14 point Christmas tree lightbulb star ornament.
The back of the 14 point star ornament with hanger.Four lightbulbs glued together end to end into a four point star and then two of those flat stars glued together to form an eight point star.The back of the eight point star with a close-up of the wire hanger,
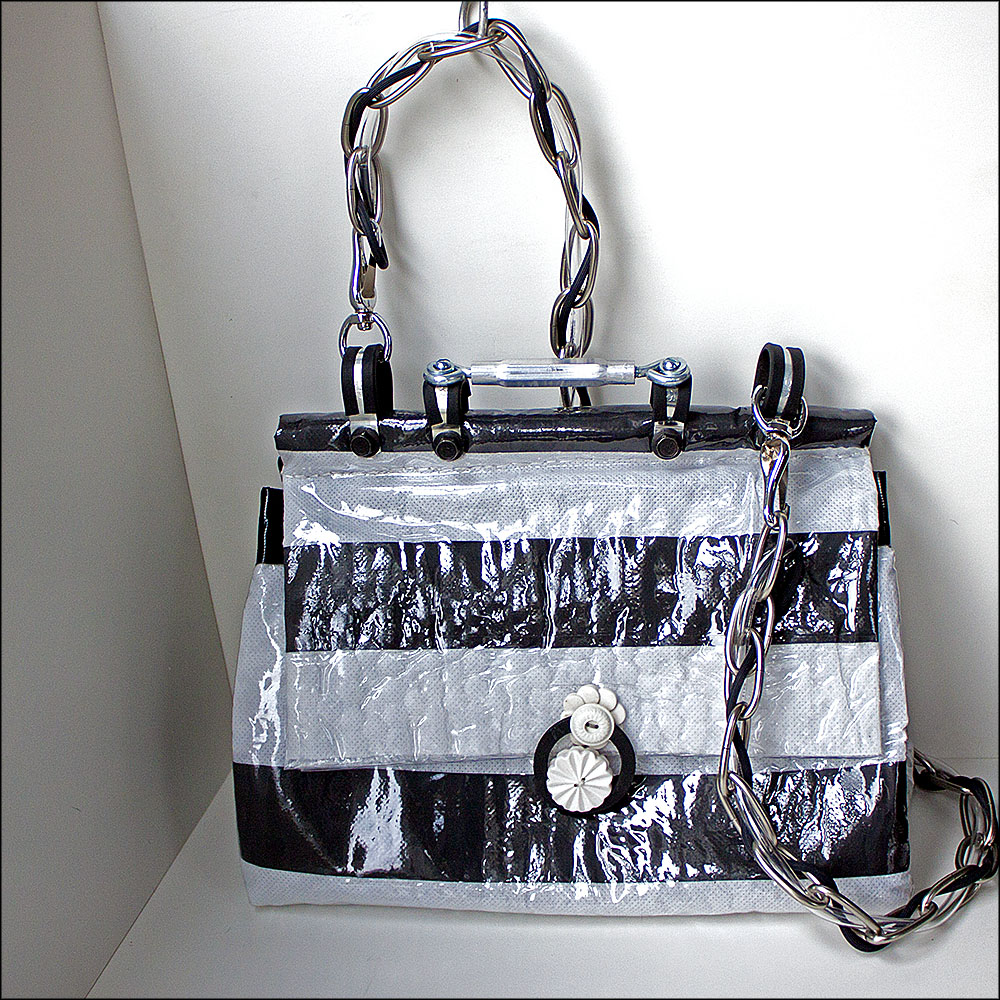
Lynne: I suppose that Crafty Challenge 4 really was my idea. I have been carrying the handbag I made for Crafty Challenge 2 and it was not really designed for everyday use. So I needed a bag to carry through the winter. The crafty challenge seemed like a good way to make myself make one.
I believe Cheri deserves the blame for the Coach Willis idea. The Willis bag is a deceiving design. The rod and handle assembly is complicated and that type of handle puts a particular stress on the closing clasp. This means that the bag needs to be made of strong reinforced material and that the position of the clasp has to be precise for the handbag to hang right. But what you don’t know beforehand can keep you from ending before you start.
Since I was still fascinated by the possibilities of fused fabrics, I wanted to make the handbag from plastics. At a garage sale the other day, I found two white carrier bags for 10 cents. These were department store bags that were made of the same material you find in the rectangular totes that are sold in supermarkets to reduce the number of plastic bags they give you. This material is some type of polyester and it does fuse with an iron. Not easily, but when used with other more amenable plastics it works.
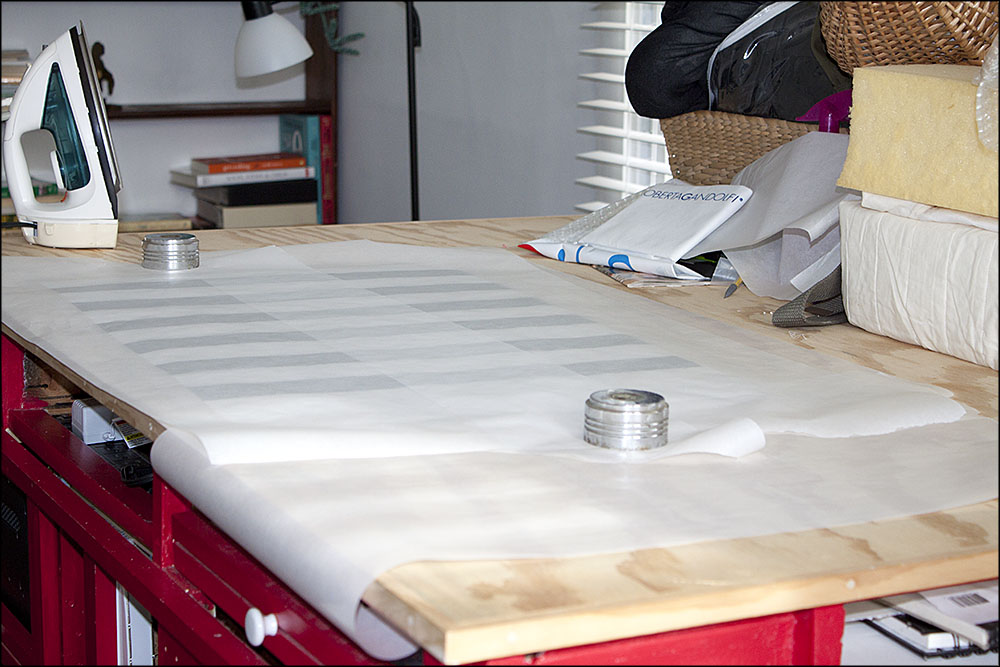
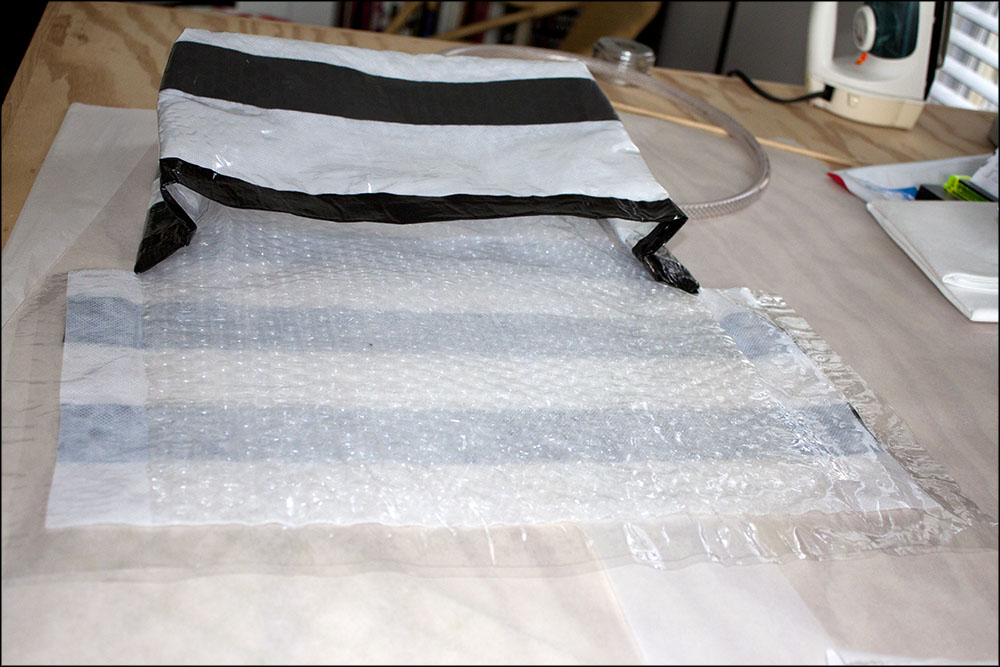
I made a fused fabric sandwich of bubble wrap, carrier bag and plastic vinyl sheeting. Each layer of the fabric has its own purpose. The bubble wrap provides sturdiness and a unique texture that I am particularly fond of. The carrier bag provides color and the plastic vinyl fuses everything together while making a durable surface for the exterior of my handbag. I used black duct tape to add stripes to the white of the carrier bag and to reinforce the top of the base of the bag.
I fused the layers into a rectangle of the size I wanted following the general directions of the duct tape bag described here. I added extra inches for the flap because I did not want to put a flap on after the main body of the bag was done. I wanted the strength of one continuous layer of fabric.
The hardware for the handle and rod assembly was the hardest and the most interesting part. I have always liked the leather-laced chains of the Chanel 2.55 bags and I had several feet of wonderful chain left from when Loryn and I put up new chandeliers in my living room and studio. The shape of the chain made it difficult to use standard rings to attach it to the handle. This meant I needed to go to the hardware store. I love our local Arone Hardware store because there are lots of parts and pieces that are not packaged and can be bought one at a time. I needed the plastic sheeting for the fused fabric, stiff plastic hose for the handle rod and smaller, clear tubing to lace through the chain. I thought the chain needed a little more cushioning and I found that the spline used to make screens made a great black accent in the chain. Rubber-coated hose clamps, fasteners, nuts and bolts and a turnbuckle for the handle made up the rest of the hardware I needed.
I don’t want you to think that I had much of a plan when I went to Arone’s. I spent a lot of time wandering from one aisle to the next just picking up things and checking to see if they would fit together. The staff there are great and let me look without interruption, although I see the guys shaking their heads every now and then. That is one of the fun things about these challenges, we are going into areas we have never been before and anything can happen. A terrible mistake can turn out to be the most brilliant idea ever and vice versa of course.
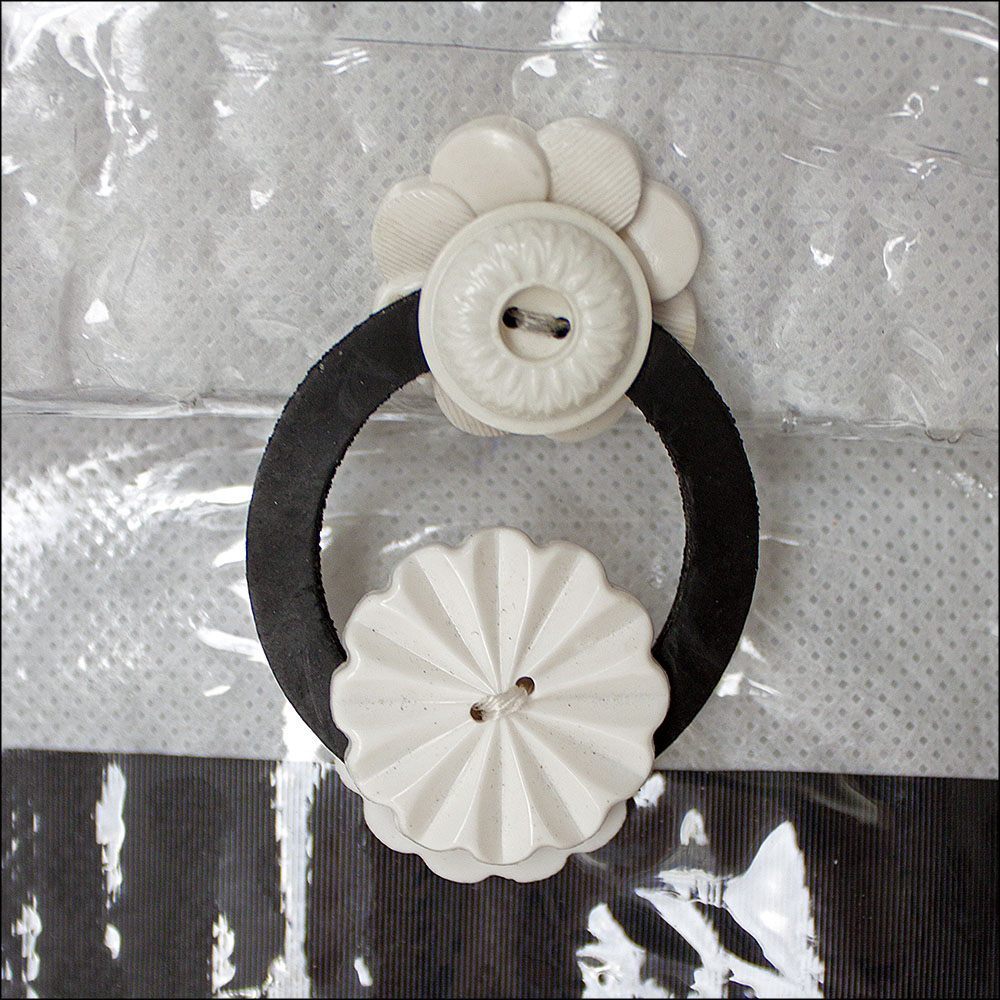
The clasp closure was the next most difficult thing. I did not want the weight of a hasp type of hardware attached to the front fabric of the bag. I wanted to use some of our vintage buttons and I thought that buttons sewn together with a button on the interior would help carry the weight of the bag through the whole structure of the fabric. The bottom of the clasp is 4 buttons sewn together. Two buttons with a small button in between to make a channel for the gasket loop were sewn to the outside of the bag and another button was sewn to the inside of the bag. The top of the clasp is 3 buttons sewn together with a rubber gasket. Small button, gasket, large button were sewn to the outside and another large button was sewn to the inside. I put holes in the gasket with an awl and just sewed through it the same time I sewed the buttons.
The clasp was also a process of trial and error and I had buttons strewn everywhere on my table. I was getting desperate for a loop when Cheri showed me a zip-lock bag full of washers she had just picked up at a garage sale. I casually snagged the largest one and went home to finish my bag.
The handbag is much roomier than I thought it would be and I really enjoy carrying it. It has a solid feel without being too heavy and I know there is not another one out there like it.
Click the thumbnails below for a gallery view of the photos.
Finished Coach Willis and Chanel inspired bag.
Chain, screen spline, duct tape and the ever necessary Diet Coke clutter my work table. Surprisingly, I find I use a mechanic’s vise quite often. It was good for drilling the holes through the rod assembly.
The fabric is laid out between sheets of parchment paper on my table and ready for fusing. The black stripes of duct tape were put on the carrier bag fabric before I fused the fabric.
The base of the bag is fused together and I am reinforcing the flap.
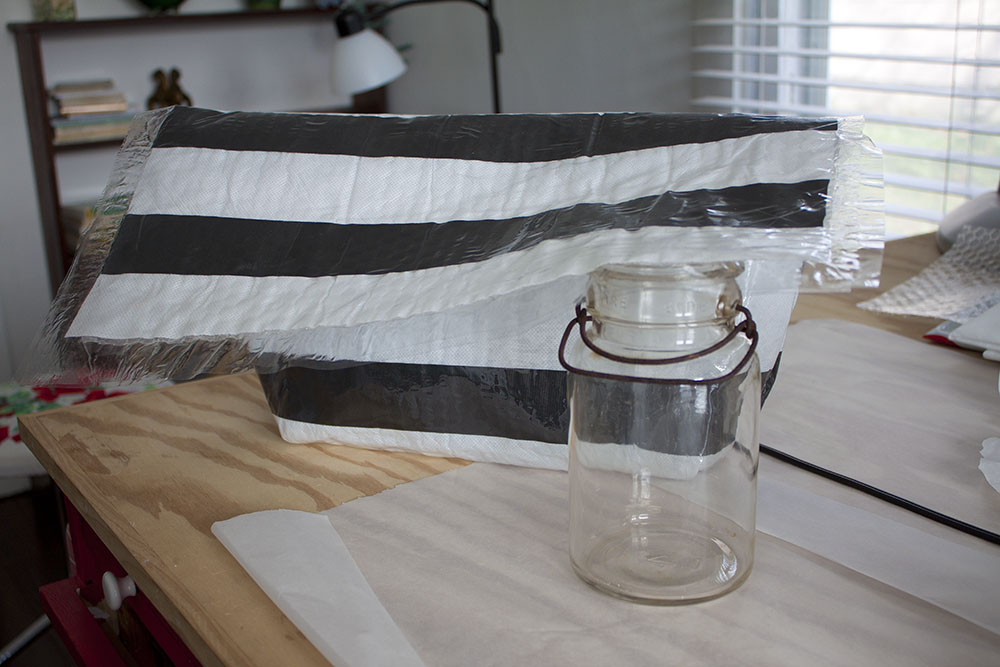
I used the mason jar as a sewing ham to iron the side seams flat.
The turnbuckle makes an interesting handle. It is screwed to the hose clamps. All 4 hose clamps are secured with nuts and bolts through the rubber hose rod.
My tree with the fortune cookie leaves and bread twist-tie branches.
Cheri: At garage sales I am usually on the lookout for items that I can use in a collage. I have mentioned before that I like to purchase multiples of small items. My reasoning is; if you have a lot of one item you get the luxury of messing it up and having more to fill in if you really want to try it again. So, I have multiples of various items.
That being said, when you are at a garage sale, do not overlook the free box. This is a great place for multiples. Often, people will collect silly things, like, bread closures, bottle caps, nuts, old nails and the like. I really do not know what makes someone decide to keep these items, but I am always very glad they have.
It was one of those happy instances, when I looked in a free box and there in a bag was about 200 bread wires. They were crinkled up and they looked like a bunch of branches. I had been working on a tree design that I liked and I thought the wires would look great as the branches.
This is how I put together this tree collage. After I placed the branches, I decided the branches needed leaves. I remembered the fortunes that I had been saving from our weekly trips to China Lane (a local Chinese food restaurant). They were perfect for the leaves after I gave them a little curl. The birds were made from Fimo clay and were left over from another project I had been working on. All of the pieces came together and it worked. I really like that when that happens.
Close-up of the Fimo clay birds and Chinese fortunes.
Cheri: Sometimes it can be very difficult for me to pick out the most bizarre item that I picked up at a garage sale. I don’t automatically pick up an item thinking, “this is bizarre”. I am actually thinking about what I can do with what I picked up. It may be what I may feel that I can make from the item, or maybe even what I think someone else can make from it. And then again, I pick up some items because I just think they are really cool and I want to have that item. I like to think that it adds to the cohesiveness of what I collect. That being said, my bizarre item for this week is a bunch of garter hooks. When I first saw the bundle of hooks, I was shocked. For one thing they looked brand new, and for another there were so many of them. I have a tendency to buy items that I can find a lot of. This way I have several to work with if I should choose to and I can make a few different items. When I picked them up an idea flashed in my brain, these would make awesome curtain hooks for a bedroom. I could not get the image out of my head, so, I bought them. Will I use them in my bedroom as curtain hooks for some slinky fabric curtains? Maybe, maybe not. You just never know.
*Please note: Unable to locate the hooks as I have placed them in a place “I will remember”, unfortunately, I have not “remembered“ yet. Trust me, they really are cool.
Lynne: Loryn and Kristin have already written about the great Saturday we had garage saleing together, so I thought I would add some comments to theirs. It is unusual that we are all together and still have enough time to spend on a morning of garage sales. It’s really an immense amount of fun, although we have to account for the space two more people occupy and buy accordingly.
I have been looking for the past two years for a harrow for my brother. I have sent him endless photos on my cell phone of seeders and harrows and other things with interesting parts but no specific name. All of which were busts.
Cheri and I were talking Saturday morning about some of the finds we had made and I mentioned that Bob’s harrow was being extremely elusive. I told her that I may have to give up that find. One garage sale later, I stared in disbelief at a harrow. I know that it is probably coincidence, but it is not hard to believe that some spirit of garage sales has aligned my wants with the items in a sale.
If you look at Loryn’s and Kristin’s post, you will see that the Subaru was full to the brim and the harrow was not something Cheri and I wanted to put on our laps in the back seat. Kristin is ever prepared and had bungee cords to strap the harrow to the roof carrier. It did make a weird whining sound on the way home, but it was safe and sound and is tucked in the garage. (Bob, if you’re reading this it’s still in the garage.)
That was my find of the week and is another notch in our tally book of garage sales. Good hunting out there and may all your notches be as satisfying.
I want to run my fingers through them just looking at the picture.
Sometimes when you are at a garage sale, you will run across an item that is so cool that you know if you don’t buy it, you will spend the rest of your life regretting it. Okay, maybe not that long, but a long time.
Anyway, Lynne and I were at a garage sale last weekend and I ran across something that describes this scenario perfectly. The item I found was peg boards and pegs.
The boards are about 12×12 inches square. They look like actual pegboard and they have patterns that fit over them. A student is supposed to match the colored pegs to the pattern. They have always reminded me of a Lite Brite without the electricity.
The pegs come in all different colors, and they are about 2-3 inches long and they are made of wood. When you stick your hand in the container and wiggle your fingers, they make a really neat wooden sound. That may be the reason I like them so much.
I believe the board and pegs are about 30 to 40 years old and they just have that awesome vintage feel. The graphics on the back are very cool, so needless to say I bought them. I knew I could not take the stress of lifetime regret.
Since I picked them up, I have been running ideas though my head and this process has become a nice calming oasis in my otherwise hectic world. I think that I may try several ideas and then again, maybe, I might just hang out with the container of pegs and run my fingers through them. Ahhhh…so calming.