Link prefers Continental style over English knitting. What a cat!

–Cheri
Link prefers Continental style over English knitting. What a cat!
–Cheri
Loryn: No matter how much crafting experience you have, things often go wrong when you’re designing a custom project. The trick is not to get discouraged, and use your creativity to come up with a solution!
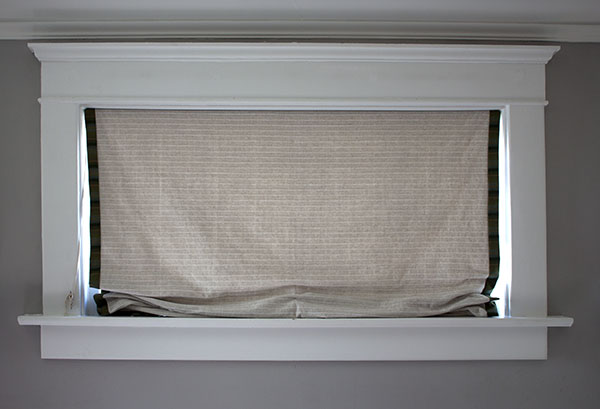
I’ve been wanting roman shades for my living room, and I thought I would get started on this window because it is the smallest of the three (it’s a Victorian house, so the window panes on the downstairs windows are over 6′ tall on most of the windows). I just needed one piece of fabric that was 55″ wide by about 40″ long. What could be easier than that? Famous last words!
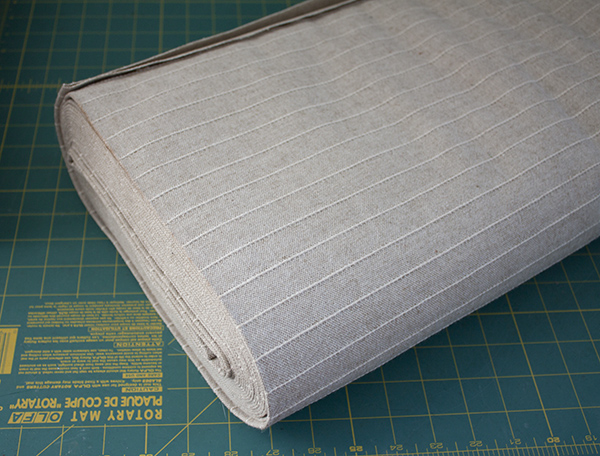
For my fabric, I have a bolt of upholstery-weight linen cotton fabric that I picked up at a garage sale for $10. I bought it specifically for these shades. I love the horizontal woven stripe. The fabric is 56″ wide, so I had one inch to spare for a hem.
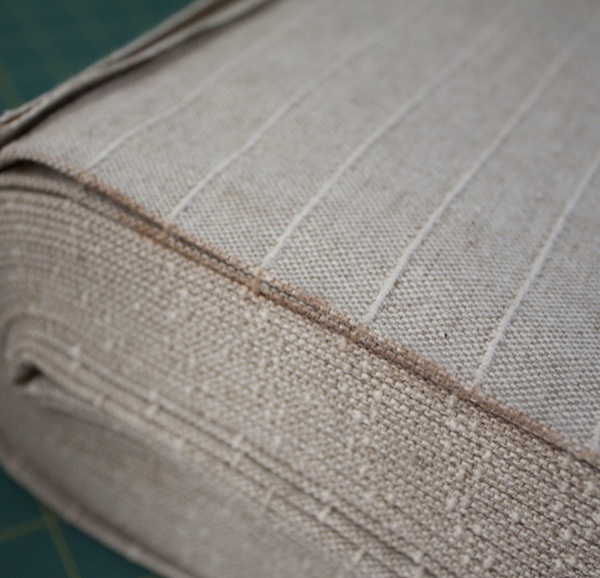
First check. After I cut the length I needed, I discovered this stain along the folded edge of the bolt. I need every bit of this fabric for my three windows, so going down to the unstained part of the bolt was not an option. No problem, I’m used to getting stains out of vintage fabrics. I soaked the fabric in Biz (which is what I had on hand) for several hours. Biz is great at getting out greasy stains, but it didn’t have any effect on this stain.
I went out and picked up some oxygen detergent, and used the boiling method to clean it a second time. Stain didn’t budge.
I tried the oxy method again, and this time I boiled the fabric for nearly an hour. Stain didn’t budge.
The oxy method removes just about every stain but rust, so maybe that’s a rust stain. I soaked the fabric in Yellow Out for several hours, which was a pain because it gives off a lot of fumes. Stain still didn’t budge.
By this time, I was ready to admit defeat and start looking for other options to hide the stain.
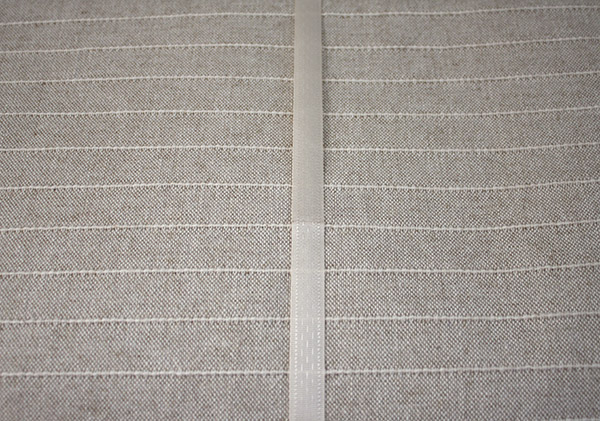
One option would be to cut out the stain and put vertical seams in the shade. I didn’t want to do that in this case because I wanted to emphasize the horizontal lines of the fabric. Roman shades often use ribbons on the front of the shade where the tapes are, so I bought some bias tape that could cover the stain. One piece would go down the middle (over the stain), and two pieces would go at each edge.
Before I could iron the tape on, I needed to run the fabric through a regular laundry cycle to get all the Yellow Out rinsed out. When I pulled the fabric out of the washer, the stain was gone.
What??
Don’t ask me why regular laundry detergent worked where all my other cleaners didn’t. Who knows.
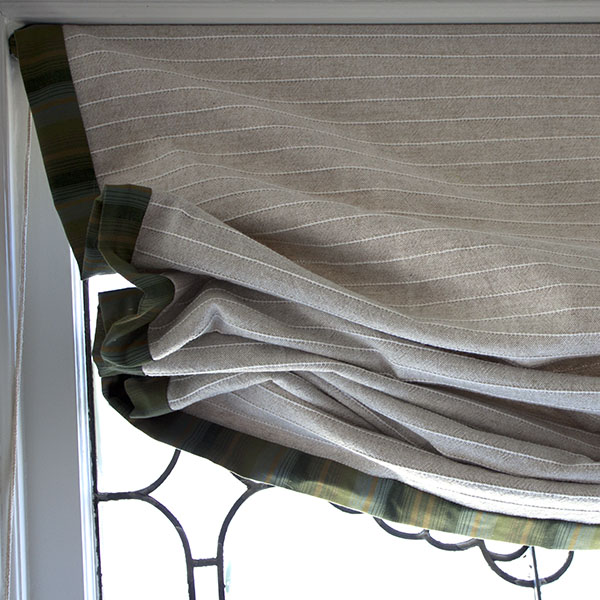
I scrapped the bias tape idea, and went back to my original plan. It should be smooth sailing from here, right? Those of you who’ve worked with linen or cotton fabric can probably guess what went wrong next. I dried and ironed the fabric, and then decided to double-check my measurements so I could hem the sides. Only to find that the heat from boiling had shrunk my fabric by 2″. It was now only 54″ wide, and the window is 55″ wide.
Sigh. I guess it needed a decorative binding anyway, didn’t it? It adds a nice accent color, and nobody has to know it’s covering up a mistake. I cut a 4″ strip of fabric to add a 1 1/2″ finished binding that extends past the edge of the main body and adds the width I need. I cut the binding horizontally across the fabric rather than on the bias so that I could have horizontal stripes along the sides to match the horizontal stripe in the main fabric.
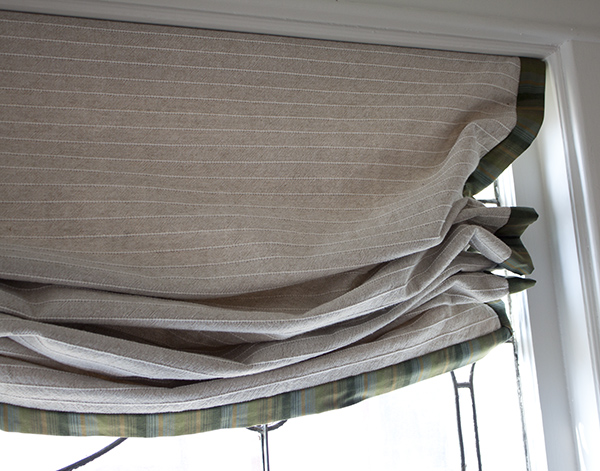
I had a great tutorial to show you on how to make perfect mitered corners for binding. Unfortunately, I learned that my method does not work when the binding extends past the edge. Instead of nice, flat, square corners, the binding pulls, giving my shade convex corners.
This time I admitted defeat. The convex corners are staying! They’re just as hard to see in person as they are in the photos. I’ll show you how to apply binding on another project!
I tried one final new idea on this shade: I sewed on eyes (from hook and eye sets) instead of rings for the shade strings.
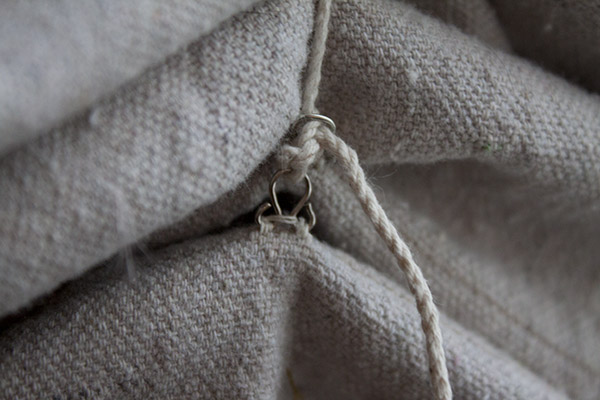
I have a huge lot of vintage hooks and eyes that came from an estate sale. I thought I would try using them in place of rings to guide the ropes that raise and lower the roman shade. They were easier to sew on, but I don’t recommend them for shades that you’ll raise and lower a lot. the sharp eyes will cut the ropes eventually.
After all of that, I finally have a finished shade that I really like. Challenges will always arise when you’re designing a new project. The more you exercise your creativity to overcome the obstacles, the easier it gets. And in the long run, those creative solutions will become your best work!
–Loryn
Like all cats, Link has an excellent singing voice.

–Cheri
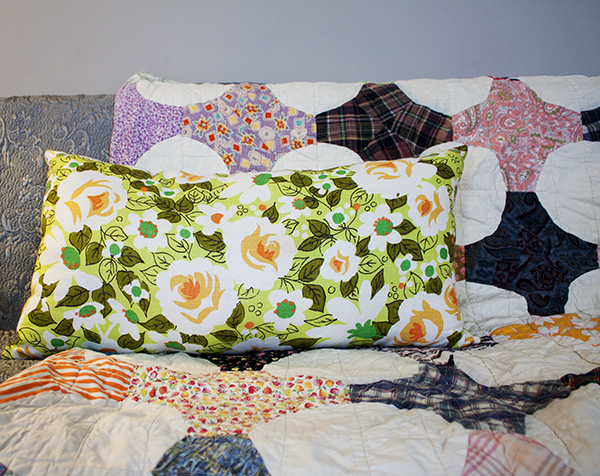
Loryn: You can make simple pillows from just a bit of fabric and some stuffing material. For this pillow, I did a simple slip stitch closure that is quick and easy. If you’re not confident with slipstitching yet, read on for some tips to help upgrade your skills.
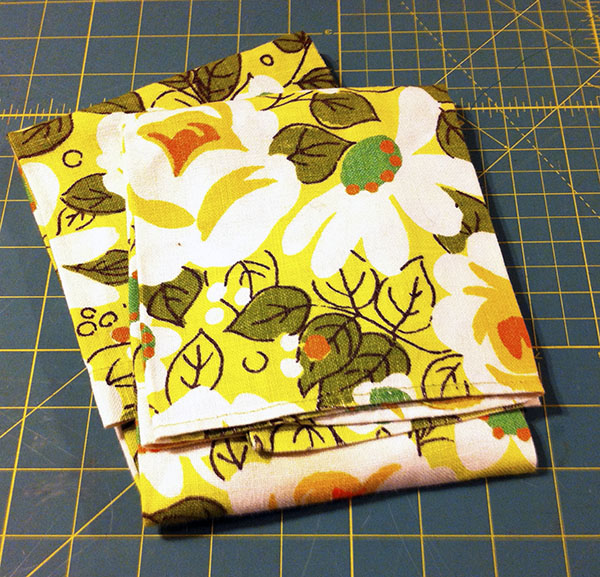
For simple pillows, you can be really creative with materials. For this pillow I used vintage linen tea towels, an inexpensive source for a great print. I used two bed pillows for stuffing material. This pillow is very tightly stuffed to provide a lot of support.
To make your pillow, cut two pieces of fabric to size, and pin them together with the right sides together.
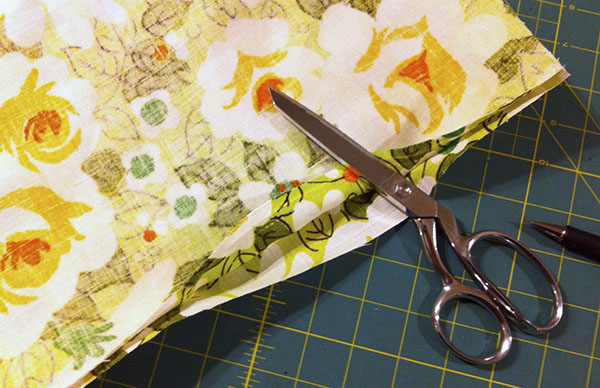
Sew the edges together, leaving an opening for stuffing the pillow. Be sure to leave the opening in the middle of a seam, not in the corner, because it’s hard to form a corner with hand stitching.

Trim the corners so it will be easier to turn them.

Turn the envelope right side out, and press the seams. Use a pin or dull needle to pull the corners out, but don’t pull so much that you tear the seam.

Before you start stitching, pin the seams in place across the opening. You’ll place your slip stitches right on the fold.

Place your knot inside the seam, and bring the needle out on the fold. The most important thing to do to make your slip stitching look good is to keep your stitches lined up. Make the stitches short, and catch the fabric on the other side directly opposite your first stitch.

Pull the stitches taut after every few stitches. Keep sewing all the way across the opening. When finished, make a knot with your needle, and hide the thread inside the seam. Enjoy your new pillow!


-Cheri

-Cheri
So we have arrived at Christmas! I hope everyone is having at wonderful holiday. For those of you who have been following along with our ornament countdown adventure, you know that Cheri and I have been showcasing our ornament creations this year. We have been alternating days which is about all we had time for with our preparations for Christmas as well. We have gathered them all together here in one post for easy viewing.
First Day: Lucky Stars

Second Day: Scrapbook Paper Balls

Third Day: Beaded Glass Ball

Fourth Day: Cardboard Tube Snowflakes

Fifth Day: Sequins and Pins

Sixth Day: Wire-wrapped Spider

Seventh Day: Teeny Tiny Places

Eighth Day: Buttons, Buttons Everywhere!

Ninth Day: Crochet Wreath

Tenth Day: Scrapbook Paper Origami Stars

Eleventh Day: Chinese Fortune

Twelfth Day: Wire-wrapped Ice Fairy

Thirteenth Day: Steam Punk Felt Bird

Fourteenth Day: Wire Wrapped Joy

It has been a wonderful craft experience to work in so many mediums. Cheri and I had a great time creating all of these amazing ornaments and look forward to another showcase for next year (which will include all the Crafty Sisters, not just us two).
Happy Holidays from Kristin!

-Cheri

-Cheri

Loryn: I’ve collected handmade Christmas trees for over ten years, ever since Cheri made me one for Christmas. Since then, she’s given me one just about every year, and Kristin has contributed to my collection, too. I’m always amazed at how unique each tree is! The one above is made from chenille pipe cleaners that came from a 1950s chenille tree that was badly damaged. Cheri remade them into my tree and a wreath for Kristin.

This tall beauty is made from a vintage glass bead garland wrapped on a foam form, then embellished with more vintage glass ornaments.

This felt tree started my whole collection. Cheri made it from an old army blanket, a brass tube, and a wood scrap. It’s so simple and cute!

A few years ago, Cheri did a bunch of paper sculptures, and she made this little tree out of paper.

I wore nothing but black throughout my teens and 20s, but when I got into my 30s, I fell for pink in a big way. This crazy feather boa tree is an homage to my love of pink. It’s wrapped around a felt form and decorated with small ornaments pinned into the foam. The white base is an old piece of ironstone of mine that makes a perfect stand for the tree.

This is one of my favorites. Cheri made it the year that we put together a vintage aluminum tree. It had almost a hundred branches in all different sizes, and we drove ourselves crazy assembling it. Her pipecleaner version makes me smile every time I see it.

Kristin made me this elegant beaded tree. I love how naturalistic the branches look.

Here’s Cheri’s Alexander Calder tree. Simple and fun!

I collect wooden ornaments, so Cheri made this great tree to add to my collection. I love how she paired the ornaments with that great paper.

Last, but not least is this adorable Charlie Brown tree. She made it from wire, florist’s tape, and a branch from a fake tree. Just a year later, they were all over stores, but none as nice as this one!
I love my Christmas tree collection, and I hope to keep adding to it every year (hint, hint)!

