Day 8 and I went for an easier project today as I am working on two of the future advent projects already. The snowflake confetti I bought has come is so handy throughout this year’s advent and even a small bag of it was a LOT of confetti. I am just now halfway through with the bag.
Materials:
Clear glass ornament ball
Snowflake confetti
Glitter
Ribbon
Thin wire
Jump ring
Pliers
I pulled the top off the ornament and filled it full of snowflake confetti and glitter, then put the top back on the ball. I did fold up the arms of the snowflake confetti before I stuffed it inside. I then took the thin wire and made a loop then threaded some pieces of ribbon on it. I then used a jump ring to connect it to the ball. Done!
Placemats and another awesome wreath are in the works. You should see them soon!
Loryn has been doing lots of entertaining lately and has the most awesome table. It is gigantic and sits our family very well. I decided that for this advent, I would make the table decor for Christmas family dinners. Today I made the napkin rings.
Materials:
Scrapbook paper
Tacky glue (white glue)
Foam sheets
Mod Podge
Sponge brush
Wax paper
I cut strips of scrapbook paper in three different styles to 1 1/2″, 1″, and 1/4″ wide by 7″ long. I used a sponge brush and some watered down tacky glue to glue the papers one on top of the other. I then squeezed these flat between some wax paper and heavy books.
I cut 1 1/2″ by 6″ long strips of the foam sheets and once the paper strips were dry, I used some more watered down tacky glue and the sponge brush to glue them to the foam strips. I again squeezed these flat between my sheets of wax paper and heavy books.
I then trimmed the paper on one end to evenly match up to the foam and left a 1/2″ edge of paper on the other end. I smeared straight tacky glue on the inner side of the leftover edge of paper and a bit on the end of the foam and curled it around the tacky glue bottle (nicely doing double duty here) and glued the ends of the foam/paper strips together, making sure the paper strips lined up, wiping any excess glue away, and ensuring the rings formed good circles.
After the glue was dry, I used another sponge brush and covered the rings with one coat of Mod Podge. I am not too worried about durability and if I need to make more next year, I will gladly do so. This was fun and easy and only took a couple of hours.
I only show five of the rings above as the others were all still drying. I only made a few to start to be sure I liked how they turned out. I also used several colors of foam sheets to add a little more color. (I know the insides of the napkin rings will be hidden by the napkins themselves, but they do spend a lot of time on the table with nothing in them after everyone pulls their napkins out.)
Stay tuned for napkins and other table decorations coming soon!
It has been a nice, quiet Sunday around here today. A positively beautiful day that my dogs are thoroughly enjoying.
We are now at day six and I have a really awesome ornament for you today. I have this bag of plastic snowflake confetti that I have been using for various projects and I made up this confetti ornament last night.
Materials:
3″ Styrofoam ball
Confetti snowflakes
Sequin pins
Small piece of wire
Super glue
Ribbon
Nail set (not necessary, but I found this very helpful)
I took my small piece of wire and made a loop that I stuck into the top of the ball and super glued. This gave me my loop for the tree hook. This appears to to be the start of all my Styrofoam ornaments.
I bent up the snowflake arms of the confetti to give my ball a 3-D appearance. Next, I started pinning the bent snowflakes to the foam ball with the sequin pins. I pinned these in circles around the ball. I snugged them all together so they the bent snowflake arms are all intertwined and there is very little of the foam ball showing.
I used the 1/32″ Nail Set to push the pins in all the way so I would not bend up the confetti snowflakes. The nail set is a simple tool from the hardware store, used to inset nails in trim and such. You can see it in the photos below. It worked great for this project. It even had a small cup on the end so the pin doesn’t slide around as you push the pin into the ball.
After starting this ornament, I thought that it might be very pretty to have painted the ball before adding the snowflakes. I wanted a very white ornament to contrast to the green tree, so I left mine white. I made a small ribbon bow and attached it to the top of the ball with the tree hook.
I do not recommend dropping this ball on the floor if you have carpet and pets. I have a lot of dog fur on my floor no matter how many times I sweep and I was terrified that I would drop the ball and end up with it covered in fur. The bent arms of the confetti snowflakes make them almost velcro-like in its ability to pick up lint and fur. I didn’t drop it, but I just wanted to forewarn anyone else who made this.
Ha Ha! I got both my projects finished today! My project for day 5 is an ornament (Styrofoam base) that I covered with strips of red and green paper, then finished off with some wired silver/multicolor mini-garland.
I took the small piece of wire and formed a loop at one end. I stuck the other end through one sequin then stuck the wire into the Styrofoam ball. Then using the super glue, I glued it securely. This gave me somewhere to safe to attach my tree hook at the top of the ball.
My next step was to cut lots of 1/4″ by 2″ strips of green and red paper. In reality, I only used 2″ x 10″ pieces of paper in each color and cut them all into my 1/4″ strips. I then folded these strips in half. I grabbed a sequin pin, put a silver sequin on and then attached the folded paper to the ball with the pin/sequin.
I did seven rows of these, with no particular spacing, just what I thought looked good, and covered about 2/3 of the ball, leaving the top uncovered. Lastly, I took the silver/multicolor wired mini-garland (trim ribbon) and pinned it to the ball in circles to cover the rest of the ball.
Since I had already put in the wire loop for the hook, all I needed to do was add a green tree hook and I was done!
I like this one and ended up curling the ends of the paper strips to give the ornament more depth. I think it looks like a Christmas acorn.
Hey all! So, my SO and I went out for breakfast and then made a run to Joann’s this morning and I got the rest of the ribbon I needed to finish the ribbon garland. Of course, I go too much, so do not be surprised to see the ribbon in another project before this year’s advent is finished.
Materials:
Gold bead garland
Lots of ribbon
Scissors
In theory, this is an easy project as long as you have the time. It took me two days working about 10 hours total to finish 13 1/2′. I used a gold bead garland and tied 4″ strips of ribbon between each bead. My total yardage of ribbon was approximately 90 yards.
You can see from the image above that I tied two pieces of 6″ ribbon between each bead. I am very happy with the result. It is going to look great on the Christmas tree. The start of this post (from yesterday) is here.
So, I have my day four Christmas advent project started, but as is my usual habit, I misjudged. I have a terrible tendency to completely underestimate materials and end up with way, way too much, or no where near enough. This time around, I have no where near enough.
I am going to give you a sneak peak and will post the completed project tomorrow after a run to Joann’s.
Beaded ribbon garland.
The garland is made from a gold bead garland and Christmas color ribbons. I cut the ribbons to four inches long and have tied them on to the bead garland. I had five shades of green, one red, and one gold ribbon. I mixed the greens together with two colors tied together and then red and gold pieces tied together. I am tying them between each bead.
The bad thing is that I have 396″ (yes, that is 33′) of gold bead garland and I have only tied about 78″. I have a long way to go. I don’t need to do the whole of the bead garland, but I would like at least 10′. So, official pics tomorrow, stay tuned!
I made it to day 3 of the Christmas countdown! This feels a bit monumental, as we have been absent from craft blogging for so long.
Today, I made little tree ornaments out of foam sheets (Foamies) in various shades of green.
First my materials:
The materials I used to make my foam tree ornament.
Small plastic snowflakes
Head pins with eyes
Jump rings
Tiny jingle bells
4 sheets of green Foamie sheets
Wire cutters and pliers
Pointed yarn darning needle
Circle cutter (Thank you Martha Stewert)
Superglue (not pictured)
I used my circle cutter to cut out 24 circles of various sizes of green foam from 1″ to 2″ in diameter. I then poked a hole in the center of the plastic snowflakes and the green circles with the darning needle. Using the head pins, I slid on one snowflake, one circle, and another snowflake, twisted a loop and cut the wire. I ended up making 24 of these and then using the jump rings, I strung them together for a total of eight green circles on each ornament. I attached a single jingle bell to the last foam circle with a jump ring to add a little fun and noise.
Lastly, I cut three more circles at 1 1/2″ diameter and cut them in half. I glued these into cones with superglue and then slid another snowflake on a headpin, then poked the headpin through the bottom of the cone, made a loop at the top of the cone and attached an ornament hook. I used another jump ring to attach the cone to the rest of the tree ornament and Voila! I was finished.
Pretty green tree ornament.
I am very happy with how these turned out. My one recommendation is to use a circle cutter as cutting these out by hand makes them look very lopsided and wrong. The circle cutter makes them perfect and even.
I have been making wreaths off and on over the years, but lately, for every season. I love all of the pretty scrapbook papers available and I have such a hard time not investing in every type of paper punch ever made. I have managed very admirably to keep this part of my craft collection to a small box that holds my paper and various cutters.
Materials:
Scrapbook paper (heavy and thin)
Paper punch
Glue
Wire
Wire cutters
I have this awesome petal paper punch that I have barely used and picked up on clearance some time ago. I needed an excuse to use it. After this project, it has certainly seen some usage. I started by making two green wreaths (I had a LOT of green scrapbook paper). I cut out 1 large circle (about 10″ for the outside diameter) from two pieces of heavy paper, glued them together, made a quick wire hanger that I attached to the circle, and then I started punching out petals. And more petals. And more petals.
First wreath in progress. I made the other two wreaths much wider.
The first wreath I made is pretty thin, and while it looks great, I like wider wreaths better. When I started, I just randomly placed the petals to get a feel for the design. I found that I really liked the way the wreath looked with the petals pointing out on both the inner and outer side of the ring. Above you can see a few, but I had not quite gotten into the swing of placing the petals.
Here you can see my hanger and how I covered it up with petals.
I then found that I needed to cover the wire hanger and built up petals around the wire until I could hide it under yet more petals. You can also see the petals pointing inside and outside the wreath. I just kept layering until you could no longer see the paper ring underneath and until I liked the layout of the petals.
Mostly complete wreath, still have to add the outside petals.
Above is the first wider wreath I did, again all in green paper. You can also see the start of hiding the wire hanger. I found it much easier to do all the inner pointing petals, then some of the middle petals, glue on the outer pointing petals, and then finish filling in the middle part of the wreath with the paper petals.
I was using the cut out center piece of the paper ring for my glue. I would pour some out, dip the wider end of the petal into the glue and then place it on the paper ring. In the picture above, you can see my bowl of petals. I punched lots and lots of these.
Green wreath, completed and hung on my door.
The finished green wreath looks great and I was very happy with the outcome. So happy that I immediately set out to make another one in more Christmassy colors, red and green.
Hello! Kristin here. We are all still around. We had taken a break to work on lots of other projects (houses mostly) and we are back for the holiday advent!
Lynne and I put up our Christmas tree on Sunday and found that it needed a new tree topper. Our previous tree topper was part of our 2011 Christmas event Paper Star Christmas Tree Topper.
We did this project together and we had a great time. Our materials list:
Styrofoam ball
Heavy wire
10″ Bamboo skewers – package of 100
Spray Glue
Spray Paint
Heavy bamboo skewer – 1
Wire cutters
Glitter
Green florist tape
Wire
Tacky glue
I took the old topper apart and we reused the spiral wire from it and stuck it through the Styrofoam ball. At this point, I was using a lint roller to hold the topper to see what it looked like. This changed very quickly to something else that would actually hold the star up straight while we worked on it.
Spiky Styrofoam ball!
We switched to one of Lynne’s weights (painted milk bottle filled with bb’s) to hold the star. A recommendation that we have after having finished the star, once you stick the bamboo skewer in the ball, pull it back out and dab the end in glue (Alene’s Tacky Glue) to hold the skewers in place. Otherwise, you will be picking up and replacing skewers every time you move the star.
We cut around 20-30 skewers in half and the rest in thirds with the wire cutters. When cutting the skewers, slant the wire cutters to make an angle for ease of stabbing into the Styrofoam ball. Also, put the shorter skewers in first and then the longer ones to avoid stabbing your hand or the need for a leather glove. (Always good to learn from someone else’s experience).
Starting the spray paint.
We then started spray painting the star with Lynne’s awesome Copic markers and air compressor to make them work as spray paint. This was long and did not need to be done, and didn’t cover the star nearly as well as we had hoped. We decided that this did not work and bought a $3 bottle of spray paint and sprayed it gold. Worked so much better! Then you spray the star with the spray glue and dust with glitter.
Spray painted gold!
The ball has been spray painted gold and covered with glitter. Lynne then covered the bottom part of the heavy skewer with green florist tape (matched the tree) to hide the length that goes into the tree and is wired down.
Gold spiky star on our tree!
The topper is now on top of the tree. Lynne and Loryn did this part as I had already driven home after the Thanksgiving break. It is wired to the top of the tree to keep it straight.
Our beautiful tree with all homemade decorations.
Our beautiful tree is now complete! The ornaments and garlands are all homemade and have been previously posted on The CraftySisters. It looks just wonderful!
So, I have finally caught the cough/cold that has run rather rampant through my family. I think I was getting a little cocky when I didn’t get it over Christmas (when they all had it) and thought I was home free. So, other than an empty box of tissues, I haven’t made anything today. I thought I would take a couple of photos of my current project though.
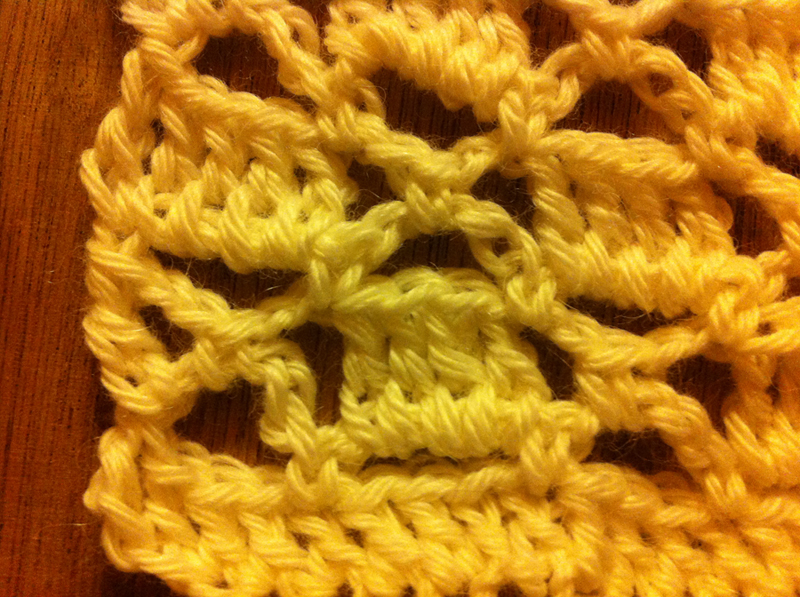
It is an inside scarf. I have a VERY cold office and decided that I needed a scarf that I could wrap around myself. It is about 7″ wide and I haven’t yet decided how long it will be (I have 5 skeins, so who knows). The yarn is 100% alpaca and is just amazing. I mentioned the yarn in a previous post and at the time, I had planned to make a lace shrug out of it. A little ambitious for me, but a lace scarf is right on track. I haven’t done any real complicated crochet stitches, so this is a first for me.
The scarf is started with a double crochet foundation stitch and is then the Arch 11 pattern from a wonderful crochet pattern book I picked up at Half Price Books, Super Stitches Crochet by Jennifer Campbell and Ann-Marie Bakewell. I really like their book, the patterns are very easy to understand and for once, I understand the crochet symbols.
So, I have at least made progress on a project, and now back to bed.