Category Archives: craft

Christmas Ornament Countdown: Cardboard Tube Snowflakes

Christmas Ornament Countdown
Glittery snowflakes from paper towel rolls.

Cheri: This is my second ornament in the Christmas Ornament Countdown. I like to work in paper and when I can use paper that was something else at one time, that makes it doubly good. These ornaments are made from paper and toilet paper rolls. They are really quite easy to make.

All you need to do is take the roll and flatten it. Then take a ruler and measure in ¼ inch increments. After that is done cut them apart with scissors, or if you have a large paper cutter you can use that. You will have several rings of cardboard. I like to start out with a flower pattern and work from there. You can bend the cardboard into any shape that you want and just let your imagination take over.

After I had them glued together, I spray painted them with silver metallic spray paint, then I sprayed adhesive glue and sprinkled them with glitter.

When you are faced with an empty paper roll, you may want to think twice before throwing it out. You never know what you can make out of it.

Christmas Ornament
Close-up of ornament.

Christmas Ornament Countdown: Beaded Glass Ball

Wow! Cheri’s Scrapbook Paper Balls are absolutely wonderful! Our different styles and how our imaginations work make this Christmas Ornament Countdown an excellent showcase for each of our talents.

I do a lot of beading and jewelry making so it became obvious that one of my ornaments for this Countdown would be a beaded one and since blue and teal are my favorite colors, this is the inevitable outcome:

Blue beaded glass ball.

I make the mesh first and start that with a collar of beads big enough to fit around the neck of the glass ball. Then I make the first long strand about 1/2″ longer than the diameter of the ball and then start the mesh. I add the draping beads last, working at a diagonal along the mesh, which also helps to reinforce your thread. Some glue on the knots and you are good to go. It does take me about 2 days to complete one.

I learned how to make these from that wonderful magazine Bead & Button. Every December issue they have an article about making beaded ornaments with a very informative how to.

Christmas Ornament Countdown
Beaded ornament top.

The ball is just a purchased one, I did not paint it, although I have done so in the past. I just liked the color of this ball and thought that it set off the AB beads (aurora borealis) quite well.

Beaded Christmas Ornament
Beaded veil ornament


Happy Holidays from Kristin!

Christmas Ornament Countdown: Scrapbook Paper Balls

Christmas Ornament Countdown
Simply elegant ornament made form scrapbook paper strips and floral wire.

Cheri: Kristin’s ornament was so awesome that I have to admit I was a tad bit intimidated by this challenge. Actually, this type of challenge really brings out the best in both of us.
My ornament was made with scrapbook paper too.

I cut about 35 strips of paper and pushed a hole in all of them on both ends. I then took some floral wire that I had and made a loop in one end, and fed all the strips onto the wire. I then took the very last strip and threaded it on to the other end of the wire and continued to do this until all of them had been put on.

I fanned them out into a ball, and made a loop in the other end. I really like to use scrapbook paper that has stripes on it because the pattern seems to flow better. So one down 7 more to go.

Christmas Ornament Countdown
The ornament hangs vertically with two balls strung together.
Christmas Ornament Countdown
Christmas Ornament Paper Strip Balls

Crafty Challenge 5: Wire Ornament Tree

Loryn: I’ve collected wooden ornaments from the 70s and 80s for several years now, and I’ve wanted a fun way to display them. Our Two-Hour Christmas Decoration Challenge seemed like a good time to think something up.

Here, you can see how big the tree is (my ceilings are nearly 10′!). When we were kids, our grandpa would take us to pick out a live tree at his uncle’s Christmas tree farm. We would pick out a tree that seemed little out in the field, only to find out that it was 8′ tall once we got it into the house. Evidently, I still have that same problem, as I didn’t realize how big this would be until I got it on the wall!

Wall-mounted wire tree

I used green clothesline wire that I found at the hardware store during our $5 Challenge. My initial idea was to make the tree as one piece. At 10:30, with one quarter of my time already gone, I realized it just wasn’t going to work. The wire was much harder to bend than I expected, and it was a weird, wobbly mess. Time for plan B! I decided that individual rows would be easier to work, and it meant that I could add rows as my collection grew.

Here you can see the loops I made at the end of each row to hold the screws that hold the tree onto the wall. I first planned to make the ornament “hooks” go the other way, and to use hooks to hold each ornament in its spot. In the middle of the project, I realized that by turning them over I could eliminate hooks.

The ornaments are really lightweight, so I didn’t worry about getting the screws into studs. There will be a lot of screw holes in the walls to patch. This room will be painted after Christmas, so I’ll be patching anyway. If you’re not up for patching, this would make a fun, single strand garland, or even an advent calendar, with a new ornament added each day!

Crafty Challenge 5
Close-up of tree topper.
Crafty Challenge 5
Close-up of ornaments on their hanger.
Ornament Tree
Vintage ornaments on wall tree.

— Loryn

Christmas Ornament Countdown: Lucky Stars

Okay, so Cheri and I have started a sort of Christmas ornament creation countdown. We are each going to post a new ornament every other day for the next 16 days, which will put us at 8 each before Christmas. We both wanted to do something a little extra as our Crafty Challenges are on hold until after the holidays.

My first one posted here was actually going to be the last one I posted, but it didn’t take me nearly as long as I had first thought to finish. It is based on the paper lucky stars that seem to be everywhere now. Here is the excellent tutorial on Youtube that taught me how to make the stars if you want to make your own: Paper Lucky Stars. They are really easy to make and I found myself watching TV and folding paper stars and suddenly I was done (okay, two and a half days later I was done).

Christmas ornament full of lucky stars.
Can you guess how many stars are in the glass bulb?

I bought a clear glass ball ornament and six different colors of scrapbook paper. I used my brand new Fiskars paper cutter and cut tons of 1/4″ by 6″ strips and began my journey into stardom and this is the wonderful result! I love the effect and the sound they make when you shake the ball.

Glass ornament full of lucky stars.

Close-up view of the lucky stars.
So many lucky stars!

Glass ornament full of lucky stars.

Happy Holidays from Kristin!

Crafty Challenge 5: Star Christmas Tree Lightbulb Ornaments

Star ornament made from Christmas lights

Cheri: Well, another project come and gone. This one did not freak me out too much. I am always making little projects.

Sometimes I will see an object that I really like because it stirs up memories of being a kid. That is what happened when I bought these Christmas tree light bulbs at a garage sale a few months ago. I was drawn to the color, (pink) and I really liked the vintage feel of them too.

I knew that I would never use bulbs like these on a lighted string (who could trust them), but I still liked the look of them. They were the kind of lights we had on our tree when I was a kid. I don’t even know if these are sold anymore. They do have a tendency to get hot and really the newer, small lights are brighter.

When I saw them for 50 cents, I couldn’t think of anything to do with them at the time so I tucked them away for when an idea came.  When this project was discussed, I felt that I could possibly use the light bulbs for something. I was pretty sure what I wanted to do and I was also sure that the idea would work pretty well. All I really needed was hot glue, ( I am the Queen of hot glue).

For the 14 point star ornament, I started out with glue on the metal tips and then I put one light bulb in the center on each side. I tried to do this mathematically but as I am math challenged, I decided to go by sight. It came out pretty well the first time and I knew that I really didn’t want to press my luck so I decided it looked pretty symmetrical.

For the eight point stars, I just glued 4 together and glued 4 more together and attached them. I hot-glued buttons onto them to cover the glue in the center.

I then decided I needed a hanger that was not very noticeable. In the box were 2 bulb clips, so I took one bulb off the star, attached the clip and then glued the bulb back on. This way I can attach a hook to it.

All in all I was quite pleased with the outcome and I think it will look terrific on a tree. The best thing is it was really simple and cheap. I just love it when a plan comes together.

14 point Christmas tree lightbulb star ornament.
Christmas lightbulb ornament
The back of the 14 point star ornament with hanger.
Christmas lightbulb ornament
Four lightbulbs glued together end to end into a four point star and then two of those flat stars glued together to form an eight point star.
Christmas lightbulb ornament
The back of the eight point star with a close-up of the wire hanger,

Upgrade Your Sewing: Hand Sewn Mini Pincushion

A hand sewn mini pincushion

Loryn: Even if you have a sewing machine, there are times when hand sewing can really make the difference in your sewing projects. If you would like to upgrade your hand sewing, this mini pincushion makes a great stocking stuffer while improving your skills. It looks adorable even when your sewing isn’t perfect!

The supplies you need are:

  • Small scraps of a natural fiber fabric
  • Sewing thread and needle
  • Pearl cotton embroidery thread in a contrasting color and embroidery needle
  • Two tiny buttons

The first thing to do is to pick out your fabric. I’ve used wool on this one. It’s only 1 3/4″ in diameter, so you can use up tiny scraps of fabric. I do recommend that you use natural fibers like cotton, linen, or wool for this project if you’re a beginner, as they are not too slippery. Silk and most synthetic fibers are slippery, so the layers slide out of place, something you don’t want to deal with while you’re getting your sewing chops!

Use a glass as a template.

After you’ve picked your fabric, decide on the size. The easiest way to do this is to find a round object about the size you want to use. My favorite round template is this vintage juice glass, which is 1 3/4″ in diameter. Double your fabric with the right sides in and trace around your object with a disappearing fabric pen or chalk pencil.

Trace a circle on your fabric.

If you haven’t already, trim the fabric down into a square with a wide hem allowance, which makes it easier to grip. We’ll cut it down to a small seam allowance after sewing. Put a pin into each corner, and you’re ready to start sewing.

A knot to get started

Thread your needle and you’re ready to get started. I’m using contrasting thread so it photographs better. By all means use contrasting if it helps you track your stitching—it will still look great! If you want to match, here’s a good tip: if you can’t find an identical thread match, go with a greyish shade of the same color, or even medium grey if you can’t find anything close. It will fade into your fabric.

I typically use a standard doubled thread knotted at the end for basic hand sewing. If you have a problem with knots, try a product like Thread Heaven. It really does make a difference.

Turning and stuffing the pincushion will put a lot of pressure on the knots, so pull the knot almost snug, then bring the needle back to the top and run it through the loop that is left (see photo above). This will prevent you from pulling the knot through the fabric.

Getting started with running stitch

Now you’re ready to get stitching. I’m using running stitch on this project. Slide your needle under the fabric and then back to the top, making the stitches as small as you can (turn it over to make sure you caught at least a few threads on the bottom). Start by making just one stitch at a time, then move onto more as you get comfortable.

Continue working around the circle

Continue working your way around the circle, following your traced circle line. Try to stay on the line, but don’t worry about being perfect. You’re getting practice, and it will still look cute!

Pincushion

Leave an opening about 1/2″ wide. The smaller it is, the harder it is to turn and stuff, but the larger it is, the harder it is to slipstitch the curve of the circle. I prefer the former!

Make two slipknots with your needle. To do this, make your last stitch, then stitch again in nearly the same place, but don’t draw the thread tight. Put your needle through the loop, then draw it tight. Repeat in the same place, and don’t cut your thread yet.

With seam allowances trimmed down.

Now you’re ready to trim the seam allowance down to about a 1/4″ (making sure not to cut your thread!).

Turning the pincushion.

Now it’s time to turn it right side out. A bodkin is a really helpful tool. It clamps shut, so you can stick it inside, grab onto the fabric, and pull it through that small hole. Bodkins are also great for threading elastic and cord through tubes, so it’s a great tool to add to your sewing box. Once it’s right side out, use the bodkin to make sure it is fully turned.

Stuffing time!

Now you’re ready to stuff it. I like to use scrap fabric, as it makes it weightier than polyester stuffing. Cut fabric remnants into small strips, and stuff them inside, using the bodkin to push them all around the pincushion. I used the fabric I trimmed off the seam allowances, plus some extras I was getting ready to throw away.

Sewing it shut

Once it’s stuffed, thread your needle to the right side, fold the seam allowances inside, and pin it in place. To slipstitch it shut, catch a small bit of fabric on the fold, alternating between sides until it is sewn shut. Make two more slipknots, and hide the thread inside the pincushion. To do this, put the needle in exactly where you make the knot, and bring it out in the middle of the cushion. Cut the thread, and wiggle the stuffing until the thread end disappears inside.

Embroidery time

Now comes the fun part—decorating! I’m using gold pearl cotton to divide the pincushion into segments. Thread about 30″ of pearl cotton into an embroidery needle, using a single strand with a knotted end. Run it through the middle of the cushion (your knot will be covered by a button later) and pull the knot snug.

Wrap the embroidery floss around the edge of the cushion, and run it through the cushion at the same point. Pull it snug enough that the thread creates a scallop.

Wrap the thread around again, this time on the opposite side from your first wrap.

Repeat, dividing it into quarters.

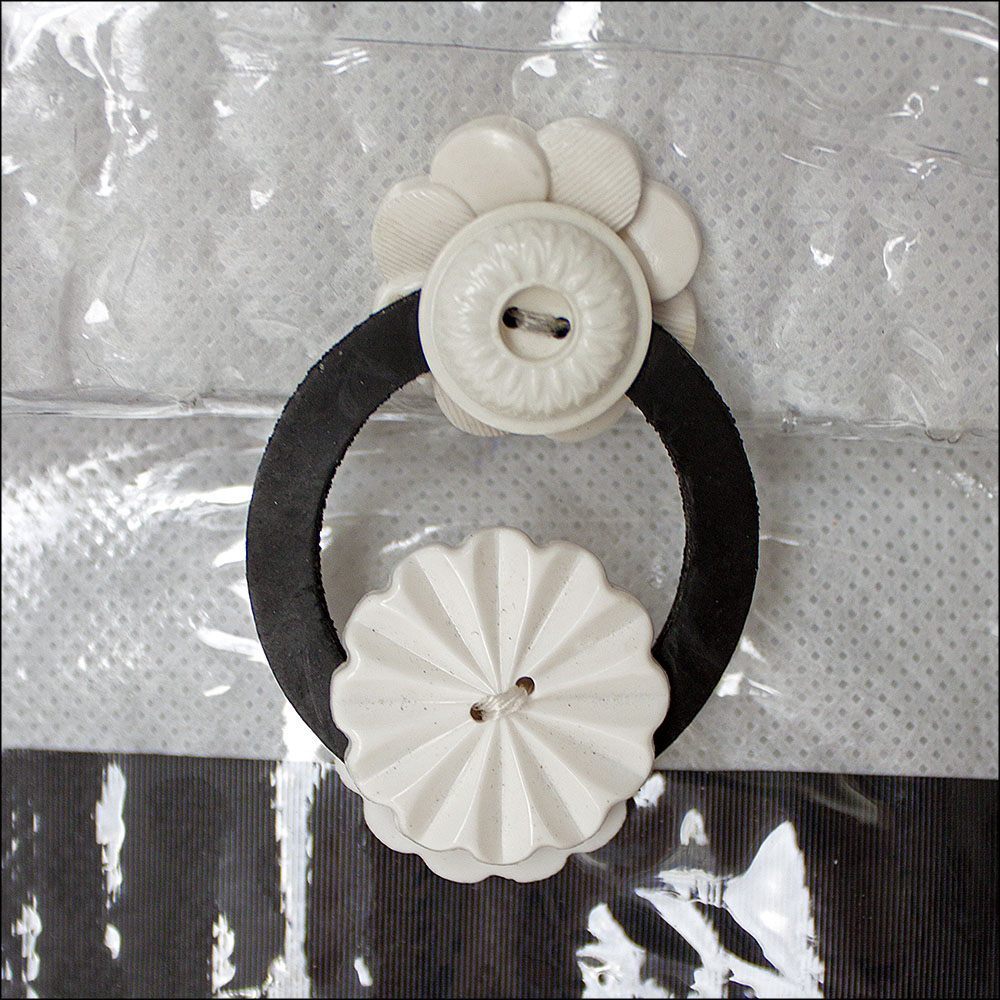
Put your final threads in the middle of each quarter, so you end up with 8 segments. Now you’re ready to finish it off with buttons. I used two tiny mother of pearl buttons from my collection. Thread the button on, then run the thread through the other hole to the bottom of the cushion. Put another button on, and repeat, so that you end up with the thread coming out of one of the holes of your top button. Run the thread through the buttonhole, and bring your needle out under the button, without going back through the pincushion. Wrap the thread around the thread shank that holds the button three times, then hide your thread inside the pincushion. You’re done!

If you have any questions, put them in the comments. I’m happy to help!—Loryn

Miniature pincushion

Crafty Challenge 5: Two Hour Christmas Decor

We have just finished our Crafty Challenge 4 and are ready for number 5! This one is all about the time of year. From around now until Christmas, the Crafty Sisters begin to get secretive. We tend to stop discussing our projects with each other and mutter a lot, or at least I mutter a lot.

For us, this is crunch time for Christmas gifts and we do make a lot of them. In this vein, Crafty Challenge 5 is all about Christmas Decorations. We did need to limit this somehow and due to the whole Christmas crunch time I mentioned, the best idea was an actual time limit. So, the challenge is to create a Christmas decoration in less than two hours. We even set a specific time. December 4th – 10am until 12pm is the making time and the unveiling will be at 12:30pm. We can think all we want and purchase the supplies in the meantime, we just cannot start making the decorations until 10am.

To get us in a holiday mood, I thought some examples of a few of our past Christmas decorations was in order. So, get your mind in gear and get thinking (but don’t get making yet!).

Photo of white Christmas wreath.
Chenille pipe cleaner door wreath made by Cheri.
Photo of yarn garland, Choir Bird and winter A-Frame house.
Garland by Kristin, Choir Bird and Winter A-Frame by Cheri.
Photo of bluebird singing carols.
Choir bird made by Cheri.
Photo of winter A-Frame scene.
Miniature A-Frame winter scene made by Cheri.
Photo of snowman ornament.
Snowman ornament made by Cheri.
Photo of ornament wreath.
Ornament door wreath made by Kristin.
Photo of painted bird ornaments.
Painted bird ornaments made by Cheri.
Photo of silver ornament and twig decoration.
Silver ornament and twig door decor made by Cheri.

If you have any questions about any of the above decorations or would like to know how they were made, ask us! You can email us in the Contact Us section of the blog.

These were all decorations I had in my Christmas storage and I realize that almost all of them were made by Cheri. You can definitely see who we will be comparing ourselves to. Wish us luck and you get crafting!

Crafty Challenge 4: Fused Fabric Willis

CC4
Coach Willis and Chanel inspired handbag.

Lynne: I suppose that Crafty Challenge 4 really was my idea. I have been carrying the handbag I made for Crafty Challenge 2 and it was not really designed for everyday use. So I needed a bag to carry through the winter. The crafty challenge seemed like a good way to make myself make one.

I believe Cheri deserves the blame for the Coach Willis idea. The Willis bag is a deceiving design. The rod and handle assembly is complicated and that type of handle puts a particular stress on the closing clasp. This means that the bag needs to be made of strong reinforced material and that the position of the clasp has to be precise for the handbag to hang right. But what you don’t know beforehand can keep you from ending before you start.

Since I was still fascinated by the possibilities of fused fabrics, I wanted to make the handbag from plastics. At a garage sale the other day, I found two white carrier bags for 10 cents. These were department store bags that were made of the same material you find in the rectangular totes that are sold in supermarkets to reduce the number of plastic bags they give you. This material is some type of polyester and it does fuse with an iron. Not easily, but when used with other more amenable plastics it works.

I made a fused fabric sandwich of bubble wrap, carrier bag and plastic vinyl sheeting. Each layer of the fabric has its own purpose. The bubble wrap provides sturdiness and a unique texture that I am particularly fond of. The carrier bag provides color and the plastic vinyl fuses everything together while making a durable surface for the exterior of my handbag. I used black duct tape to add stripes to the white of the carrier bag and to reinforce the top of the base of the bag.

I fused the layers into a rectangle of the size I wanted following the general directions of the duct tape bag described here. I added extra inches for the flap because I did not want to put a flap on after the main body of the bag was done. I wanted the strength of one continuous layer of fabric.

The hardware for the handle and rod assembly was the hardest and the most interesting part. I have always liked the leather-laced chains of the Chanel 2.55 bags and I had several feet of wonderful chain left from when Loryn and I put up new chandeliers in my living room and studio. The shape of the chain made it difficult to use standard rings to attach it to the handle. This meant I needed to go to the hardware store. I love our local Arone Hardware store because there are lots of parts and pieces that are not packaged and can be bought one at a time. I needed the plastic sheeting for the fused fabric, stiff plastic hose for the handle rod and smaller, clear tubing to lace through the chain. I thought the chain needed a little more cushioning and I found that the spline used to make screens made a great black accent in the chain. Rubber-coated hose clamps, fasteners, nuts and bolts and a turnbuckle for the handle made up the rest of the hardware I needed.

I don’t want you to think that I had much of a plan when I went to Arone’s. I spent a lot of time wandering from one aisle to the next just picking up things and checking to see if they would fit together. The staff there are great and let me look without interruption, although I see the guys shaking their heads every now and then. That is one of the fun things about these challenges, we are going into areas we have never been before and anything can happen. A terrible mistake can turn out to be the most brilliant idea ever and vice versa of course.

The clasp closure was the next most difficult thing. I did not want the weight of a hasp type of hardware attached to the front fabric of the bag. I wanted to use some of our vintage buttons and I thought that buttons sewn together with a button on the interior would help carry the weight of the bag through the whole structure of the fabric. The bottom of the clasp is 4 buttons sewn together. Two buttons with a small button in between to make a channel for the gasket loop were sewn to the outside of the bag and another button was sewn to the inside of the bag. The top of the clasp is 3 buttons sewn together with a rubber gasket. Small button, gasket, large button were sewn to the outside and another large button was sewn to the inside. I put holes in the gasket with an awl and just sewed through it the same time I sewed the buttons.

The clasp was also a process of trial and error and I had buttons strewn everywhere on my table. I was getting desperate for a loop when Cheri showed me a zip-lock bag full of washers she had just picked up at a garage sale. I casually snagged the largest one and went home to finish my bag.

The handbag is much roomier than I thought it would be and I really enjoy carrying it. It has a solid feel without being too heavy and I know there is not another one out there like it.

Click the thumbnails below for a gallery view of the photos.

Crafty Challenge 4: Willis-Inspired Felt Messenger Bag


Crafty Challenge 4
Willis-inspired messenger
Craft Challenge 4
Felt Messenger Bag

Loryn: I’ll admit that I wasn’t sure about this challenge. It’s not that I don’t like making bags; quite the opposite, and that was the problem. I’ve been making bags for many years, and I always put a lot of time and effort into nice details and finishes. So how would I do that with the limited time allowed for a crafty challenge?

Typically, my bags are lined and interlined, with lots of pockets inside. To cut down on the time needed, I wanted to use fabrics that didn’t need linings or seam finishes. Luckily, I had two thrifted items that would be perfect. The wool felt came from a Soviet military coat, and the piping is from a fuchsia 1980s ultrasuede men’s sport coat. All of the “raw edges” are on the exterior of the bag, and the construction seams are exposed.

Crafty Challenge 4
Ultrasuede piping means no raw edges inside

To mimic the look of the Willis bag and to brighten up the dark felt, I put piping at all the seams. I’ll admit, I love piping, and put it on lots of projects. I used cotton sash cord from the hardware store inside the piping.

Crafty Challenge 4
The button, tab and original buttonhole.

For a closure, I used a buttonhole from the coat as my tab. My initial idea was to use a magnet closure, but it wasn’t strong enough. The clasp holds the entire bag together, so I changed to the button tab.

The coat had green topstitching, and I decided to match it, both so I could use the premade buttonhole and because it is a nice contrast to the fuchsia piping.

Crafty Challenge 4
Hardware for the handle.

I used a dowel in the top to match that detail on the inspiration bag. The metal rings are looped around the dowel, with slits in the felt so I could put them in place. I love working with a fabric that doesn’t ravel!

Crafty Challenge 4
Side view with ultrasuede piping.

It’s hard to tell from the pictures, but this is a pretty big bag. It’s 15″ wide, just under 14″ tall, and over 5″ wide. It’s perfect for work!

Crafty Challenge 4
Detail where the front piping joins the top front

Because of the single layer construction, I didn’t put any pockets in the bag. I didn’t want any pocket seams to show on the outside of the bag or any extra layers of fabric to mess up the lines of the bag.

Once the challenge was over, I decided to make up an organizer to put inside the bag:

Divider insert for bag

The divider is two-sided, with heavy cardboard in between to give it shape. I made special pockets to hold my phone, glasses, pens, and iPad. I lined some of the pockets with ultrasuede to protect screens and lenses. Not only is it really handy, but it gives the messenger shape. I love using it! Loryn

Back pocket for iPad