
Category Archives: DIY
Link and Nettie in Paris. What a cat!

Puerto Rico. What a cat!

After the coaster. What a cat!

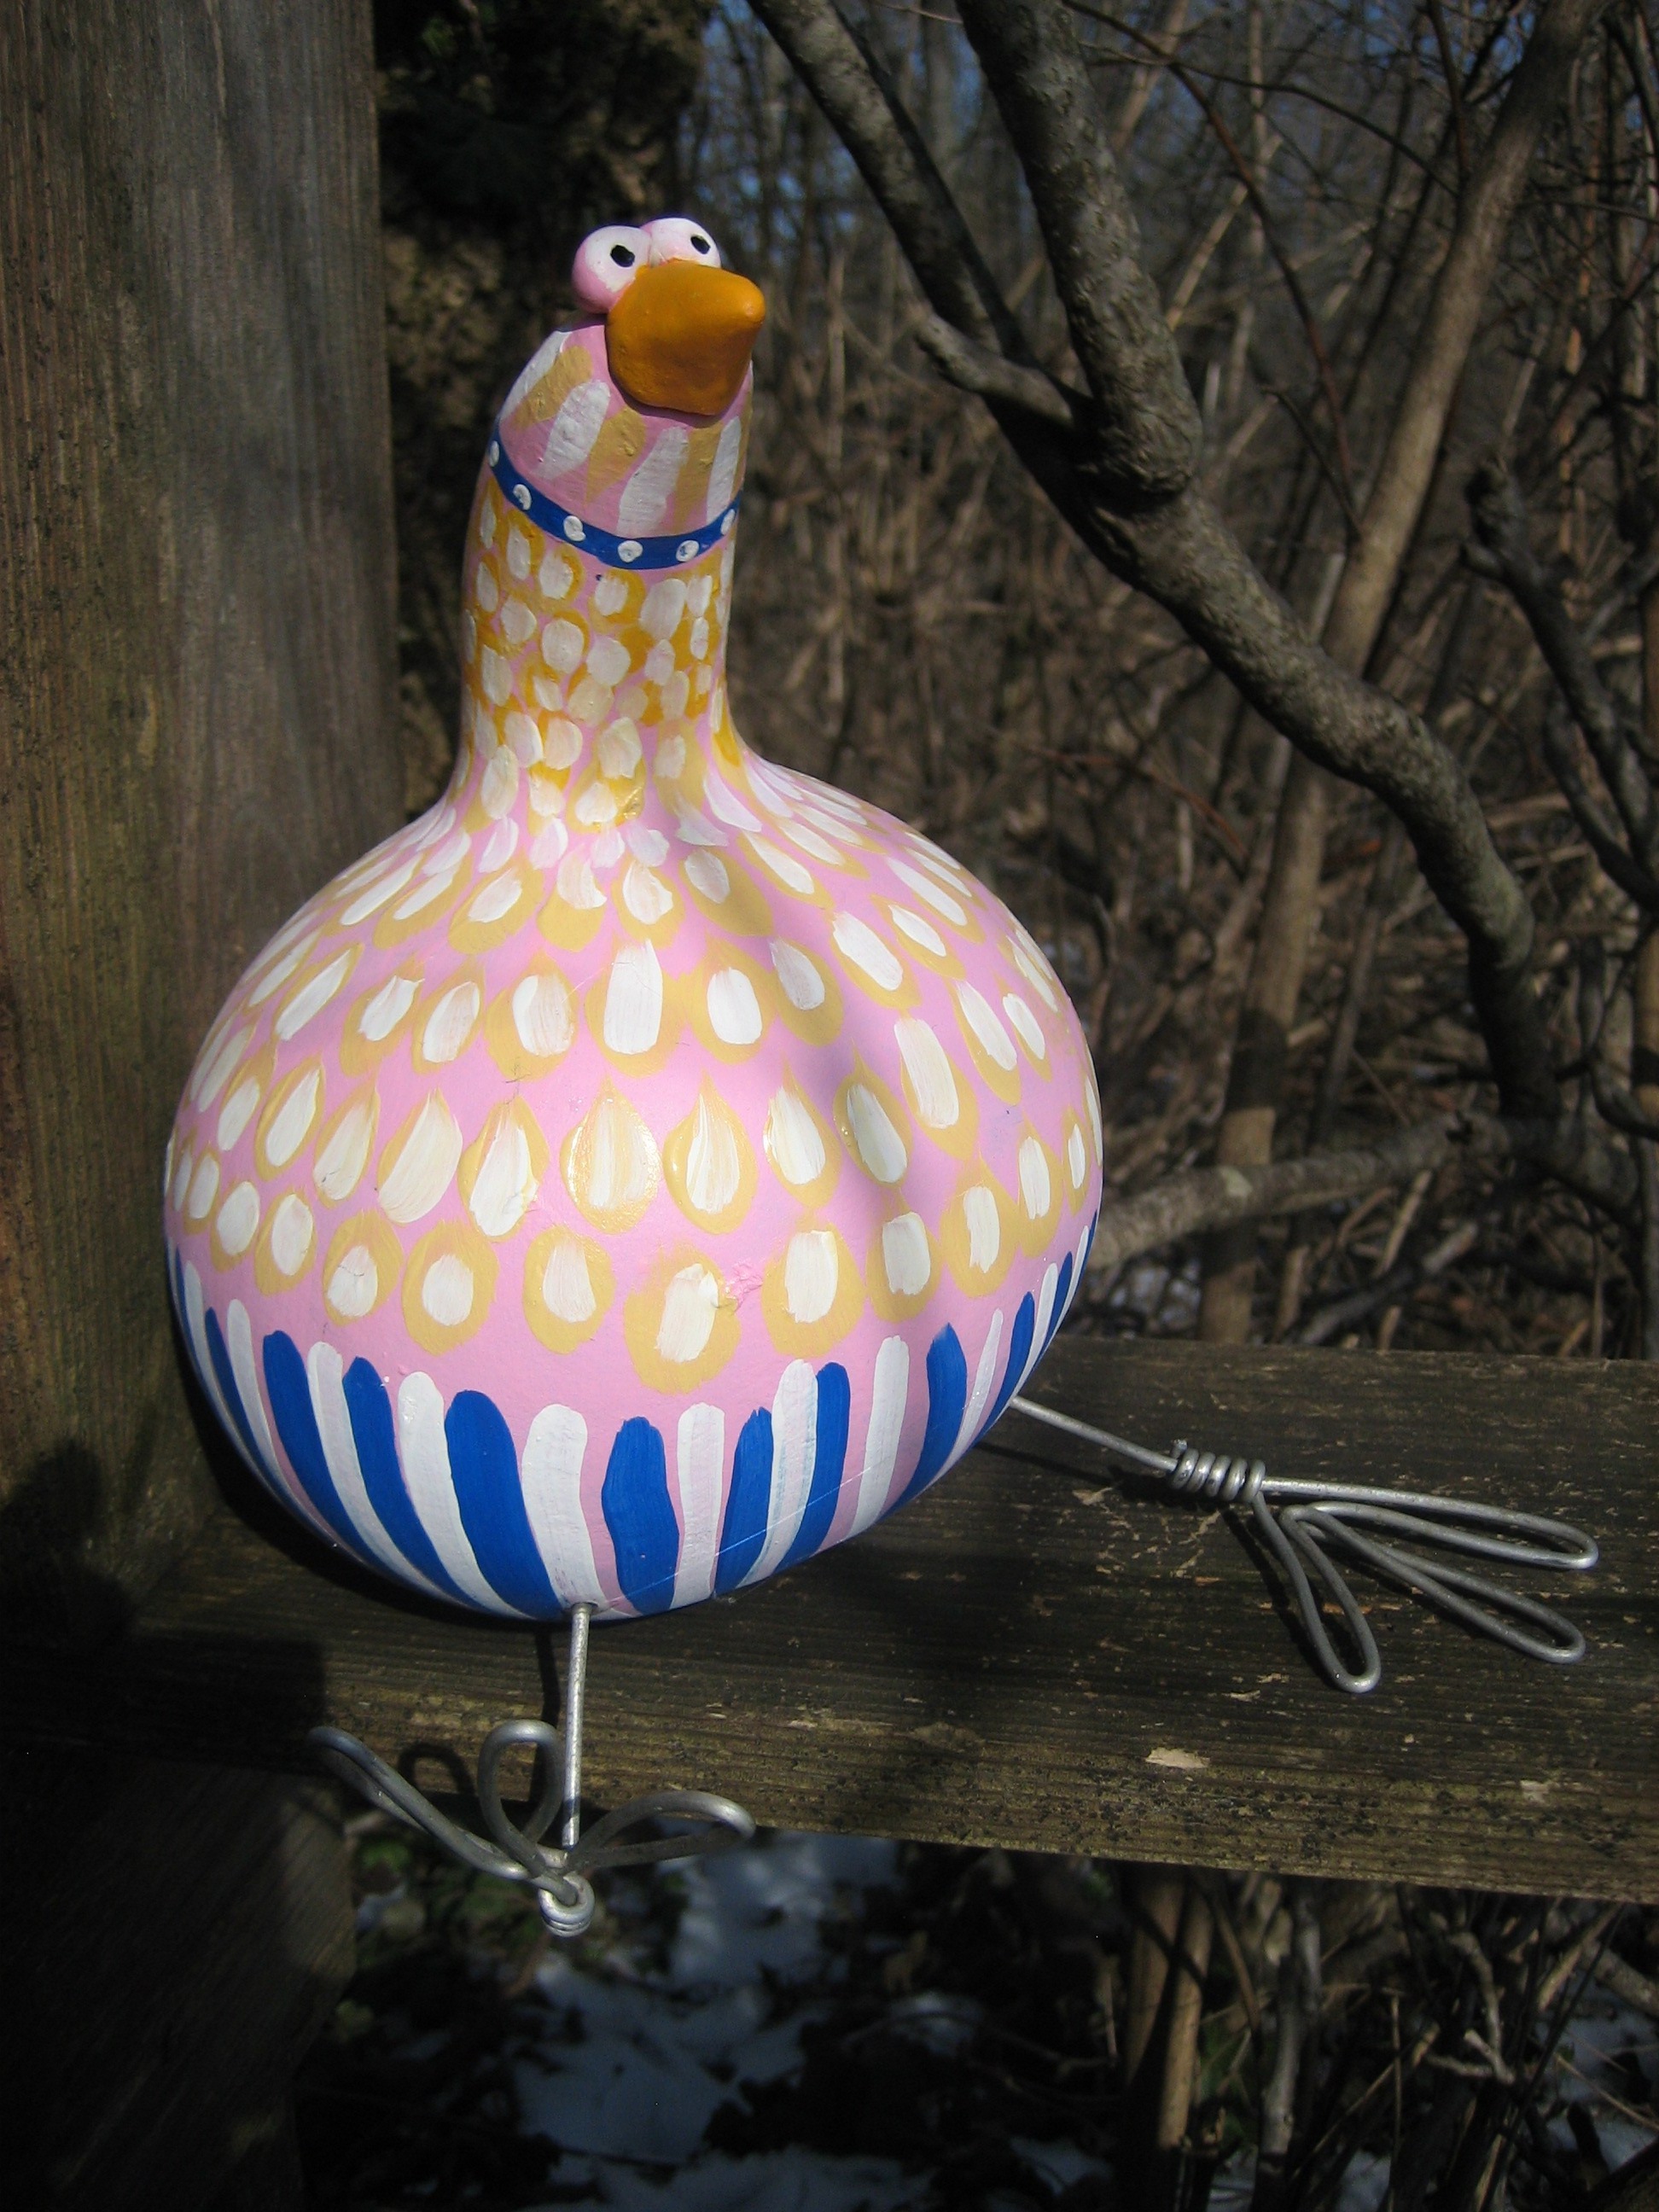
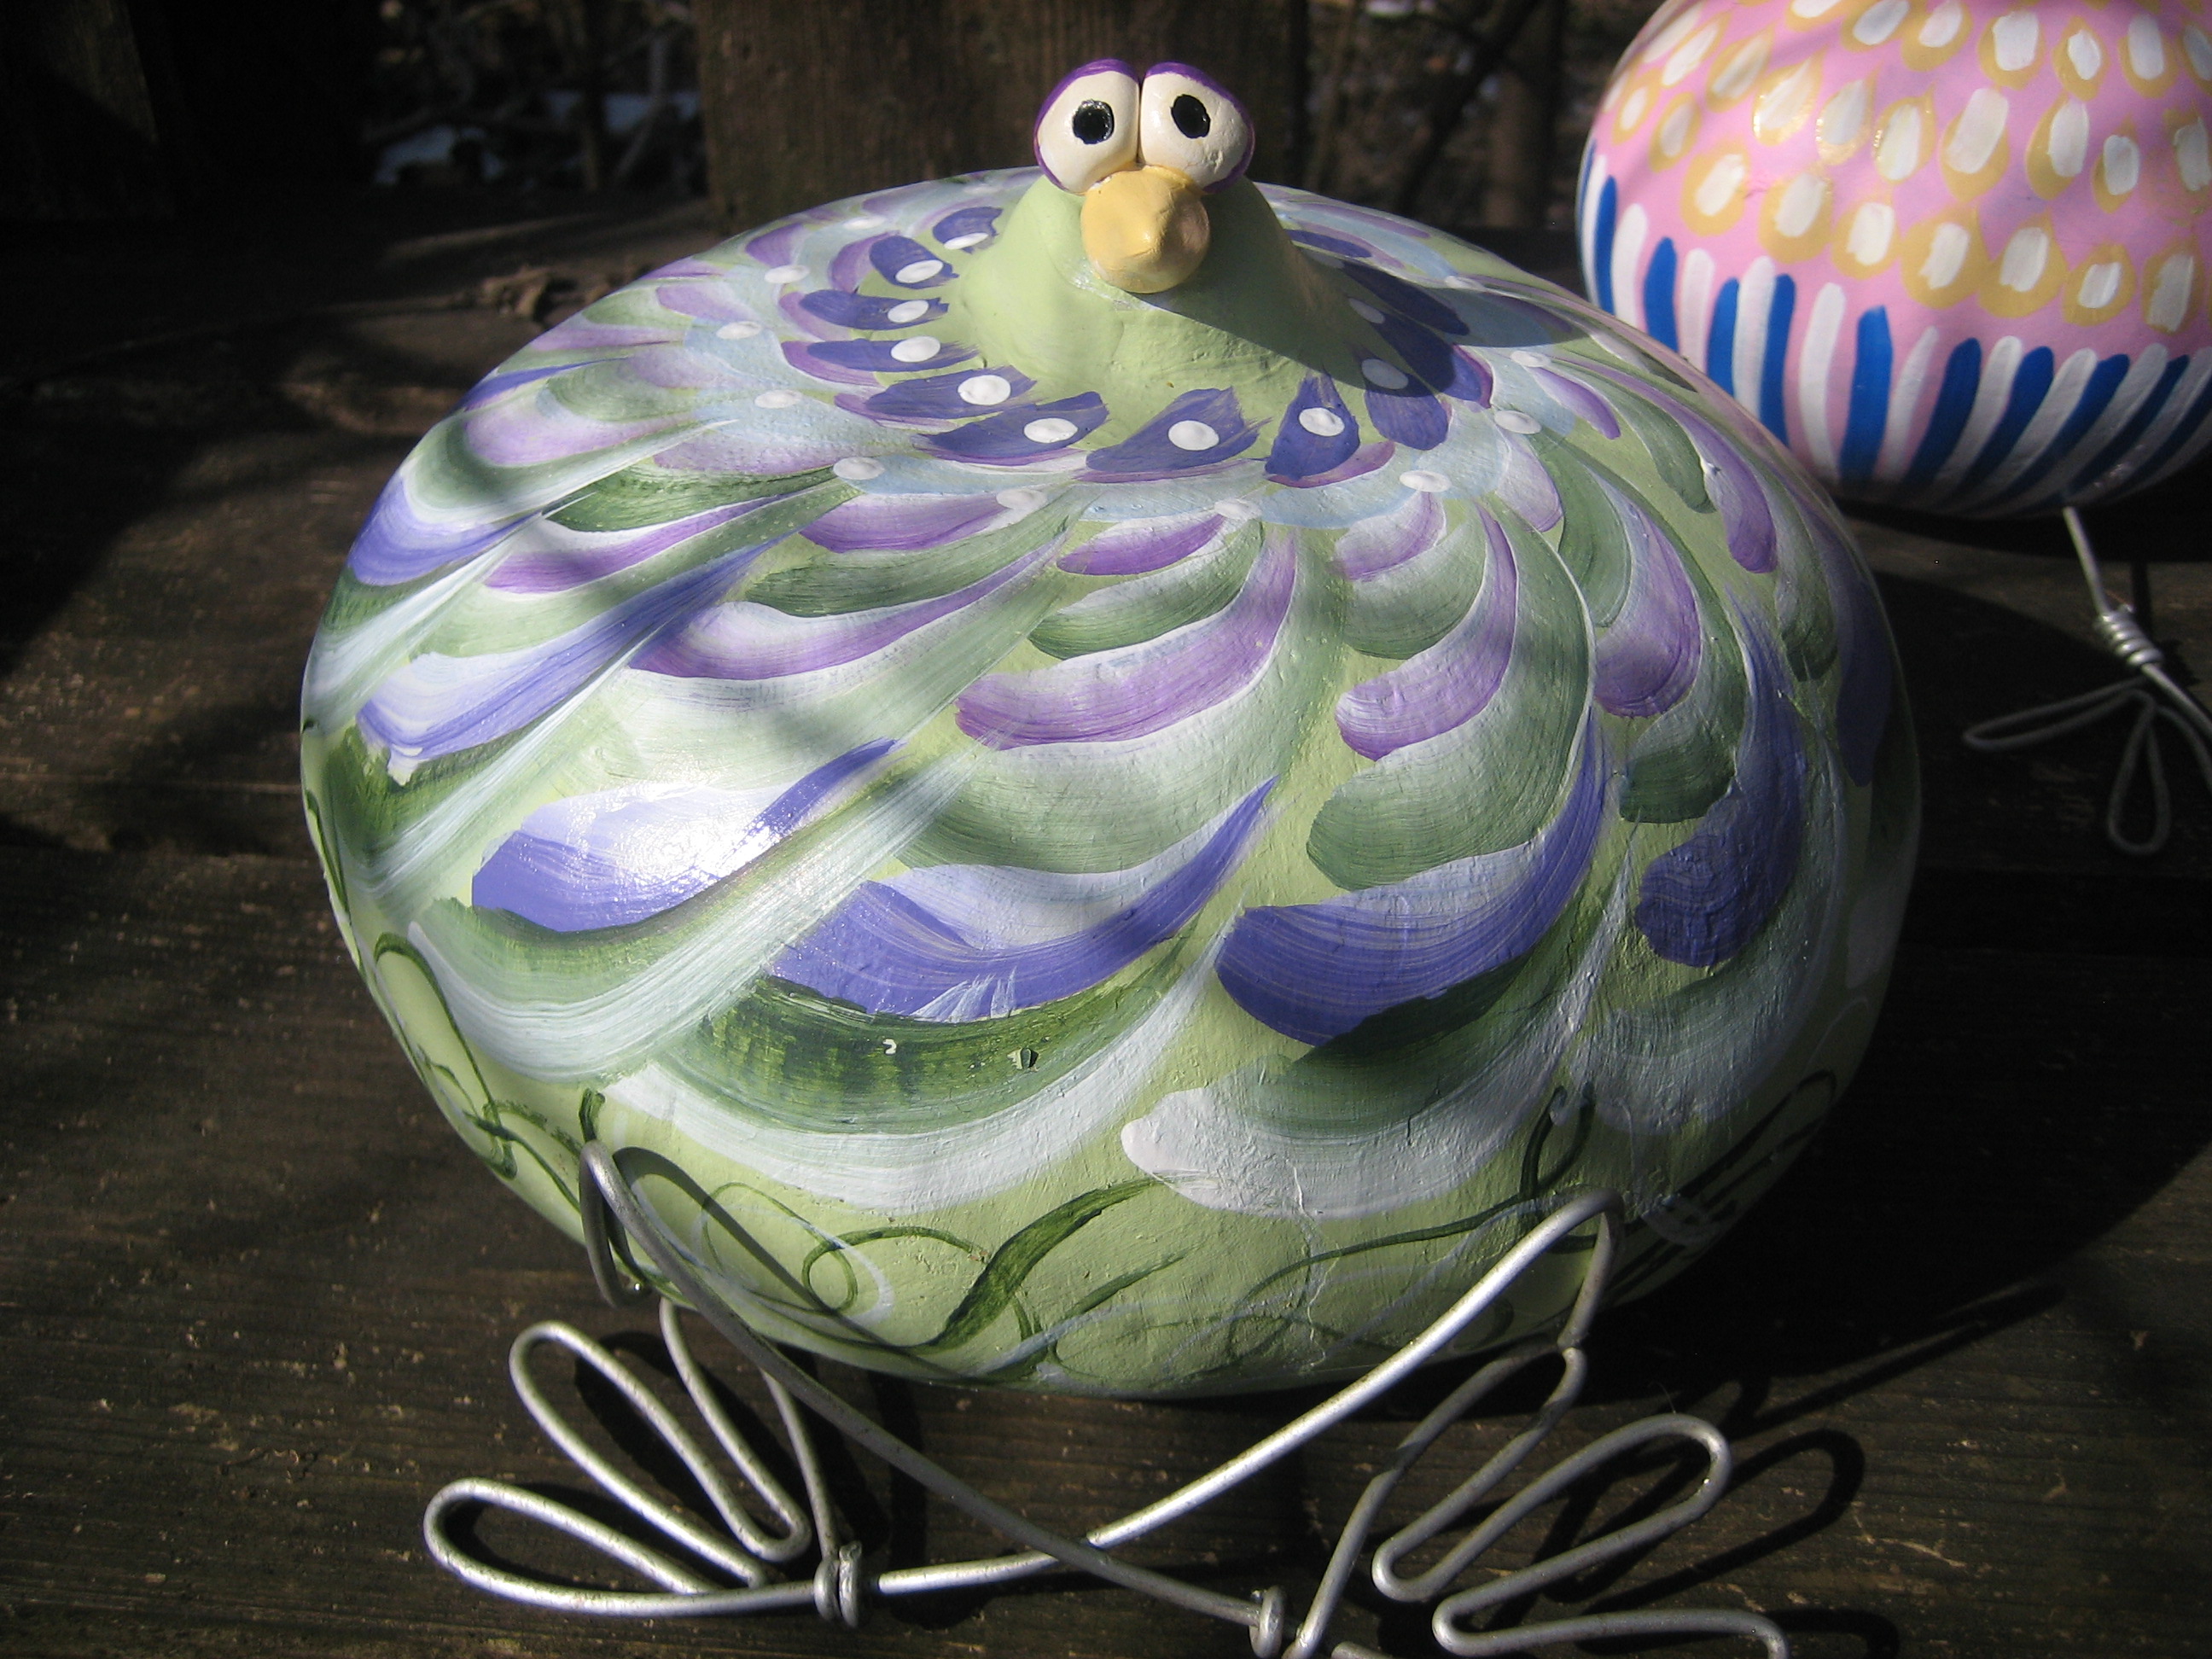
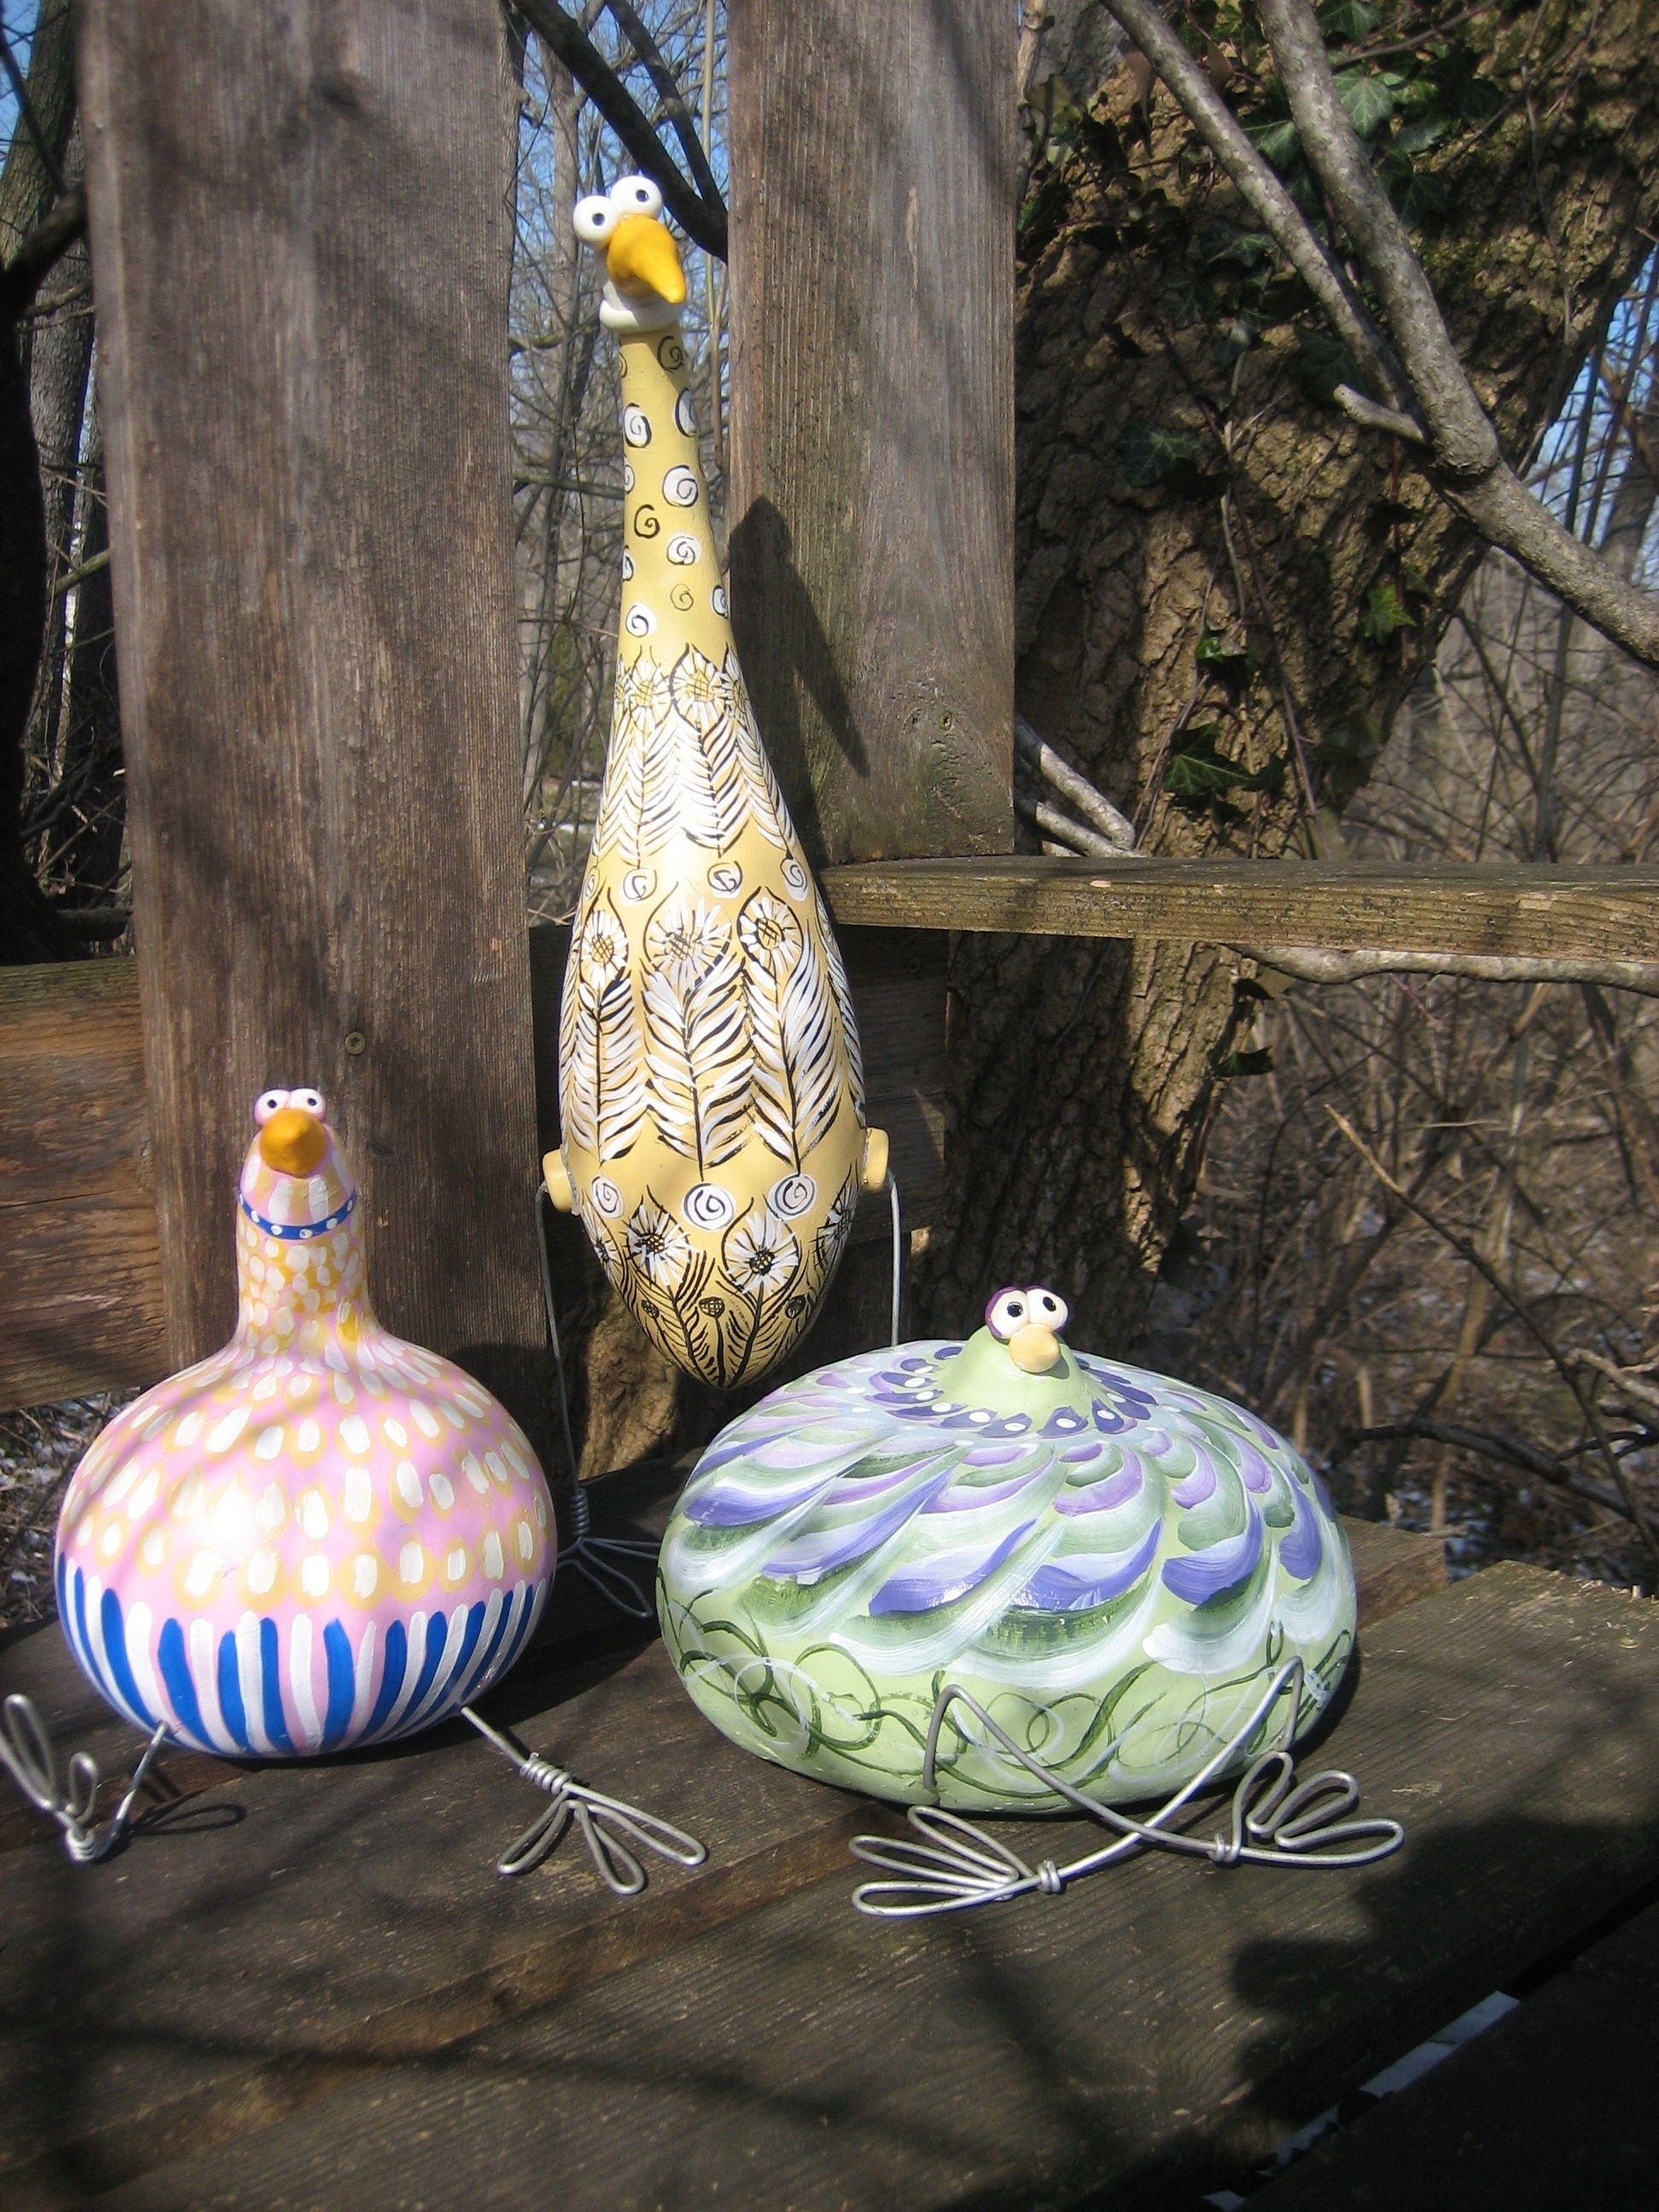
Gourdy Birds
Gordy Birds
A few years ago I had the pleasure of finding a large bag of dried gourds. I have kept these gourds and stored and restored them. Keep in mind that these are not easy items to store. They take up a lot of room and are very unwieldy. After a few years of storing them I decided that I was going to give them away, since they were laying around doing nothing. I put the bag in my car.
The gourds traveled with me for a few months and I still couldn’t bring myself to get rid of them. Why wouldn’t inspiration hit me?
It finally did!
The gourds reminded me of birds. Not beautiful birds necessarily, but goofy, rather klutzy birds. Birds that might have been related to the Coo Coo Bird.
I started by washing the gourds, just enough to get the crud off, I used sculpey to make the beaks and eyes, cooked them for the time necessary and glued them with E-6000 to the gourds.
The eyes and beaks were a jumping off point. I painted them with bright colors and bent wire to make legs. I used a small knife to make a hole in the gourds and glued the legs in.
The birds turned out to be so much fun, and I am thanking my lucky stars that I kept them. I hope you enjoy them, and I will post photos from time to time as I make new ones.

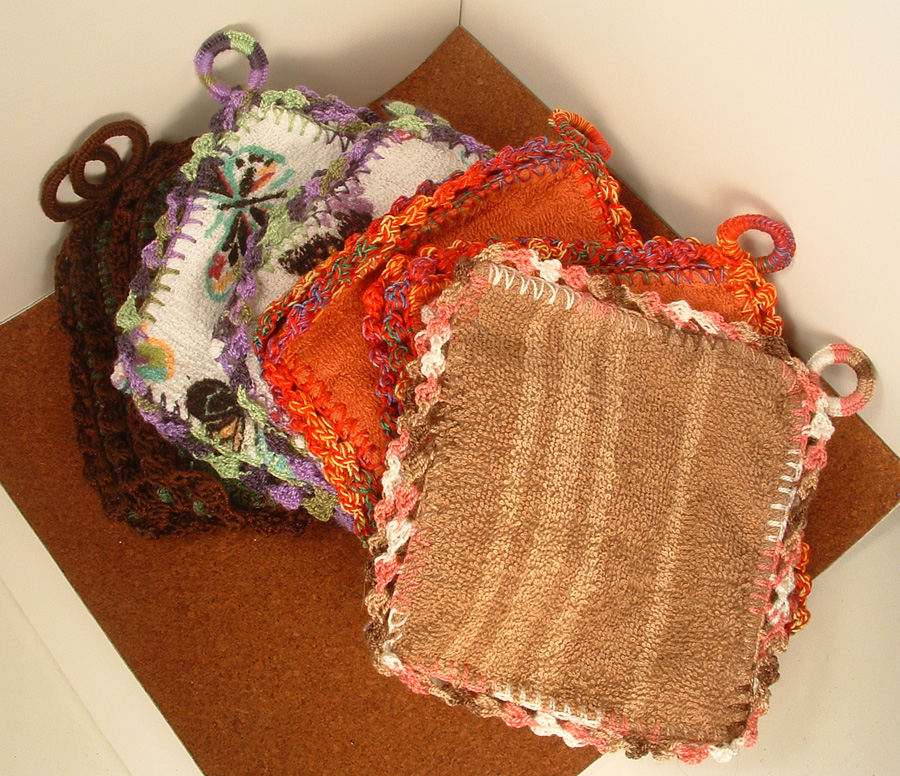
World’s Best Hot Pads – Made from Washcloths
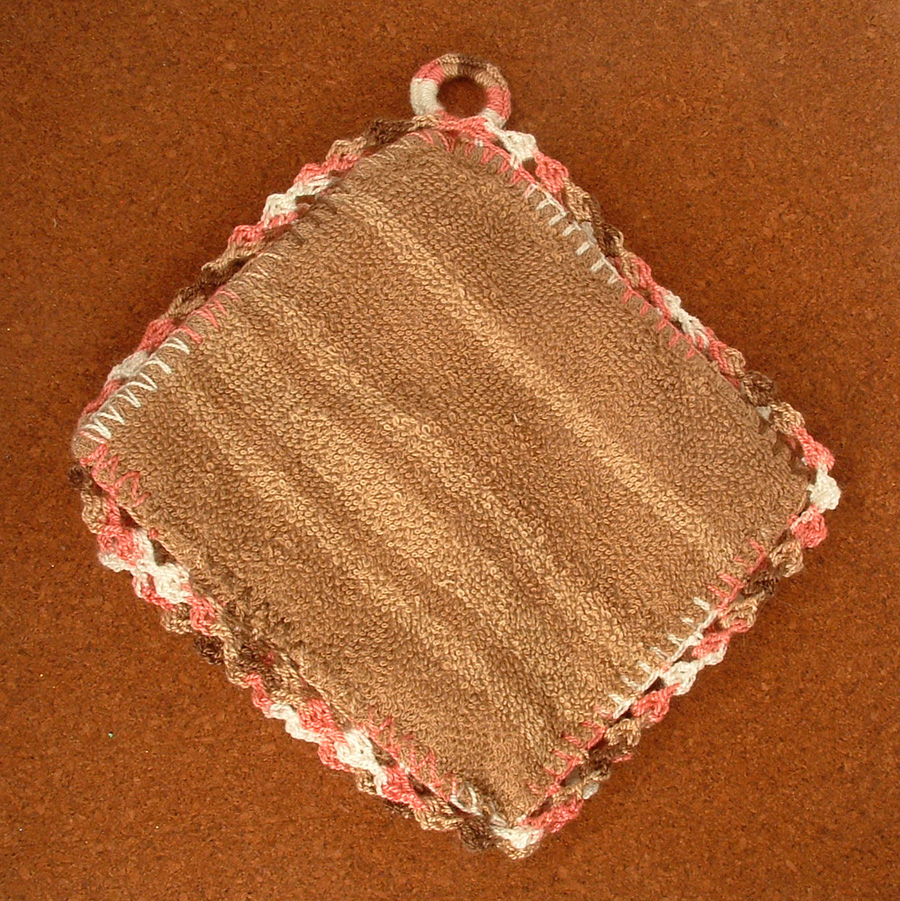
This is a very photo heavy how-to to make the best hot pads ever. I learned how to make these from my Aunt Harriet. She wasn’t really my Aunt, she was a friend of my Grandmother’s who the family adopted. Harriet Saine was a wonderful woman and is greatly missed.
Her hot pads are famous in our family. Every year at Christmas she would pull out this gigantic stack of hot pads and every woman (with a house or apartment) would get to pick two. Sometimes Harriet brought so many we would get to chose a third one. When Harriet passed away, I got her supplies for making these hot pads. In her supplies were her crochet hooks. There is one that is completely eroded down to a nub. I had no idea you could even do that to a metal crochet hook. I cannot even begin to create as many of these as Harriet was able to. I am amazed every year I am able to make these for the family that she was able to do this every year for as long as I can remember. This is my homage to Aunt Harriet.
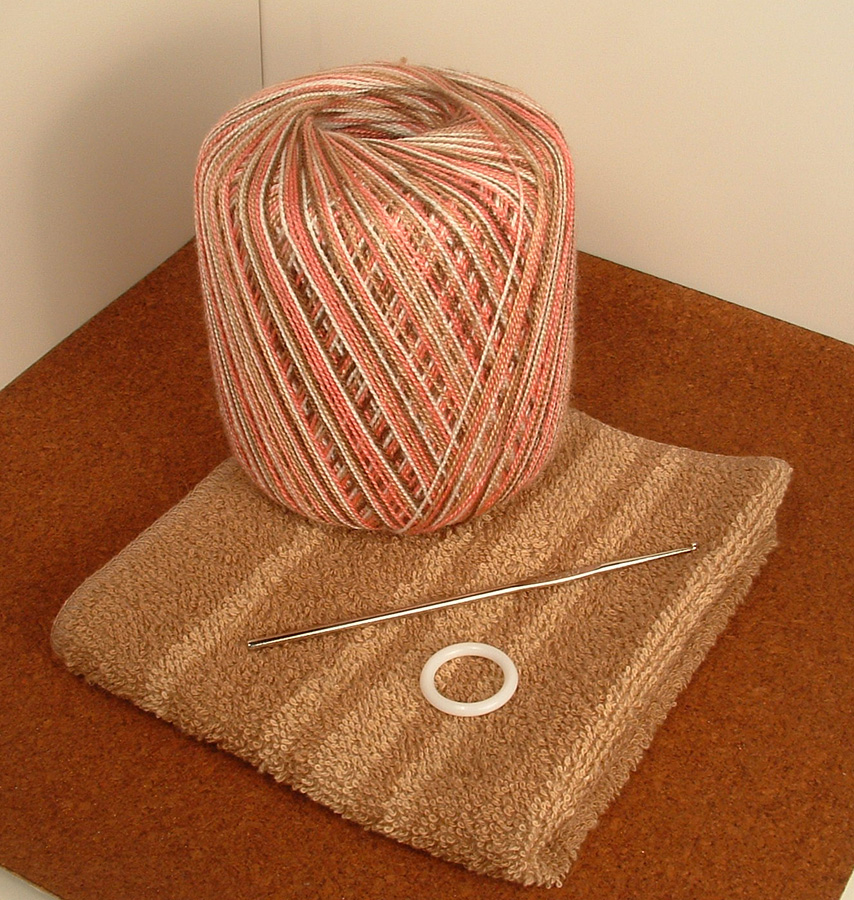
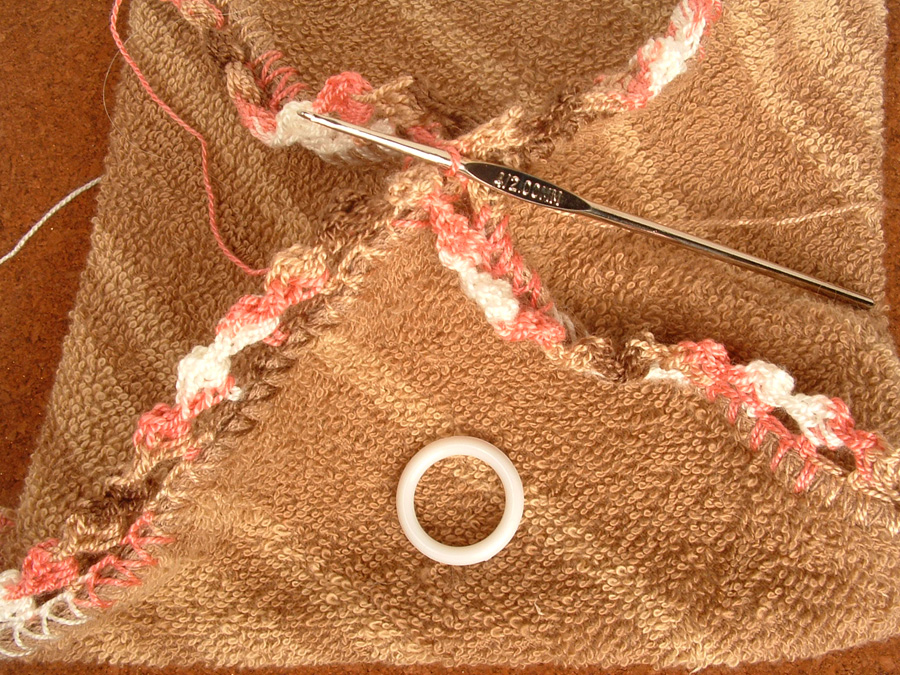
The supplies for these hot pads are very few:
Cheap washcloth (this means no embroidered stripes or thick edges)
Crochet thread
1″ plastic rings
Crochet hooks (size 4/2.00mm and size 8/1.50mm)
Pins (optional, though recommended)
Scissors
You really do need to use cheaper washcloths for this project. Cheaper washcloths do not have a high thread count and make it much easier to get the crochet hook through the fabric for the first round of stitching. You also are much better off using plain washcloths, the ones with no embroidered stripes or thick edges. The stripes are very difficult to get a crochet hook through. That is not to say impossible, but it will hurt your hands if you have to force the hook through these stripes very often. I have somehow managed to collect around 50 washcloths to make into hot pads. Eventually, I will have to stop buying them.
The crochet thread can be any sort. I now have a huge collection of thread from variegated, solid, metallic, to threads with differing thickness. I personally prefer the variegated for my hot pads. I really like the effect it makes. I currently have 2 Rubbermaid tubs of crochet thread, and like the washcloths, I may eventually have to stop buying new colors. (I have a bad habit of buying every new variegated skein I find.)
For the plastic rings, you can use any size you prefer, but I tend to buy 3/4″, 1″ or 1 1/4″. I just have to make sure that I grab two of the same size for the set of hot pads (I always make sets of 2).
I use a size 8/1.50mm crochet hook for the first round of stitching and a size 4/2.00mm crochet hook for the decorative round of stitching. The size 8 goes through the fabric of the washcloth much easier and I like a slightly larger hook to make the edging, this is just personal preference though.
To make:
You fold the washcloth in half and pin it to hold it in place. As you stitch, it tends to drift and you will end up with a lopsided fold. Holding it with the fold closer to you, begin the first single crochet in the upper left hand corner, at the midpoint of the corner.

Continue your single crochet stitching around the corner, the first short side, next full corner, and to the folded edge. Keep stitching along the fold, next full corner, and up the second short side of the washcloth. You stop your stitching at the midpoint of the upper right corner. At this point, you have single crocheted around three sides of the washcloth (1/4 of the way finished).
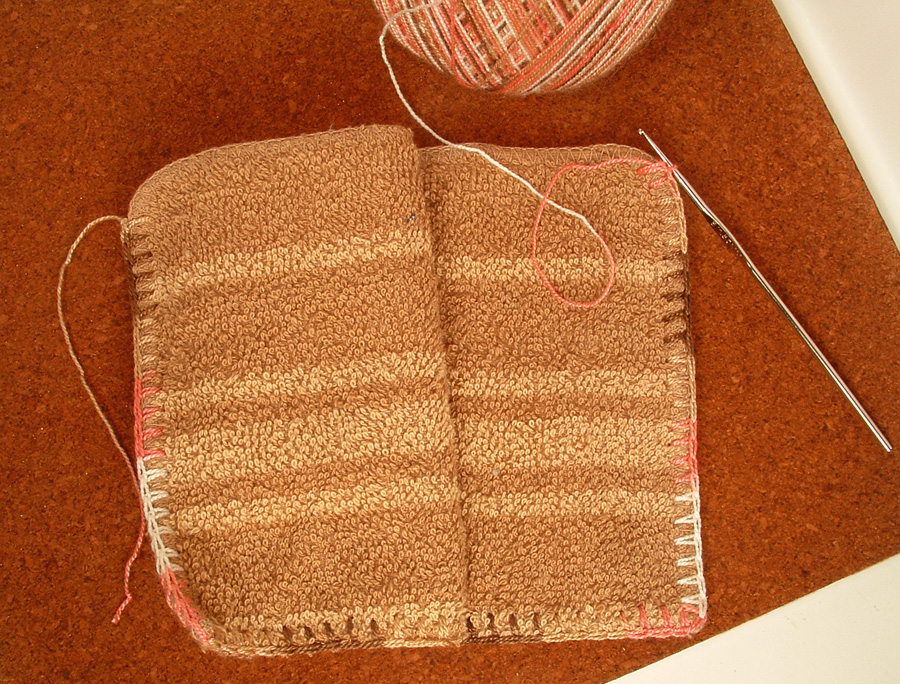
Now you need to open up the washcloth and put the two midpoints together (be sure to remove your pins). This makes what in the origami world is called a balloon fold. You connect all four corners of the washcloth at the top of the hot pad and this creates 4 triangle shaped wings. The photo below shows this fold in a flattened view from the top. You can see the four corners of the washcloth stitched together, although in the photo, the edges are not yet completely stitched. Putting a couple of pins into the wings will again help keep your folds straight and prevent you from having a lopsided hot pad.

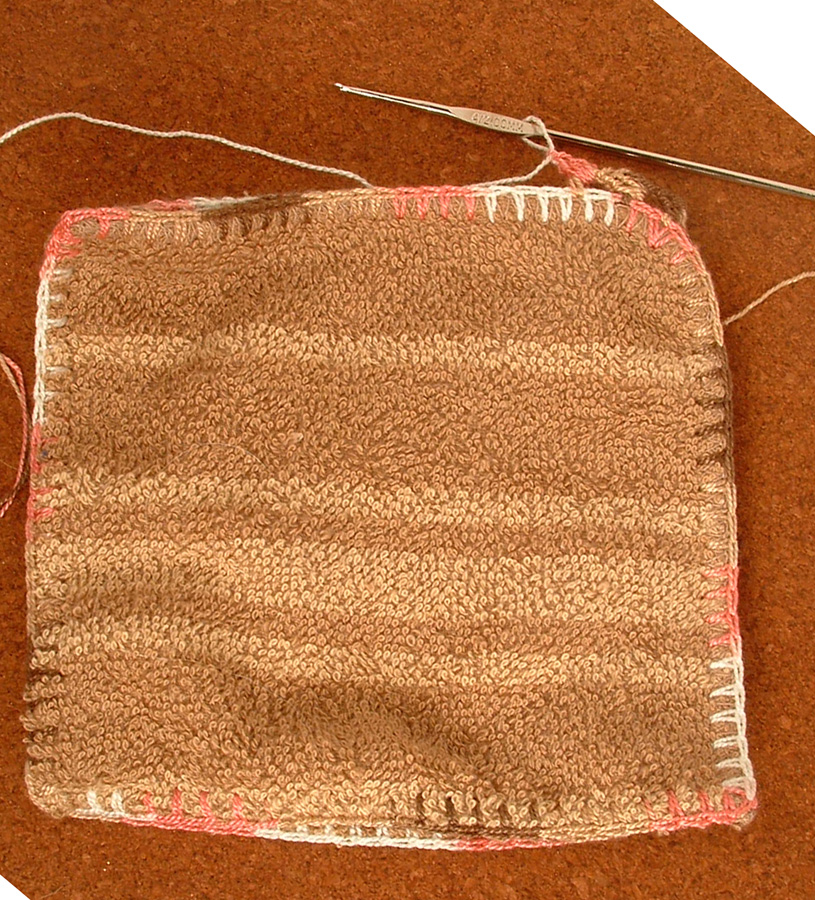
You stick your crochet hook through the two pieces of fabric at the midpoints of the corners and start single crocheting down the short side (from here on, all the sides are short sides). Continue around the washcloth (you will stitch over your first round of crochet as you go) until you are again back at the top. This should have closed all the sides and created the 4 wings and top and bottom points (1/2 way finished). You are now ready to start the decorative edging. You can also remove all the pins now.
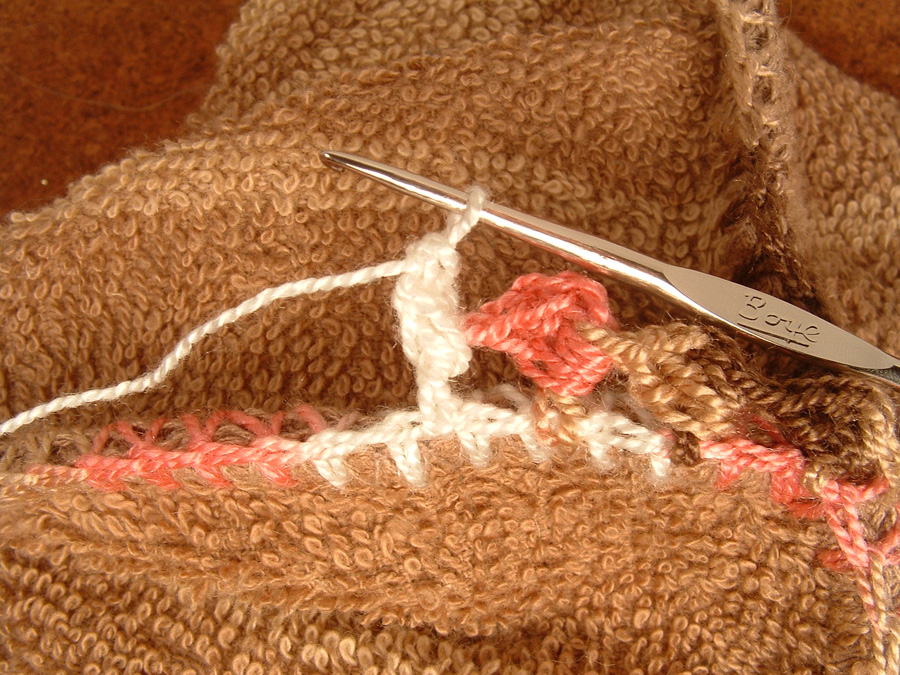
I switch hooks to the larger size 4/2.00mm hook and double crochet at this point. When I started making these hot pads, I used to make different types of edgings. You can experiment until you find one you like. I like this one and it is very easy and pretty. Single crochet twice and insert the hook under the first single crochet on the opposite wing of the hot pad. You will use this stitch as the post to stitch 3 more double crochet stitches around. Finish off with one single crochet. This completes one scallop. You will make one of these scallops in every other single crochet stitch from the first round.
dc in first sc, *dc around first dc 3 times, sc, skip single crochet and dc in next sc, continue from *


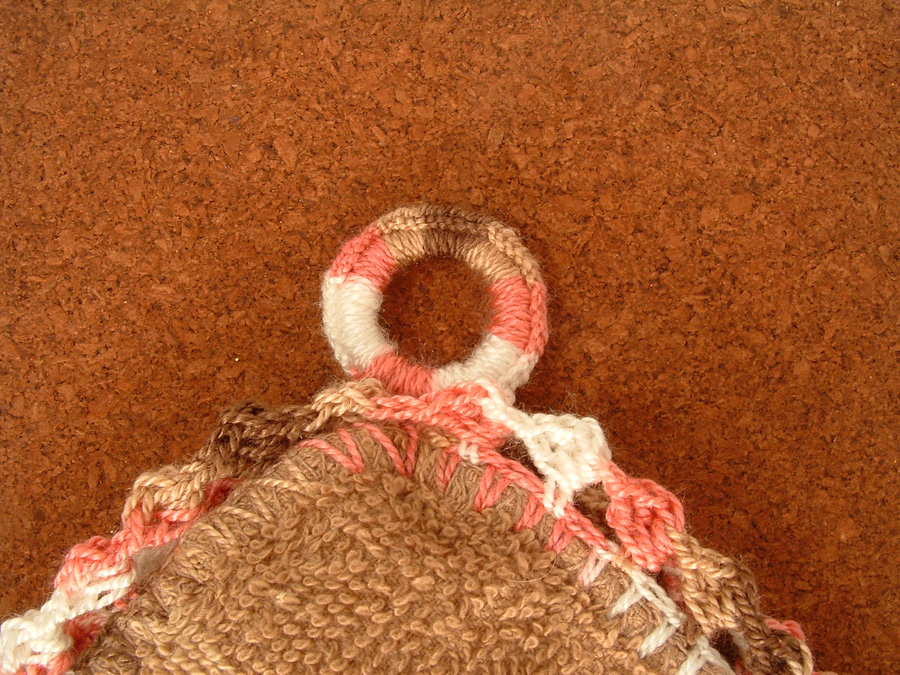
When you finish the edging and are back at the top of the hot pad you will add your plastic ring. You don’t have to add a plastic ring, but so many people like to hang their hot pads from hooks. You can skip this part entirely if you don’t want to hang your hot pads. You single crochet around the ring making sure to completely cover the plastic ring. I finish the ring with one final single crochet back into the hot pad. I tie off the threads and pull the ends inside the hot pad with the crochet hook.
You have now finished your first hot pad! As I said above, I always make these in pairs and would now start my second one. I can make one hot pad in about an hour (1 and 1/2 if I am interrupted a lot).
I have tried to photo the whole process, but if you have any questions, or want another photo, just let me know. I hope you enjoy these hot pads as much as I and my family do!
Happy Crafting,
Kristin


Crafty Challenge 12: Headwarmer – Earmuffs

Our most recent crafty challenge was to make a headwarmer. This could be in any color, material, style or shape. Cheri was ahead of us all and posted her adorable recycled sweater hat here. We gave ourselves 3 weeks to make this particular challenge as we were all still recovering from the holidays. I had mine done in less than a week and then had to try very had not to talk about it or brag about it. Of course, this early birdness of me is now completely offset by my late posting.
I love earmuffs, but have never been able to find a satisfactory pair. The never stay on my head or they don’t cover my ears very well. I also hate hats as I have very static prone hair. I knew as soon as we started talking about a headwarmer challenge that earmuffs were my challenge.
I bought a cheap set of fleece wrap-around earmuffs for less than $2. I then cut the fleece off the wire and used the wire for the base of my earmuffs. I have some lovely wool yarn, one skein in cream and another in black. I also received this gigantic spool of very fine black alpaca yarn on year for Christmas. I took all three yarns and crocheted my earmuffs with this lovely and warm combination.

I crocheted 4 circles in double crochet, all the same size and just big enough to cover my ears. I then held two of these circles on either side of the ear part of the wire frame and using half-double crochet, I stitched the circles together. I really wanted the double thickness which provides amazing protection from cold and wind. You could also put some stuffing or quilting in between the two circles if you wanted poofy earmuffs (this would be very cute for a child).
After stitching both circles on the frame, I then single crocheted around the length of wire between the ear pieces. To keep from having to weave-in ends, I folded the ends from the ear pieces under the single crochet. This made the back wire a little thicker and made it so I only had the ends from this last stretch to weave-in.
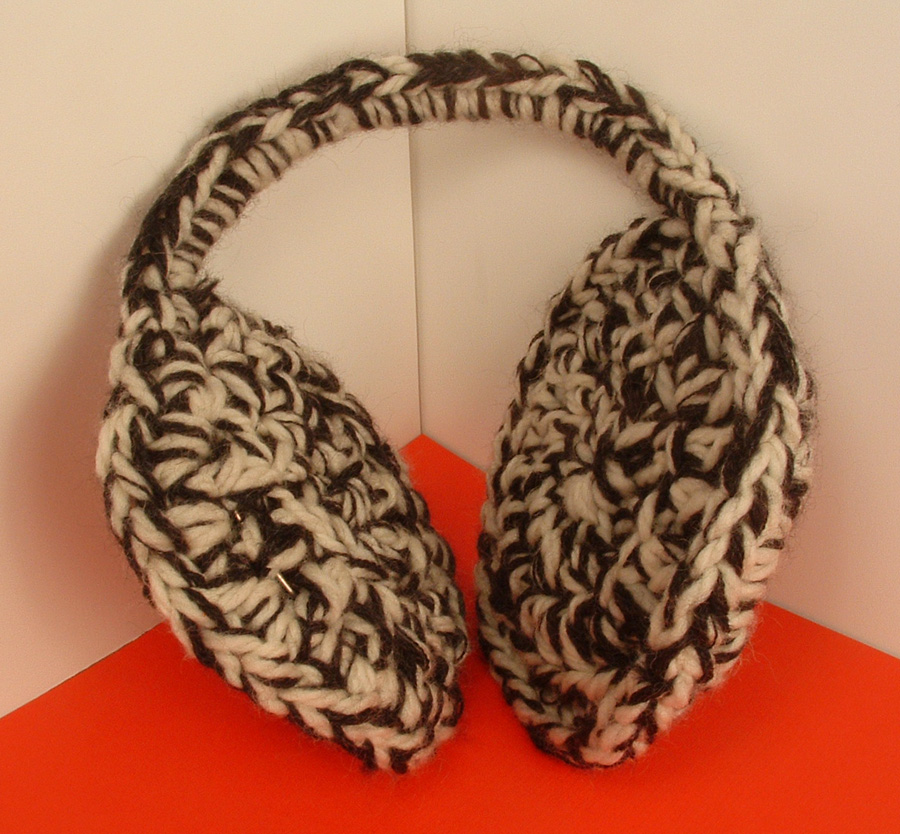
This completed my earmuffs. This project took me all of about 2 hours and most of that was just figuring out what stitch I wanted to use to make the circles. I have been wearing these for weeks now and just love them. They are comfortable, very warm, and I haven’t had cold ears at all this year!
Happy Crafting!
Kristin
Ornament Advent: Day 22 Tissue Paper Garland

Cheri-Kristin and I always make similar projects and when I saw her garland from yesterday, I had to laugh. Without even being aware of it we both made garland. Her project is so pretty that it made me a little intimidated to post mine, but here goes anyway. I hope you like it.
Supplies
Tissue paper
Colorful thread
Sewing machine
Ribbon (optional)
This is such an easy project, if you can sew a straight line, you can make these. I stacked a bunch of tissue paper together and cut out several shapes. Circles, squares and rectangles of tissue. I started with the ribbon garland, and just placed one or two of the tissue paper objects underneath the zipper foot. For the garland without the the ribbon, all you do is run the thread over the tissue paper objects. For the tissue paper bows, just bunch up the tissue paper in the middle and sew over it.
It is really simple and sewing tissue paper and ribbon is a really awesome way to combine this medium together.
Merry Christmas

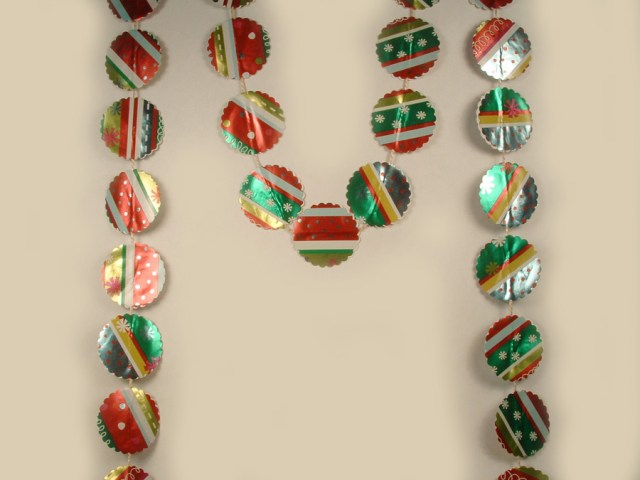
Ornament Advent: Day 23 Christmas Wrap Garland
One of the greatest benefits of having a crafting family are how ideas are bounced, re-imaged, and re-shaped among us. I really love the Star Ornaments that Loryn made and I also just love the Chinese Fortune Garland that Cheri made. I decided to do something similar to Loryn’s stars and follow Cheri and make a garland. I am very happy with how it turned out!
Supplies:
Christmas wrap
Paper punch (I used 2″ seal punch)
Glue stick or pen
Yarn, string, or ribbon
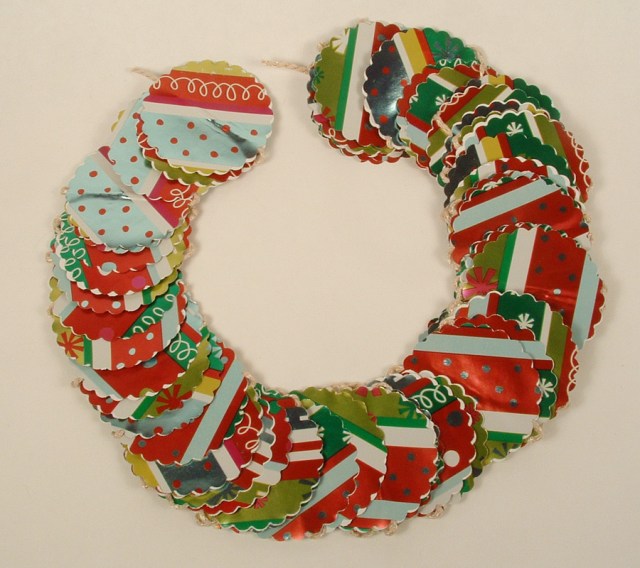
I had some really shiny Christmas wrap and also had this 2″ seal paper punch. I used the paper punch to cut around 120 pieces out of the Christmas wrap. I then pulled out some thick crochet thread that is a sort-of soft gold color and is ribbonish (flat and about 1/8″ thick). I spread glue on two cut-outs and glued the crochet thread between the two pieces. You do have to be sparing with the glue as the Christmas wrap is very thin. I left around 1/4″ of the yarn visible between the cut-outs.

My garland is around 12′ long and looks great on a tree! I think this whole garland took me around 45 minutes to make. The other nice thing about this garland is that once you fold up the shapes, it takes up so little space and stores very well.

Happy Holidays and Happy Crafting!
Kristin
Ornament Advent: Day 20 Wrapping Paper Christmas Tree
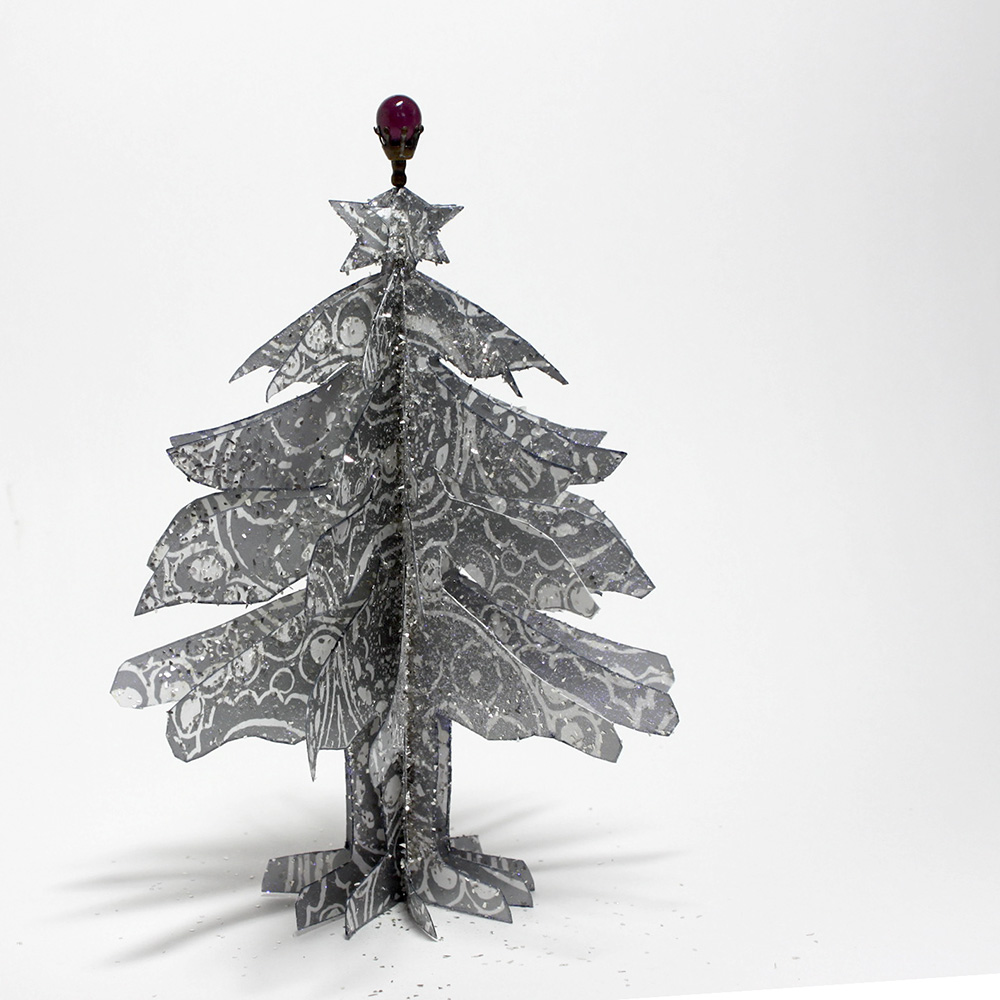
Lynne: I liked using scraps of wrapping paper to make my last ornament and I decided I would try to use up more of the pieces I have lying around. I found this tutorial on design and form with these terrific paper ornaments, but I don’t have that precision in my paper-cutting skills. Thus I drew a very loose, cartoon type tree and used that for my pattern.
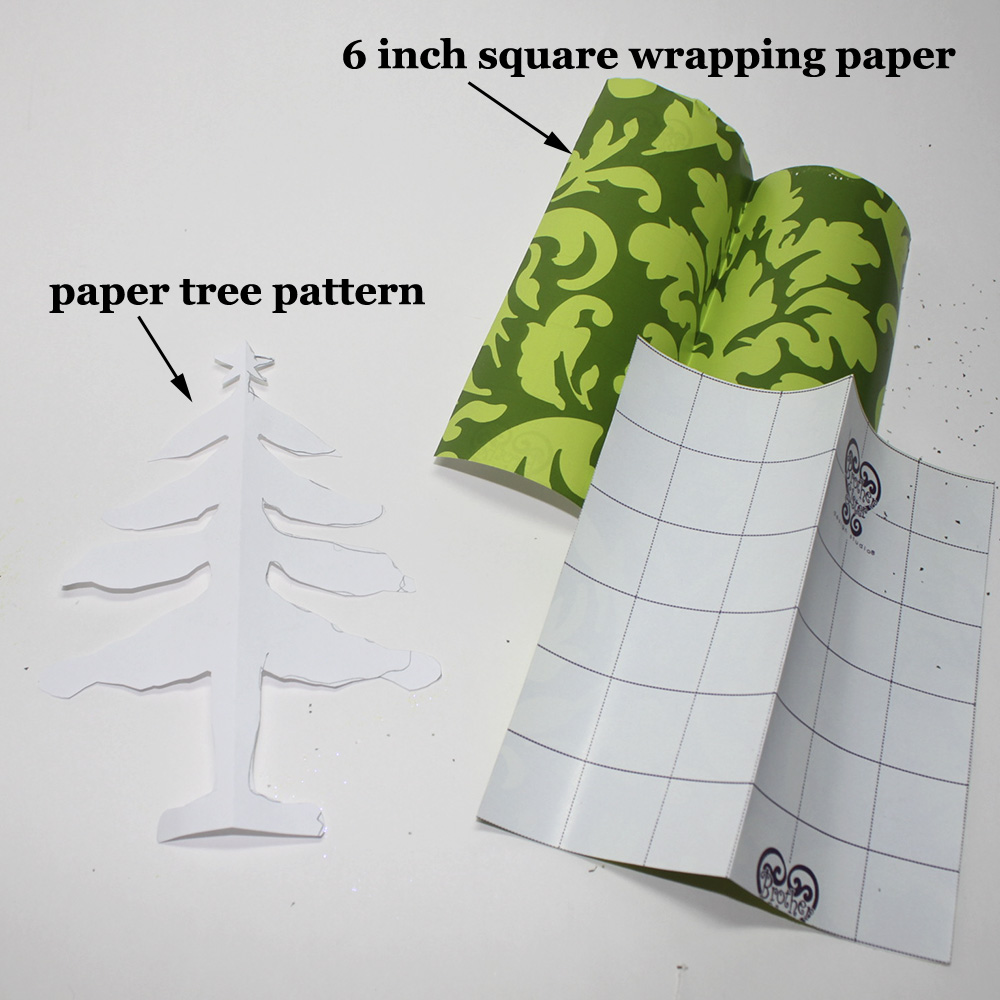
You will need:
a 6 x 6 inch square piece of paper for the pattern
approximately 10, 6 x 6 inch square pieces of wrapping paper
a glue stick
When you draw the pattern, draw it full size and then fold it in half. This will be easier to do instead of trying to think of how one half of a tree will look. Don’t worry too much about how it looks. You will be surprised how good irregular lines will look in the finished ornament.
Glue the unprinted sides together and then start gluing to make a stack. Be sure to keep the folded edge straight so everything matches when the ornament is opened. I used a weight for a few minutes to make sure the glue would hold.
I traced around the pattern onto the stack and then began to cut. It seemed that more than three edges were too hard to cut, so cut what you can and then retrace the pattern from what has already been cut. When every edge has been cut, glue the two outside edges together and adjust the 3d figure until it is evenly spaced.
I added glitter and stuck an old hat pin in the top, but feel free to decorate any way you wish. I used a loop of fishing line for a hanger, but these ornaments will stand on their own if you want to use them in a centerpiece.

Happy Holidays and just one more ornament!
