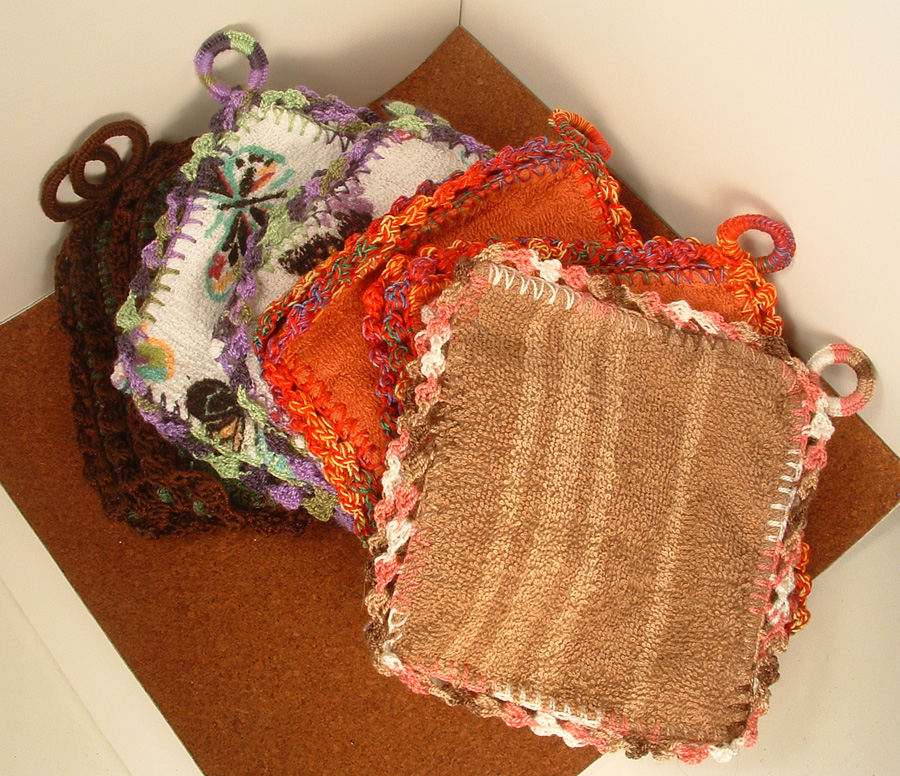
This is a very photo heavy how-to to make the best hot pads ever. I learned how to make these from my Aunt Harriet. She wasn’t really my Aunt, she was a friend of my Grandmother’s who the family adopted. Harriet Saine was a wonderful woman and is greatly missed.
Her hot pads are famous in our family. Every year at Christmas she would pull out this gigantic stack of hot pads and every woman (with a house or apartment) would get to pick two. Sometimes Harriet brought so many we would get to chose a third one. When Harriet passed away, I got her supplies for making these hot pads. In her supplies were her crochet hooks. There is one that is completely eroded down to a nub. I had no idea you could even do that to a metal crochet hook. I cannot even begin to create as many of these as Harriet was able to. I am amazed every year I am able to make these for the family that she was able to do this every year for as long as I can remember. This is my homage to Aunt Harriet.
The supplies for these hot pads are very few:
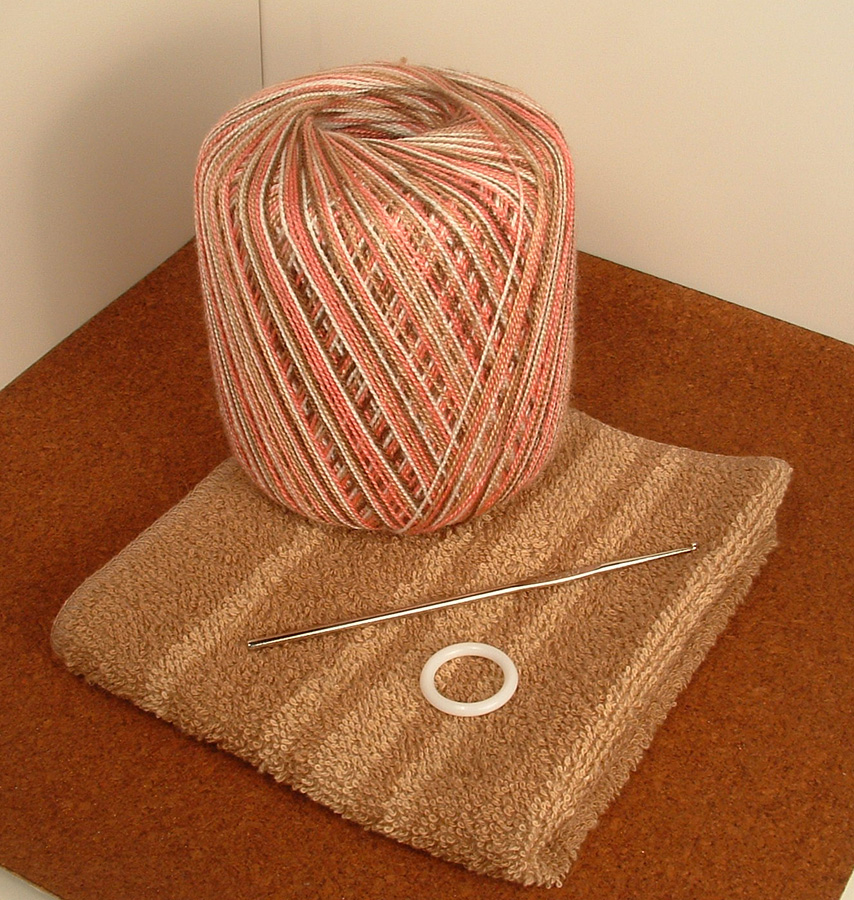
Cheap washcloth (this means no embroidered stripes or thick edges)
Crochet thread
1″ plastic rings
Crochet hooks (size 4/2.00mm and size 8/1.50mm)
Pins (optional, though recommended)
Scissors
You really do need to use cheaper washcloths for this project. Cheaper washcloths do not have a high thread count and make it much easier to get the crochet hook through the fabric for the first round of stitching. You also are much better off using plain washcloths, the ones with no embroidered stripes or thick edges. The stripes are very difficult to get a crochet hook through. That is not to say impossible, but it will hurt your hands if you have to force the hook through these stripes very often. I have somehow managed to collect around 50 washcloths to make into hot pads. Eventually, I will have to stop buying them.
The crochet thread can be any sort. I now have a huge collection of thread from variegated, solid, metallic, to threads with differing thickness. I personally prefer the variegated for my hot pads. I really like the effect it makes. I currently have 2 Rubbermaid tubs of crochet thread, and like the washcloths, I may eventually have to stop buying new colors. (I have a bad habit of buying every new variegated skein I find.)
For the plastic rings, you can use any size you prefer, but I tend to buy 3/4″, 1″ or 1 1/4″. I just have to make sure that I grab two of the same size for the set of hot pads (I always make sets of 2).
I use a size 8/1.50mm crochet hook for the first round of stitching and a size 4/2.00mm crochet hook for the decorative round of stitching. The size 8 goes through the fabric of the washcloth much easier and I like a slightly larger hook to make the edging, this is just personal preference though.
To make:
You fold the washcloth in half and pin it to hold it in place. As you stitch, it tends to drift and you will end up with a lopsided fold. Holding it with the fold closer to you, begin the first single crochet in the upper left hand corner, at the midpoint of the corner.

Continue your single crochet stitching around the corner, the first short side, next full corner, and to the folded edge. Keep stitching along the fold, next full corner, and up the second short side of the washcloth. You stop your stitching at the midpoint of the upper right corner. At this point, you have single crocheted around three sides of the washcloth (1/4 of the way finished).
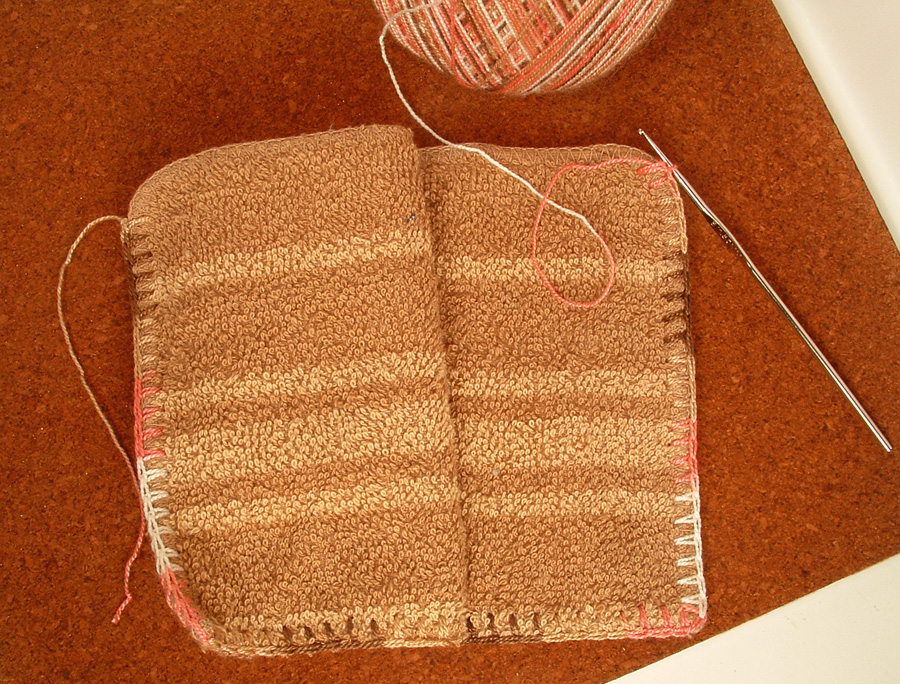
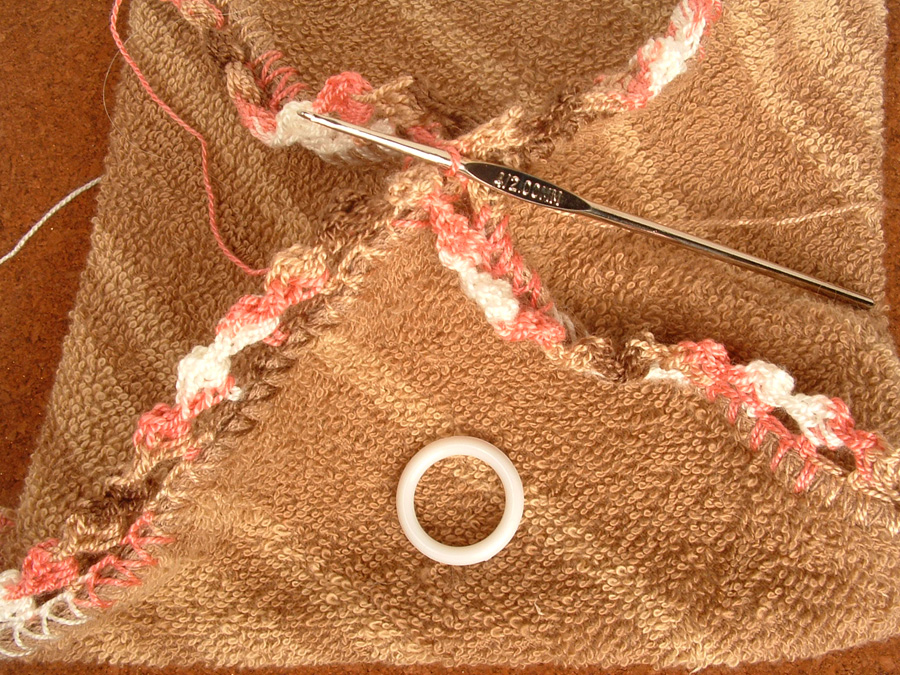
Now you need to open up the washcloth and put the two midpoints together (be sure to remove your pins). This makes what in the origami world is called a balloon fold. You connect all four corners of the washcloth at the top of the hot pad and this creates 4 triangle shaped wings. The photo below shows this fold in a flattened view from the top. You can see the four corners of the washcloth stitched together, although in the photo, the edges are not yet completely stitched. Putting a couple of pins into the wings will again help keep your folds straight and prevent you from having a lopsided hot pad.

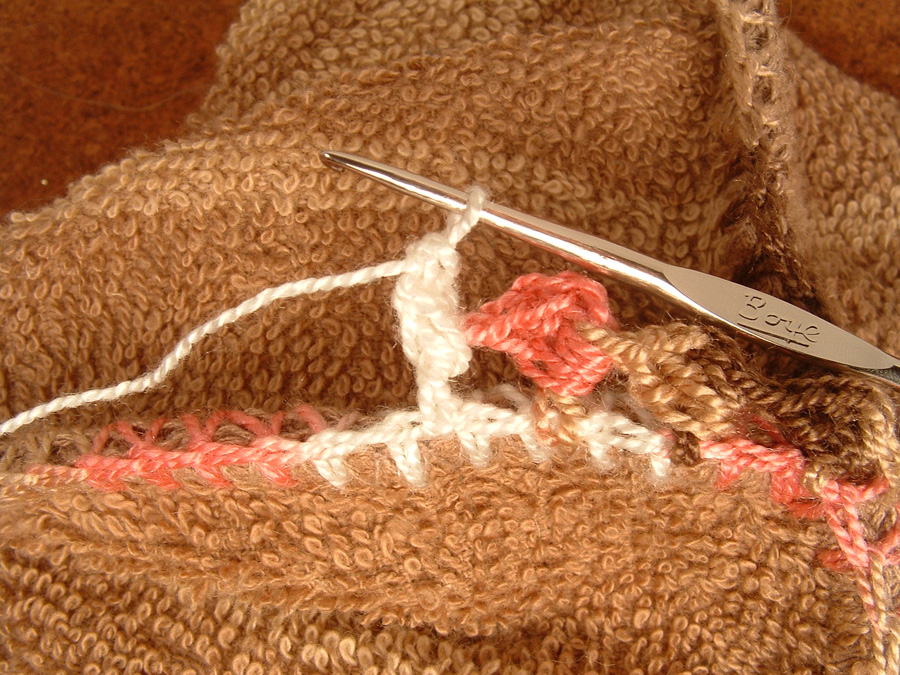
You stick your crochet hook through the two pieces of fabric at the midpoints of the corners and start single crocheting down the short side (from here on, all the sides are short sides). Continue around the washcloth (you will stitch over your first round of crochet as you go) until you are again back at the top. This should have closed all the sides and created the 4 wings and top and bottom points (1/2 way finished). You are now ready to start the decorative edging. You can also remove all the pins now.
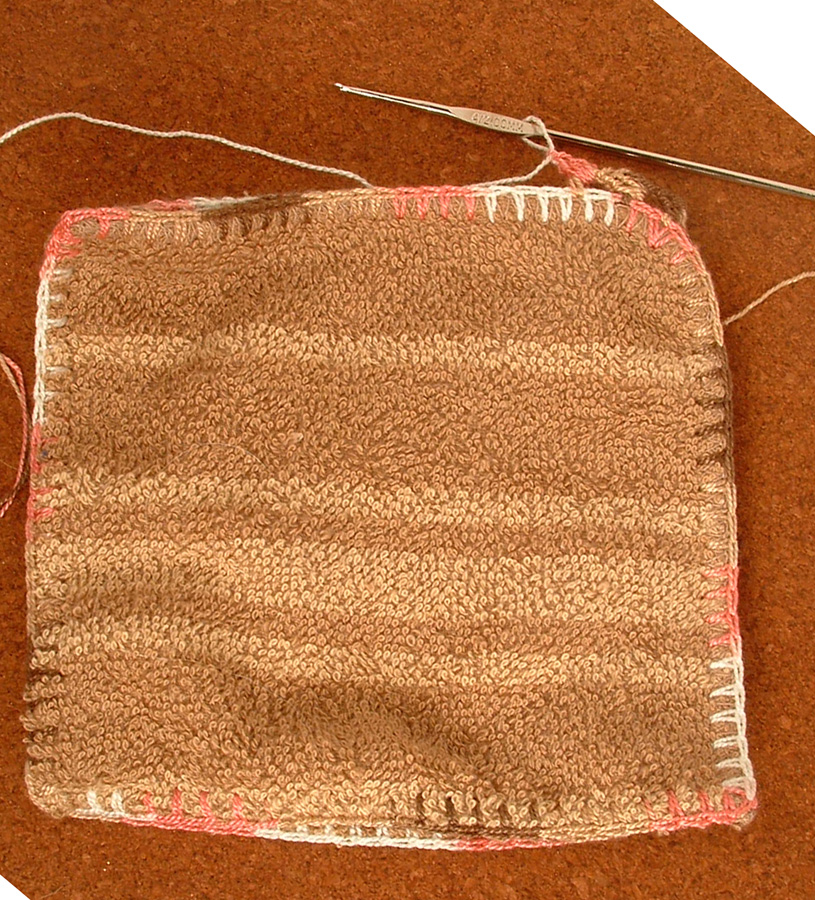
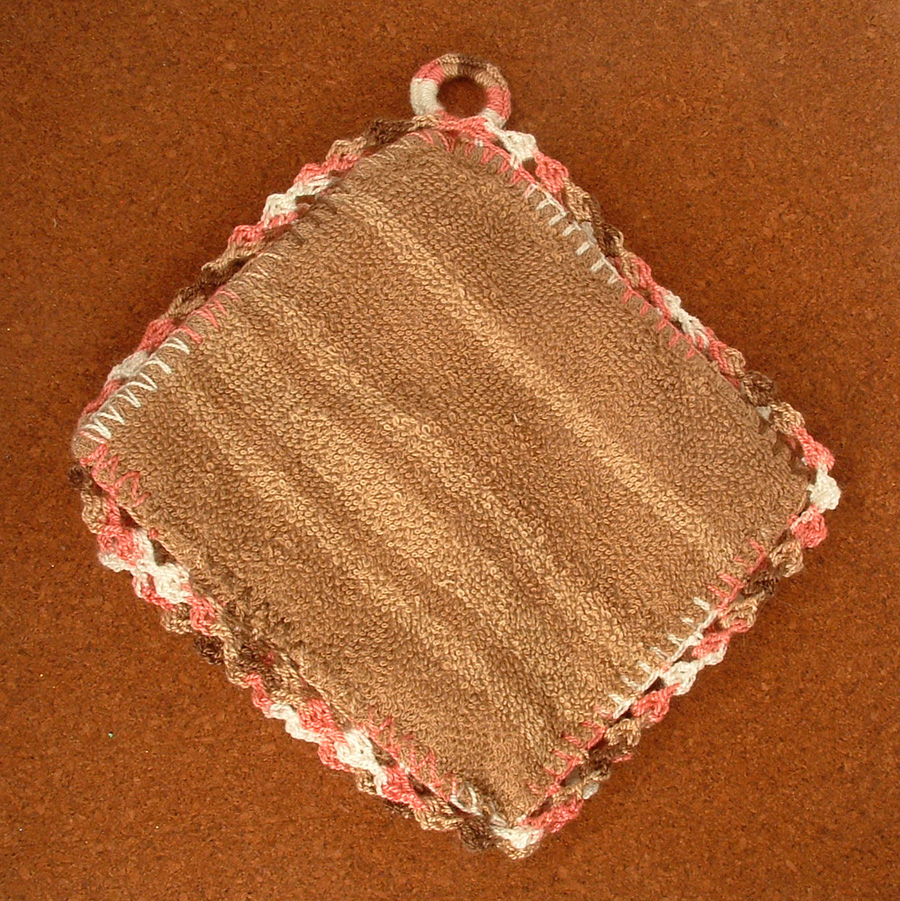
I switch hooks to the larger size 4/2.00mm hook and double crochet at this point. When I started making these hot pads, I used to make different types of edgings. You can experiment until you find one you like. I like this one and it is very easy and pretty. Single crochet twice and insert the hook under the first single crochet on the opposite wing of the hot pad. You will use this stitch as the post to stitch 3 more double crochet stitches around. Finish off with one single crochet. This completes one scallop. You will make one of these scallops in every other single crochet stitch from the first round.
dc in first sc, *dc around first dc 3 times, sc, skip single crochet and dc in next sc, continue from *


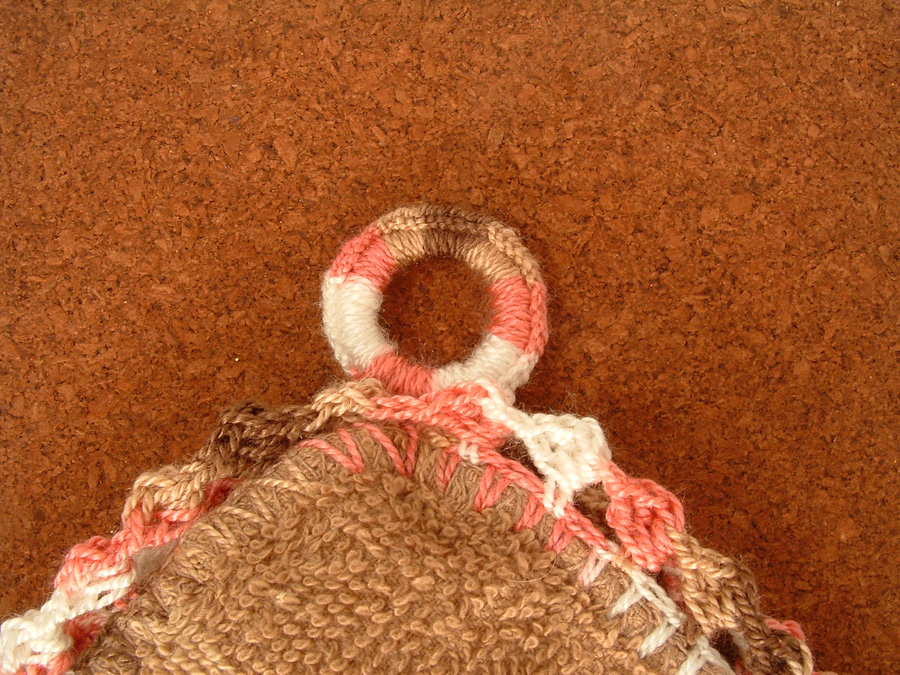
When you finish the edging and are back at the top of the hot pad you will add your plastic ring. You don’t have to add a plastic ring, but so many people like to hang their hot pads from hooks. You can skip this part entirely if you don’t want to hang your hot pads. You single crochet around the ring making sure to completely cover the plastic ring. I finish the ring with one final single crochet back into the hot pad. I tie off the threads and pull the ends inside the hot pad with the crochet hook.
You have now finished your first hot pad! As I said above, I always make these in pairs and would now start my second one. I can make one hot pad in about an hour (1 and 1/2 if I am interrupted a lot).
I have tried to photo the whole process, but if you have any questions, or want another photo, just let me know. I hope you enjoy these hot pads as much as I and my family do!
Happy Crafting,
Kristin