Category Archives: craft

Christmas tree ornament made of chenille pipe cleaners.

Ornament Advent: Day 19 Chenille Tree

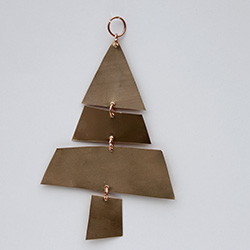
I knew from the beginning that I would just have to make a tree ornament for this Christmas advent. I have had one in mind, but I had no idea to execute it. I watched Loryn’s and Cheri’s tree ornaments get posted and loved each of them. My goal was to keep the ornament very simple and easy to make. This whole ornament probably took me about 30 minutes and I was Google Talking (can I use that that way?) with Mom which slows me down as we each share what we are project we are working on.

Christmas tree ornament made of chenille pipe cleaners.

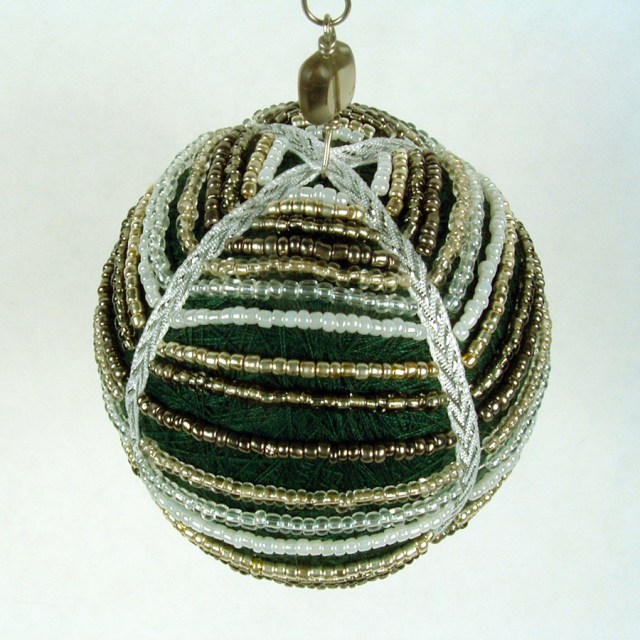
I used chenille pipe cleaners, cut in half, then wrapped candy cane style for the form of my tree. I know I keep mentioning temari lately, but I have a ton of supplies leftover and so I used some really cool fuzzy green thread from my temari stash to wrap around the chenille pipe cleaners. I really liked how the fuzzy thread looks like the needles on a pine tree. I tied the ends of the thread and glued my knots to ensure that they wouldn’t come loose.

Christmas tree ornament made of pipe cleaners.

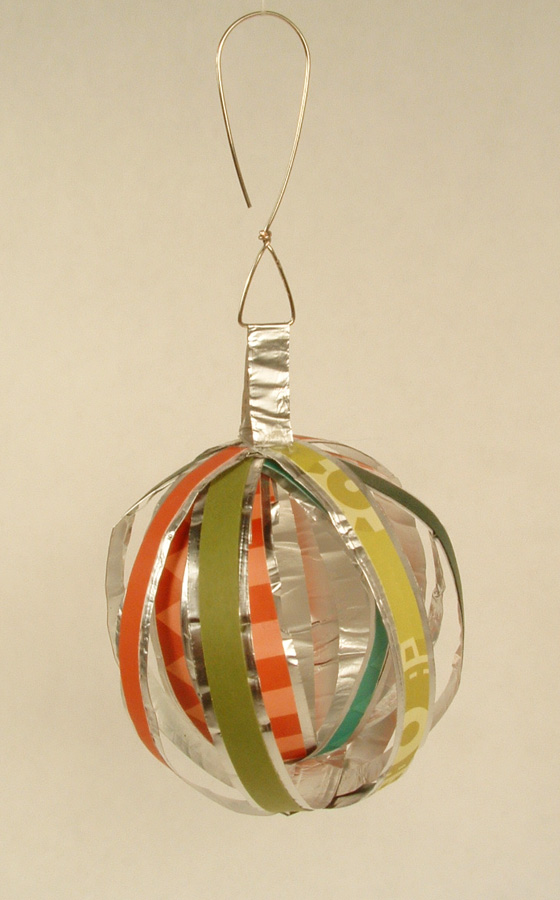
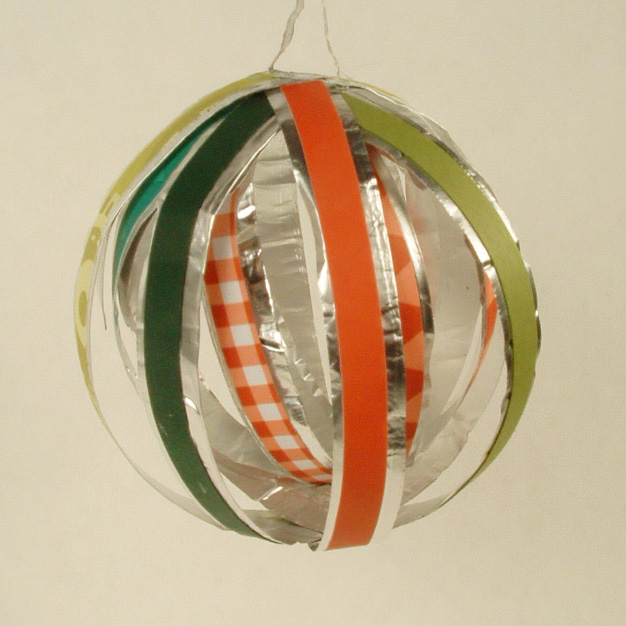
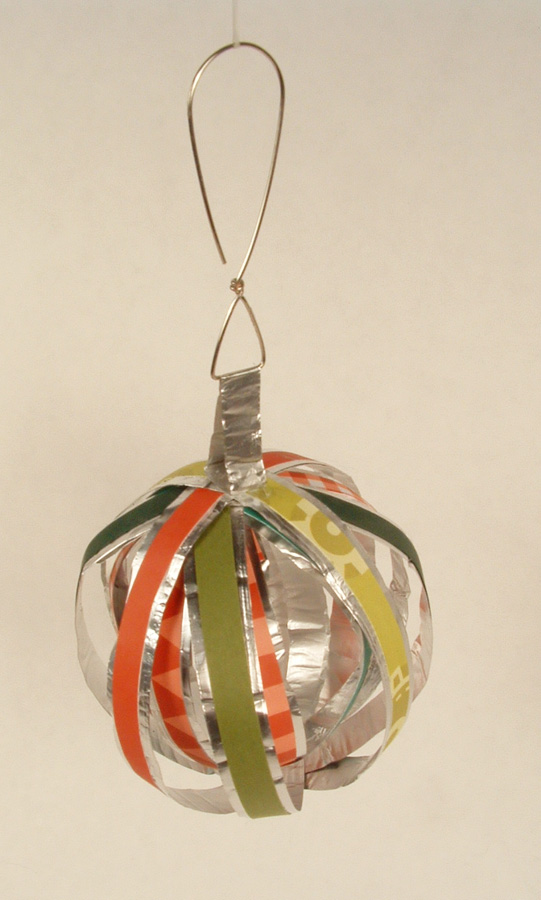
I grabbed all the thread wrapped pipe cleaners in one group. ran some silver wire down the middle, and approximately 1″ in on the pipe cleaners, wrapped the silver wire around the group to hold it together. Then I bent all the wires down over the silver wrapping so that just the wire stuck out the top. I used this bit of wire to string the wooden star bead and make the loop for the hanger. At this point, it you didn’t put the hanger on the ornament, it actually looks really cool just as a decoration for your table, although I would recommend putting something under it as the pipe cleaners are a bit scratchy.

Ornament hook made to look like a Christmas tree.

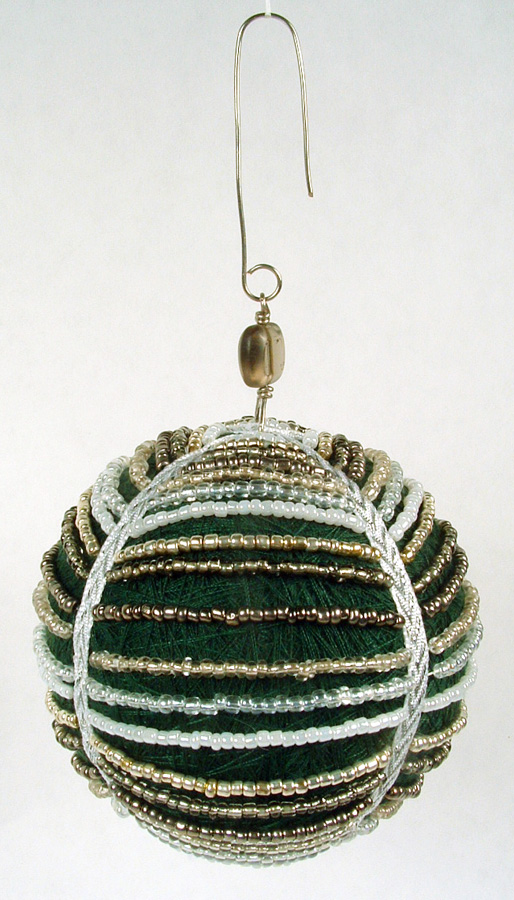
I love the hanger I made for this ornament. Whoever said that you needed to have plain hooks for your ornaments? I made the hanger out of more silver wire, just bending it into shape and curling the end so you didn’t poke yourself with it.

Ornament hook made of wire to look like a Christmas tree.

Happy crafting!

Kristin

Thread ball draped with glass seed beads sewn into ribbon.

Ornament Advent: Day 15 Beaded Ball

Gonna Go Back in Time!

Thread ball draped with seed beads

So, I was not feeling at all well this weekend and missed my Saturday post for the Ornament Advent. To make up for it, I decided to splurge and make a slightly more difficult ornament. For this ornament, I once again raided my temari ball stash and used one of the green balls for the base. It is around 3″ in diameter. I then wrapped the ribbon around the ball tacking it down first with pins and then with basting stitches.

Thread ball draped with glass seed beads sewn into ribbon.

The beads are from the giant spinner of seed beads that Mom and I bought to take with us when we went camping (yes, we like to craft while camping). I strung the beads and crossed under the ribbon, trying to make a slight draping effect while doing so. It was interesting how much heavier the ball got by the time I was finished. All those glass beads weigh more than you would think.

Green thread ball draped with stands of seed beads.

I then decided that I needed a bead topper and found a lovely smoky gray glass bead in my oddments and leftovers drawer that looks great. I made the hook and I was ready to go.

Green thread ball draped with seed beads.

I am really pleased with how this one turned out.

Happy Crafting,

Kristin

Ornament Advent: Day 17 Copper Christmas Tree

Christmas Tree made from scraps of thin copper.

I love copper, as you can see here. I had some of the copper disks left and decided to make a Christmas tree mobile ornament. Just cut your sheet copper into some irregular branch-like shapes, punch holes with an upholstery needle, and assemble with jump rings. After fifteen minutes of work, a cute ornament emerges! It stands about 5″ tall and looks great on the tree!

— Loryn

Copper Christmas Tree

Ornament Advent: Day 14 Dinosaur Dandies

dinosaurbuddiescheri2

Cheri: This little group of dinosaurs are all dressed in their finest silver and glitter and are ready to decorate your tree.

Supplies:

Toy dinosaurs

Silver paint

Glitter

Oven-bake clay, red and white

Eye hooks

Paint your dinosaurs. I think you could probably spray paint them, but it is pretty cold here and I don’t think it is a good idea to spray paint in the house. (LOL)

After they are painted, (maybe 2 coats), put another coat of paint or sealer on them, and while they are still wet, sprinkle them with glitter. You could probably put a pretty heavy coat on, but I wanted them to look like they had been “kissed” with snow.

Knead a small ball of white clay and red clay, make a small coil with the white clay and roll it into a circle. Then make a small white ball for the tip of the hat. Make a small Hershey’s kiss with the red clay and stick it to the white circle. Attach the pom-pom and bake the clay according to the instructions. After they are baked and cooled, apply a little clear sealer and sprinkle with glitter.

Attach the red hat to the dinosaur with hot glue and then decide if you would like them to be doing something. I made a music book for one of the dinosaurs to make him look like he was singing and the other one with the outstretched hands was given an ornament to hold. These were both hot glued on.

I hope you like the ornaments I have made for our Christmas Advent Countdown. Wow, Christmas will be here before we know it.

dinosaurbuddiescherigawker1

Ornament Advent: Day 13 Beaded Copper Wire Tree

tree2


For Day 13 of the ornament challenge, I knew I wanted to focus on copper. I ultimately settled on a wire technique from my jewelry-making days. I used 18 gauge copper wire, and large vintage white glass beads. Jump rings made on a size 8 knitting needle hold everything together. The heavy-gauge wire makes for a large ornament – it’s nearly 4″ tall. It was a fun ornament that went together in a few hours!

— Loryn

tree2cl

Ornament Advent: Day 11 Foil and Scrapbook Paper Ball

I really wanted to make a simple ornament with aluminum foil. I have been wracking my brain trying to think of something and it hit me while I was driving home from work. I could make an awesome ball with strips of foil and paper.

Ball Christmas ornament made of strips of paper and aluminum foil

The ornament is a ball inside a ball. The style is reminiscent of a ribbon temari ball  that I made years ago. I cut strips of aluminum foil 1″ wide and strips of scrapbook paper 1/4″ wide (all the strips were roughly 12″ long). I folded the foil lengthwise to not quite in half. I then folded the other edge to give myself two nice, smooth edges. This made the foil strips about 3/8″ wide. I ran a bone folder over the foil strips to make them smooth and shiny. I glued the scrapbook strips to the foil strips and let them dry.

Paper and aluminum foil Christmas ornament.

After they were dry, I cut the strips to 10″ long, just to make them easier to handle. Then I wrapped the strips around a solid object (I used a small glass for the outer ball and the glue bottle for the inner ball), glued the ends down, and cut off the excess. I made four smaller rounds and 4 larger rounds. I made the inner ball first then added the larger strips to make the outer ball. I glued the top and bottom where the strips met.

Ball ornament made of strips of paper and aluminum foil.

I made a small circle of foil about 1/4″ wide and glued that to the top of the ball and attached a homemade hook and I was finished. I think the whole ornament took me about an hour to make.

I am really happy with it, although it is rather delicate. At least if it gets bent out of shape it is really easy to fix.

Happy crafting!

Kristin

Ornament Advent: Day 9 Upcycled Felt Bird

feltbird

Loryn:  For Day 9 of our Ornament Advent challenge, I’ve made a bird from old sweaters that I felted. Wool felt is expensive, so upcycling old sweaters is a crafty way to have a good supply cheaply. I sewed the bird together using blanket stitch. (For a tutorial, see my felted ornament post from last Christmas). I wanted the bird to be delicate, so I used fine gauge sweaters so the felt isn’t too heavy. I loosely stuffed him with cut up felt scraps, which gives an old fashioned look.

feltbirdcl

For the details of the face, I used gold embroidery floss for the beak, and a bead with a few blue backstitches for the eye. He went together quickly and looks great on the tree!

— Loryn

feltbirdgawk

Felt Christmas Tree ornament

Ornament Advent: Day 7 Felt Tree and Wreath

Today’s ornament was a massive lesson in frustration. Or rather, the ornament that you don’t see was. My original idea for an ornament failed spectacularly. My craft table is covered with parts, bits, and pieces. Around 10:00pm I realized that it was never going to work. Then began the frantic search. I dug through all of my supplies in the hope for a lightning strike. I didn’t get one until I was texting my sister that I was ready to give up. Right after I hit send, it hit me.

Felt Christmas Tree ornament

I love felt and I had a lot of fun last year with the pins and sequins ornament I made, so why not combine the two. The base of this ornament is a ball I made for temari. Temari is a Japanese art form that I played with a few years ago and kept all my supplies (go figure). You make the ball by taking a very large handful of stuffing and wrapping it with thread (one way to make the ball anyway). A lot of thread. You keep winding the thread around and around and around the stuffing until you get a round ball. This particular ball was my attempt to create a flattened ball to showcase a design on the front and back. I never did get around to completing the temari, but it gave me an excellent form to create my Christmas ornament.

Felt wreath side of the ornament

Next, I cut strips of felt around 1/2″ to 3/4″ wide and started cutting these strips into triangle pieces. Then I took my piles of pins and sequins and pinned the triangles to the ball to make the images of the wreath and tree. I used some fuzzy white thread to make a sort of frame to separate the two images by sewing it around and around the ball. I made a quick hook and voila! I was finished.

Side view of Christmas ornament
Here you can see the fuzzy white thread.

I really like the effect of the multiple colors of green for the Christmas tree and the stars in the wreath really make it pop. You could use anything for the form of the ornament, Styrofoam would be very easy. I imagine a Santa Claus/reindeer ornament would be very cute. Anyone want to try it? Send us your picture and we will post it! I would love to see someone else’s version.

Christmas tree side of ornament

Just goes to show that necessity really is the mother of invention.

Happy Crafting!

Kristin

Ornament Advent Day 6: Sunday Comics Christmas Ball

christmascomicsornamnet6

Cheri: I love comics, funnies, and cartoons. And I really love using comics for craft projects. This one is a favorite of mine. I hope you like it.

Supplies:

Sunday Funnies

Circle template (cup, glass, anything circular and in whatever size you would like, my circles were about 2 ½ inches in diameter).

Glue (any kind is fine).

Cardstock, (just a small circle is needed).

6 inches of ribbon

Instructions:

Fold the Sunday paper up so you can cut as many circles at once as possible. Then cut all of the circles in half. When you roll the paper, you want the circular edge to be the outer rim of the cone. Make about 45 cones and lay them aside.

Cut a smaller circle from the cardstock, this is just for a base to glue to.

Lay your cones around the cardstock circle, with the points touching, when you like how it looks, put a small amount of glue on each one and glue down. Place the next row of cones, try to put these in the little valleys created by the first row. You will be using a few less. Finally, glue one straight into the center, there should be a small spot for it. Do the same on the other side of the circle of cardstock.

Look at your ornament, and if you notice any thin spots just glue another cone into the spot. If you would like, you can glue more cones inside of the first cones. This gives the ornament a rose bud look.

What a fun project to make with the funnies, just make sure you read them first.

Merry Christmas

funnypapercones


christmascomicsornamnetgawker4


Ornament Advent: Day 5 Tiny Paper Stars

tinystarsfinal

Loryn — I see a lot of ornaments made the way these are – just glue three or more circles together – but I thought they would be really fun made with a star paper punch. They make tiny ornaments, just a few inches tall, and they’re perfect for a miniature tree.

tinystars

My paper punch is from Martha Stewart crafts. I cut a few stars from different colored scrapbooking papers, then folded each one down the middle. Glue three together around a piece of embroidery floss, then put beads on the bottom.

tinystarsfin

I like the single bead better than the one with two beads. Bells would be fun, too. They need some weight to make them hang right. The ornaments take just a few minutes to make, so you could decorate a mini tree in no time!

— Loryn

tinystarsgawk