Crafty Challenge 3: Paper-Mache Bowl

It must be said; better late than never. I am really (and I mean really) late getting my photos for this challenge posted. I have been really busy doing some painting (don’t worry, you’ll get to hear about and see it at a later date) and have just not had a whole lot of time to really do much else but sleep and work.

I had a hard time with this project for several reasons. First, I try to keep my hoarding down to a minimum and don’t have a whole lot of storage space right now, so my collection of incidentals was rather small. Second, for these challenges, I have been really trying to step out of my comfort zones craft wise and this has made for some uncertain outcomes. The project was to use the packaging or incidentals that come with a purchase. It must be the stuff that you would usually throw away or re-use for another packing job, not the purchase itself, in other words, free.
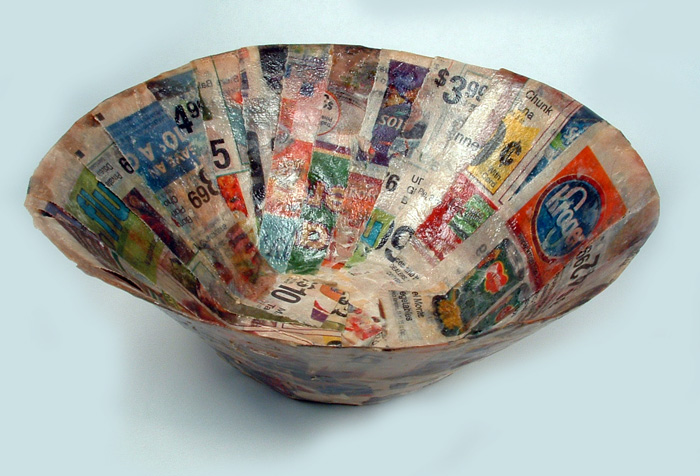
Paper-mache bowl
I love the slightly aged look the shellac gave the newspaper.

After all the plaster and paper-mache (or papier-mâché) work we did for our Halloween costumes, I thought this might be a good medium for this challenge. It wasn’t a bad idea, just an unknown path for me. I definitely learned a lot from this project.

I wanted to make a bowl for the little stuff that seems to get thrown on the counter. As it would be in the kitchen, I figured what better paper to use than the Kroger coupons I get every week (I do most of my grocery shopping there). This proved to be a good idea as the paper Kroger uses for its ads tears beautifully into strips. I then draped the paper-mache strips over some wooden bowls I had. I like their shape but not the material. I had covered the bowls with Vaseline to keep the strips from sticking to the bowls. Notice I am using the plural here for bowls. I managed to turn out one good bowl from the two starts. I then let this dry.
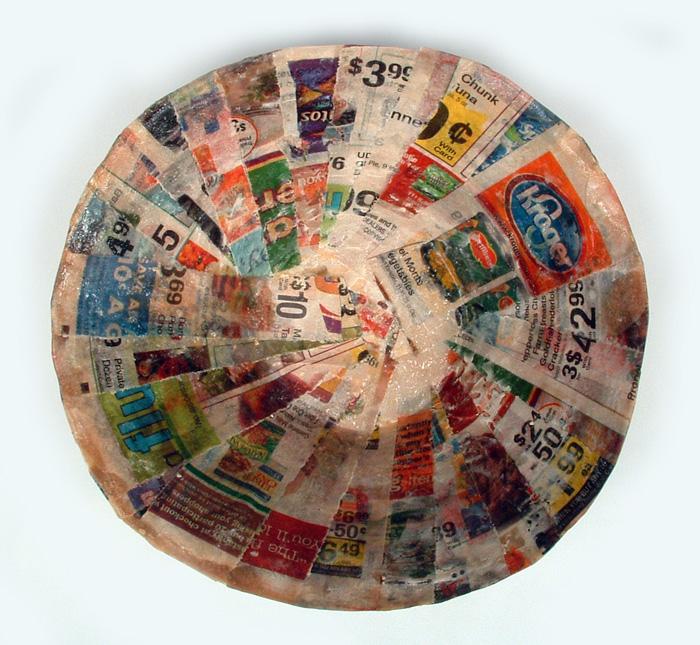
Paper-mache bowl.
I intentionally made sure that one of Kroger's logos would be visible.

I am glad I used small bowls, as larger ones would not have worked at all. The Vaseline seemed to prevent the paper-mache from drying completely (this process works just fine with plaster, but not so much with paper-mache). I managed to pry the shapes off the wooden bowls, but pretty much destroyed one of the shapes in the process. I used some of the paper strips from the destroyed shape (which were not sticking together) to fix the salvageable one and this time I used some wood glue to keep the strips down. I let this dry overnight and started shellacking the bowl the next day. I did multiple coats all over the bowl. I really liked the effect of the shellac as it gave the newspaper a lovely aged look.

At this point, it was time to present our projects and mine was really not dry. I kept it on some wax paper to present to my Crafty Sisters and it worked out fairly well. It is now a week and a half later and I have just finished taking the photos you see here and the bowl is completely set and hard. It has turned out just like I wanted it to, I just needed to be a LOT more patient. I whined a lot about this project and I apologize profusely to my Crafty Sisters who had to listen to me. I am really happy with my final project although it took over a week to get there.

Paper-mache bowl.
I did trim the top edge of the bowl with scissors to give it a clean edge.

Lessons learned: 1. be patient; 2. do not use Vaseline with paper-mache or at least put plaster on top of the Vaseline and then do the paper-mache; and 3. shellac takes a long time to dry.

Happy crafting!

Crafty Challenge 4: Vintage Coach Willis

Crafty Challenge 4
Vintage Coach Willis Bag.

Lynne: I really enjoyed our crafty challenge 3. I thought all of the projects were fabulous and I’m still experimenting with the different papers in my new notebook. But now, we must turn our faces to crafty challenge 4. I am told that this challenge was my idea, but I don’t remember and I don’t want the credit.

We are lovers of handbags and Kristin has this gorgeous Coach vintage purse. The challenge is to make a purse based on the spirit of this Willis Satchel. The project does not need to be a copy nor does it matter what materials we use; but the finished item must be in the spirit of the Willis design and done by Sunday, November 20.

A handbag? Really? My idea?

Crafty Challenge 4
Side view of vintage Coach Willis Bag.

Daily Squiggle

Daily SquiggleBut I tell you, I saw something under that foot. 

I like drawing elephants. Their trunk and ears define them so well that just a few lines can bring an elephant to life. I used a yellow marker for the base of the squiggle then I used colored pencils to add the details and the shading. The browns are layers of yellow, blue and red.

I have never believed that elephants are afraid of mice, but this elephant has seen something under her feet that she wishes were elsewhere.

Daily Squiggle

Daily Squiggle
Hey! Wait! I'm coming too.

Lynne: I have been experimenting with my markers this past month. This squiggle is done with several layers of marker and colored pencil. I have found that on this paper I can only use two layers of marker and two layers of pencil before the paper stops accepting any more color. I just end up pushing the bottom layers from side to side with any additional layers. I like this notebook, but I am beginning to experiment with different papers.

This squiggle girl is running to or from something. Maybe it’s a representation of how fast Christmas is coming and how I would like time to slow down a little.

Ballet Dancer Collage

Ballet Dancer Collage
Framed ballet dancer with butterflies collage.

Ballet Dancer Collage

Cheri: I love ballet. I like to watch it. I liked to dance ballet when I was younger. And I like any art form connected with it. When I decided to make this collage I  wanted to convey this in this piece.

The idea for this started when I bought a book at a garage sale that was a child’s book of ballet. The book was from the 60’s and it had a very stylized look to it. As I flipped through the book I came across this picture of a dancer in an arabesque. This picture was going to be the focal point. After I cut the picture out I flipped it over and felt the reverse side with the text was the better option.

I went through my scrapbook paper until I came across a pattern that I liked. Then I chose a frame. (I have several to choose from). I used spray adhesive to glue the paper to a mat and sized it to the frame. The frame says a lot about the piece and often if I can get the frame correct the rest of the piece seems to fall into place.

The fun part begins after that. I colored the dancer in and then I took little pieces of newspaper wrapped them around the end of the pencil to give them the form of flowers. I then dipped them in glue and placed them as the skirt for the dancer.

As I have said before I have all kinds of odds and ends that I picked up and sometimes these pieces just kind of call to me to be placed in a picture. The round paper disc was one of those. It has a vintage feel to it and I felt that the placement of it made it feel like the dancer was balancing on the tag. The butterflies were cut from tissue paper and have a really nice light, pastel, look to them.

Last but not least is the dancer that seems sad in the corner. She was another figure that I cut out from the book and I chose not to have the complete figure show for this. The piece does say some things about life to me, and I think that is what really makes me love collage so much.

Ballet Dancer Collage
Close-up of the dancer and her butterflies.
Ballet Dancer Collage
Curled newspaper wrapped around a pencil forms her skirt.
Ballet Dancer Collage
My incomplete sad ballerina in her corner and a close-up of the label tag.