
-Cheri
-Cheri

-Cheri

Lynne: I suppose that Crafty Challenge 4 really was my idea. I have been carrying the handbag I made for Crafty Challenge 2 and it was not really designed for everyday use. So I needed a bag to carry through the winter. The crafty challenge seemed like a good way to make myself make one.
I believe Cheri deserves the blame for the Coach Willis idea. The Willis bag is a deceiving design. The rod and handle assembly is complicated and that type of handle puts a particular stress on the closing clasp. This means that the bag needs to be made of strong reinforced material and that the position of the clasp has to be precise for the handbag to hang right. But what you don’t know beforehand can keep you from ending before you start.
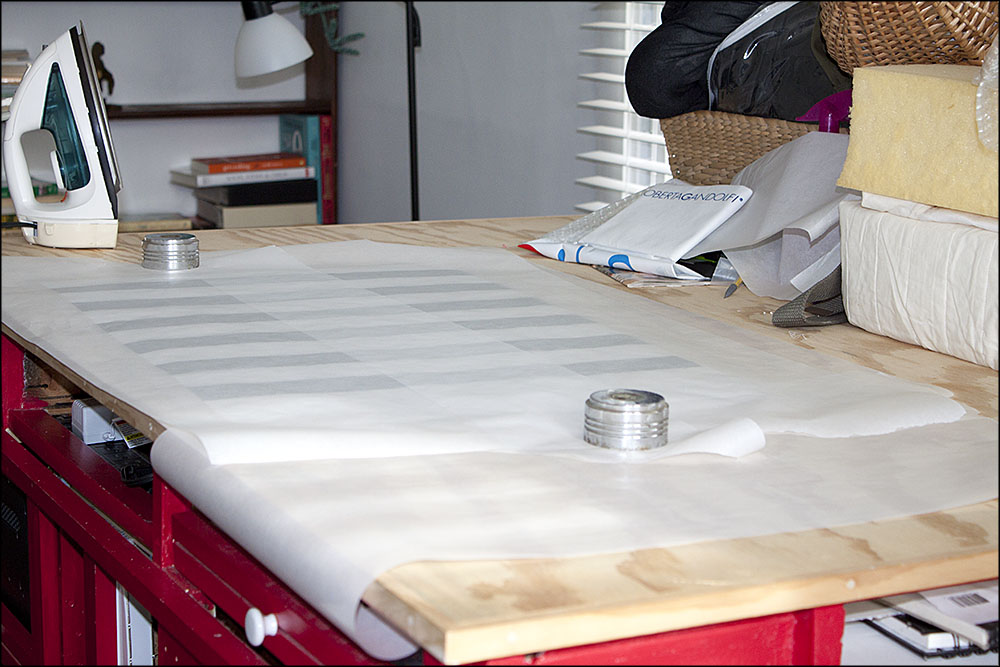
Since I was still fascinated by the possibilities of fused fabrics, I wanted to make the handbag from plastics. At a garage sale the other day, I found two white carrier bags for 10 cents. These were department store bags that were made of the same material you find in the rectangular totes that are sold in supermarkets to reduce the number of plastic bags they give you. This material is some type of polyester and it does fuse with an iron. Not easily, but when used with other more amenable plastics it works.
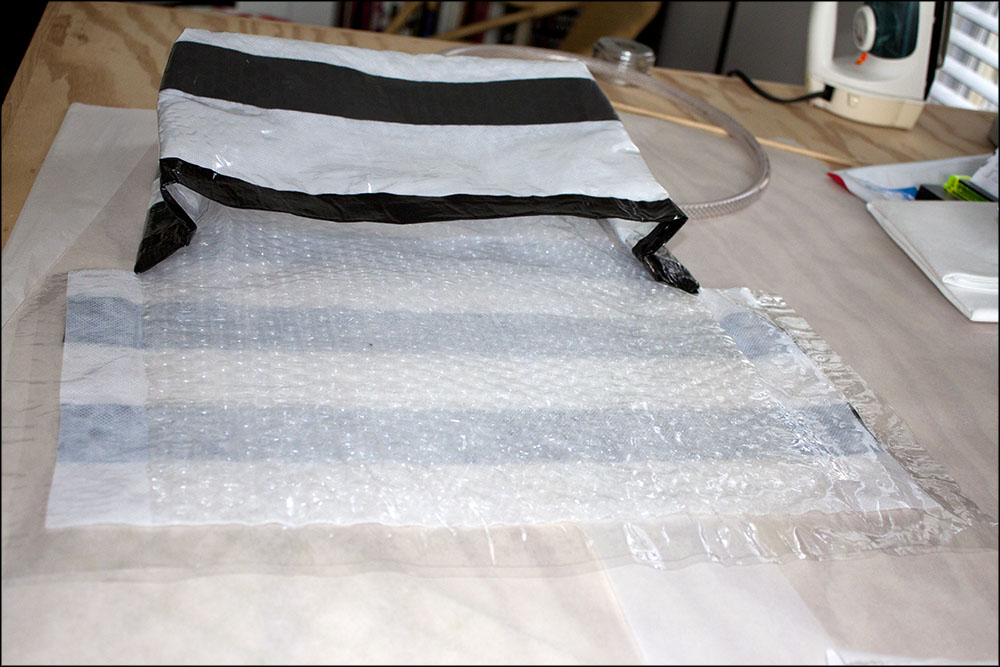
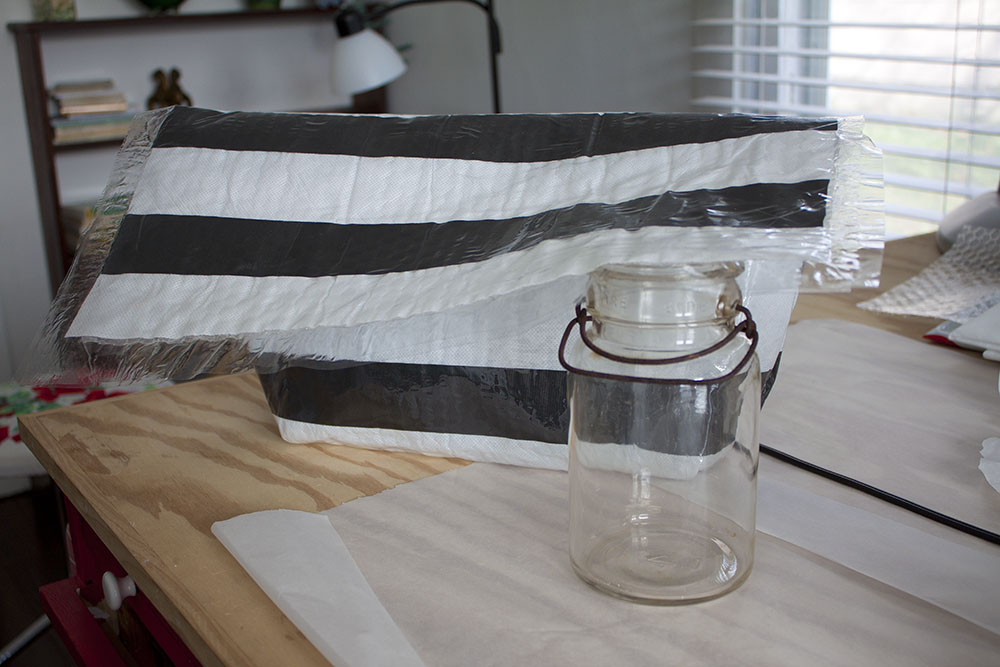
I made a fused fabric sandwich of bubble wrap, carrier bag and plastic vinyl sheeting. Each layer of the fabric has its own purpose. The bubble wrap provides sturdiness and a unique texture that I am particularly fond of. The carrier bag provides color and the plastic vinyl fuses everything together while making a durable surface for the exterior of my handbag. I used black duct tape to add stripes to the white of the carrier bag and to reinforce the top of the base of the bag.
I fused the layers into a rectangle of the size I wanted following the general directions of the duct tape bag described here. I added extra inches for the flap because I did not want to put a flap on after the main body of the bag was done. I wanted the strength of one continuous layer of fabric.
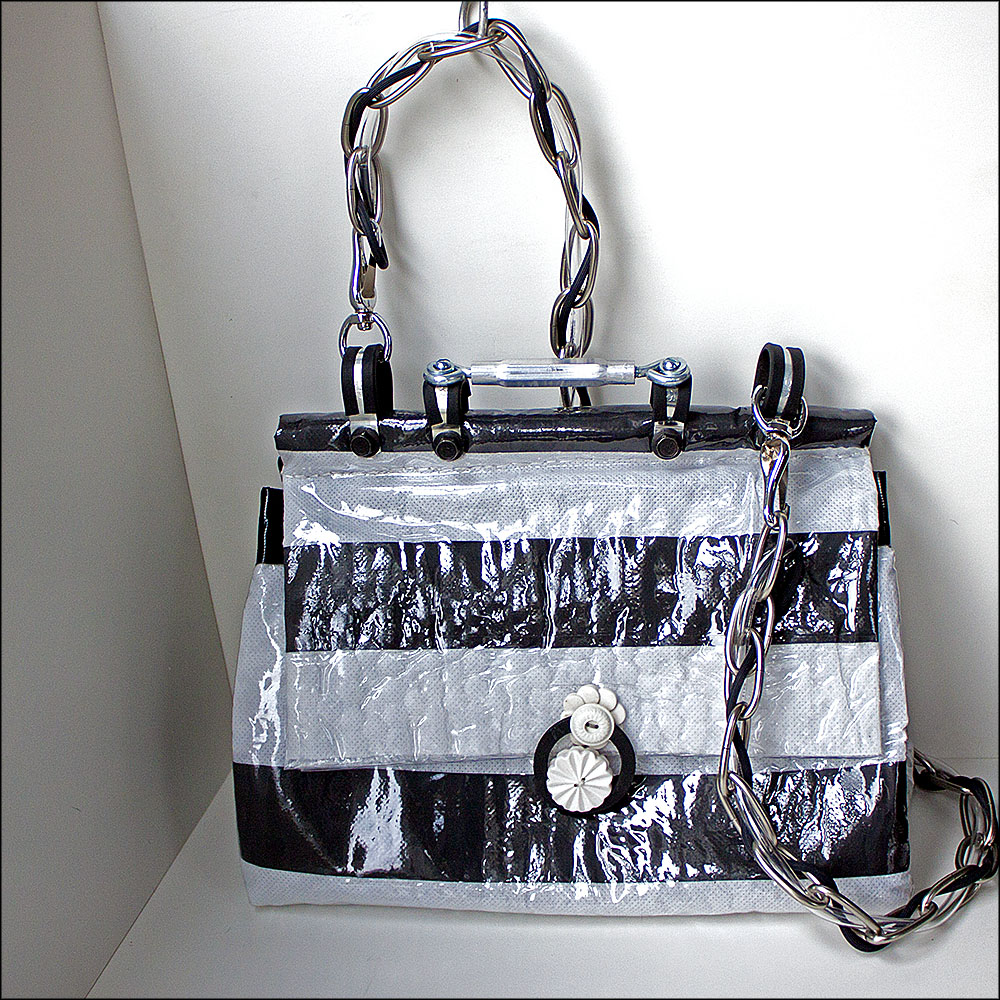
The hardware for the handle and rod assembly was the hardest and the most interesting part. I have always liked the leather-laced chains of the Chanel 2.55 bags and I had several feet of wonderful chain left from when Loryn and I put up new chandeliers in my living room and studio. The shape of the chain made it difficult to use standard rings to attach it to the handle. This meant I needed to go to the hardware store. I love our local Arone Hardware store because there are lots of parts and pieces that are not packaged and can be bought one at a time. I needed the plastic sheeting for the fused fabric, stiff plastic hose for the handle rod and smaller, clear tubing to lace through the chain. I thought the chain needed a little more cushioning and I found that the spline used to make screens made a great black accent in the chain. Rubber-coated hose clamps, fasteners, nuts and bolts and a turnbuckle for the handle made up the rest of the hardware I needed.
I don’t want you to think that I had much of a plan when I went to Arone’s. I spent a lot of time wandering from one aisle to the next just picking up things and checking to see if they would fit together. The staff there are great and let me look without interruption, although I see the guys shaking their heads every now and then. That is one of the fun things about these challenges, we are going into areas we have never been before and anything can happen. A terrible mistake can turn out to be the most brilliant idea ever and vice versa of course.
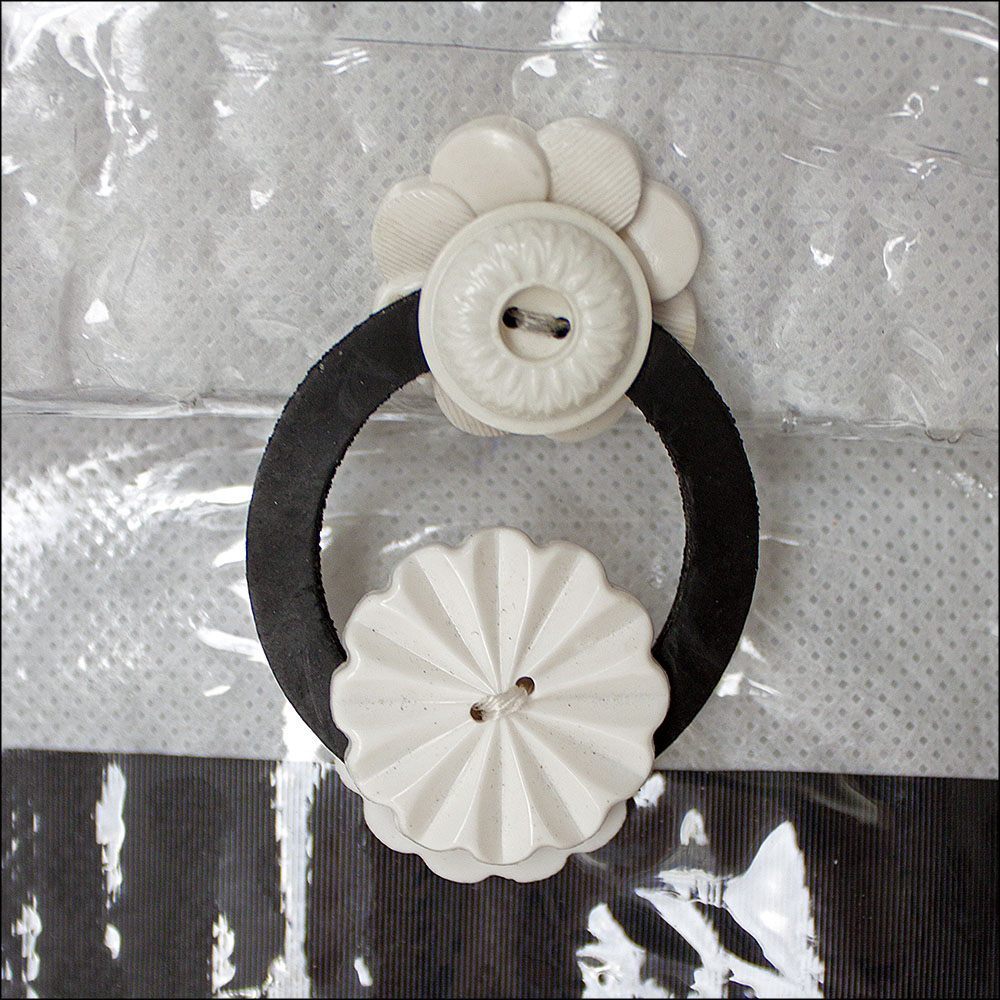
The clasp closure was the next most difficult thing. I did not want the weight of a hasp type of hardware attached to the front fabric of the bag. I wanted to use some of our vintage buttons and I thought that buttons sewn together with a button on the interior would help carry the weight of the bag through the whole structure of the fabric. The bottom of the clasp is 4 buttons sewn together. Two buttons with a small button in between to make a channel for the gasket loop were sewn to the outside of the bag and another button was sewn to the inside of the bag. The top of the clasp is 3 buttons sewn together with a rubber gasket. Small button, gasket, large button were sewn to the outside and another large button was sewn to the inside. I put holes in the gasket with an awl and just sewed through it the same time I sewed the buttons.
The clasp was also a process of trial and error and I had buttons strewn everywhere on my table. I was getting desperate for a loop when Cheri showed me a zip-lock bag full of washers she had just picked up at a garage sale. I casually snagged the largest one and went home to finish my bag.
The handbag is much roomier than I thought it would be and I really enjoy carrying it. It has a solid feel without being too heavy and I know there is not another one out there like it.
Click the thumbnails below for a gallery view of the photos.


Click on the thumbnails for the gallery view.
-Cheri

-Cheri

-Cheri


Loryn: I’ll admit that I wasn’t sure about this challenge. It’s not that I don’t like making bags; quite the opposite, and that was the problem. I’ve been making bags for many years, and I always put a lot of time and effort into nice details and finishes. So how would I do that with the limited time allowed for a crafty challenge?
Typically, my bags are lined and interlined, with lots of pockets inside. To cut down on the time needed, I wanted to use fabrics that didn’t need linings or seam finishes. Luckily, I had two thrifted items that would be perfect. The wool felt came from a Soviet military coat, and the piping is from a fuchsia 1980s ultrasuede men’s sport coat. All of the “raw edges” are on the exterior of the bag, and the construction seams are exposed.

To mimic the look of the Willis bag and to brighten up the dark felt, I put piping at all the seams. I’ll admit, I love piping, and put it on lots of projects. I used cotton sash cord from the hardware store inside the piping.

For a closure, I used a buttonhole from the coat as my tab. My initial idea was to use a magnet closure, but it wasn’t strong enough. The clasp holds the entire bag together, so I changed to the button tab.
The coat had green topstitching, and I decided to match it, both so I could use the premade buttonhole and because it is a nice contrast to the fuchsia piping.

I used a dowel in the top to match that detail on the inspiration bag. The metal rings are looped around the dowel, with slits in the felt so I could put them in place. I love working with a fabric that doesn’t ravel!

It’s hard to tell from the pictures, but this is a pretty big bag. It’s 15″ wide, just under 14″ tall, and over 5″ wide. It’s perfect for work!

Because of the single layer construction, I didn’t put any pockets in the bag. I didn’t want any pocket seams to show on the outside of the bag or any extra layers of fabric to mess up the lines of the bag.
Once the challenge was over, I decided to make up an organizer to put inside the bag:

The divider is two-sided, with heavy cardboard in between to give it shape. I made special pockets to hold my phone, glasses, pens, and iPad. I lined some of the pockets with ultrasuede to protect screens and lenses. Not only is it really handy, but it gives the messenger shape. I love using it! Loryn


-Cheri

Cheri: Whew, what a challenge this was. It was tough one, but, it was also an awesome one. I think I spent the first week trying to decide how and what I wanted to make my purse out of.
I have always enjoyed doing machine embroidery, so I decided that I would embroider the outside of my purse. I was pretty sure in my head of how I wanted it to look, so I looked around at my fabric supplies, (which is not nearly as grand as Loryn’s), and chose what fabric I wanted to use.
After one failed attempt with the fabric I had on hand, I decided to buy some new fabric. I headed to our local Wal-Mart, which has just put in a small fabric selection, after our Jo-Ann’s closed, and chose a half yard of brown canvas, I also picked up some lining fabric that went with the brown nicely. With fabric in tow, I headed home.
This was Thursday, I had 3 more days to go. I have to admit that my style of crafting is a tad bit unique. I don’t really measure anything. I will try to use a straight edge to get the proportions right but more often than not I will use the selvage edge to base my edges on. And so the great purse challenge began for me.
I worked until midnight on Thursday, midnight on Friday and started working again at 2:00 pm on Saturday. Most of the time was spent with the embroidery and the base of the bag, and then the unspeakable happened, I accidentally melted some of the lining of my bag with the iron.
I knew that this was not going to be an easy fix. So after entertaining several options I picked up some other fabric I had on hand from Loryn’s stash and started working with this. Essentially, I started again from square one.
I spent several hours on Saturday redoing my purse and in the end I was really happy with how it turned out. It looks like me and I am really quite proud to carry it.


-Cheri
