
-Cheri
-Cheri
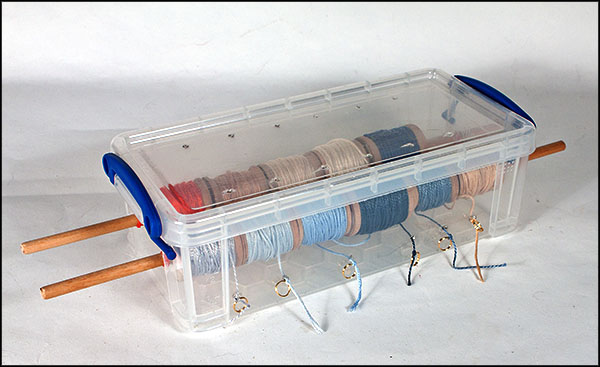
Lynne: This project told me something about myself that I did not realize before. The objects I create come from a need for something rather than from the parts themselves. I had to think of a need and then decide if the spools could fit that need.
I spent most of the two weeks drawing spools in my notebook. I find that drawing my ideas first helps me find problems that could occur before I put any permanent glue in place. After pages and pages of spools in all different configurations, I found that the container I wanted for my colored pencils could not be made with the spools I had. I had to find another need.
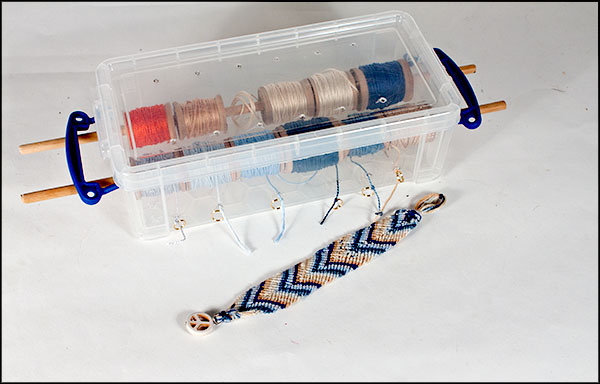
Since Kristin and I have been back from our Indiana Dunes trip, I had been wanting to make a bracelet that reflected the colors of Lake Michigan. Friendship bracelets have been the rage all summer and I thought a woven chevron would give me the effect I wanted. However when I went to get the lengths of embroidery floss I wanted, the bobbins kept falling to the floor always ending in the dustiest corner of the room. I decided I needed a covered box with a bobbin that would roll and there I realized was the use for my spools.
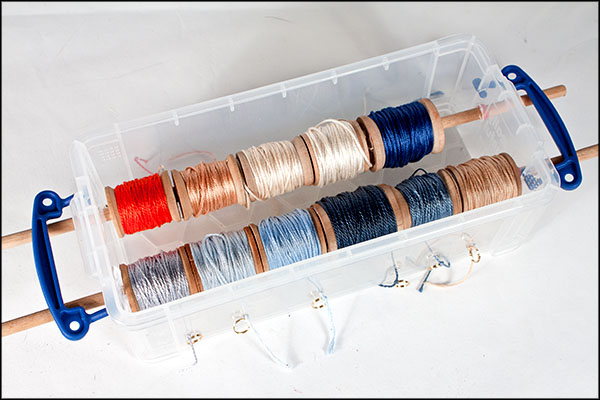
I wound the floss I needed for the bracelet project onto some of the wooden spools. I threaded the spools onto two 12 inch dowel rods and put the rods into four holes that I had put in the plastic box. I used a heated awl to start the holes and then a craft knife to make them just a little larger than the dowels.
I originally poked holes in the lid for the floss to come out of the box, but the threads tangled every time I removed the lid. I put new holes near the bottom of the box which worked great. I tied jump rings to the thread ends so they would stay in place. I cut off the jump rings when I need floss and retie them when I have the length I want.
The spools can be changed depending on the colors needed for a project and the floss stays clean and neatly wound. The bottom photo shows the completed bracelet.
We were not allowed to see or talk about anyone else’s project before the time limit was up. It was a lot of fun to get together and see what we had all come up with. The projects reflected each of us perfectly. We had a lot of fun with this and are already planning more.


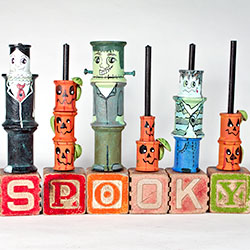
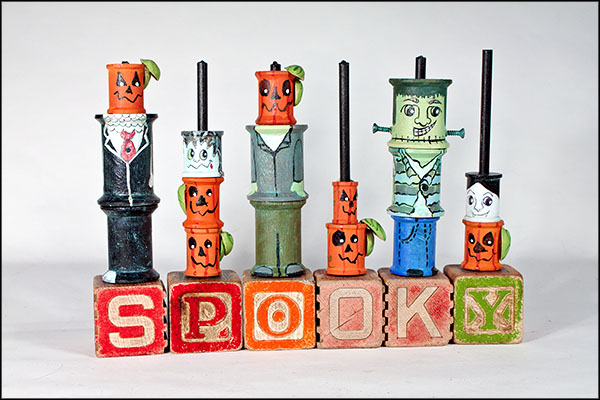
Cheri: This spool challenge was a lot of fun to do. I think all of us had a really good time and our projects were all so different. For my spool project I decided that I wanted to do a Halloween project. That being decided, I realized that I wanted to paint some monsters on the spools and then I thought it would be so cool to be able to change the parts of the monsters around. I spent a few hours painting the spools and then I had to decide what I wanted to display them on. I had picked up some old alphabet blocks maybe a year ago and they just had the right feel to them. I started working with the letters to decide what I wanted to spell and finally felt that “SPOOKY” was a very appropriate word. I drilled a small hole in the top of the blocks and then I cut 5 pieces of dowel. I then hot glued the dowel into the blocks. My son suggested that I paint the dowels black so they didn’t stand out so much, and voila!!! My project was completed. I think we all did an awesome job and I can’t wait to get started on our next project.
To see the other entries in our spool challenge click here: spool towel holder, embroidery floss project box and a study in teal wreath.


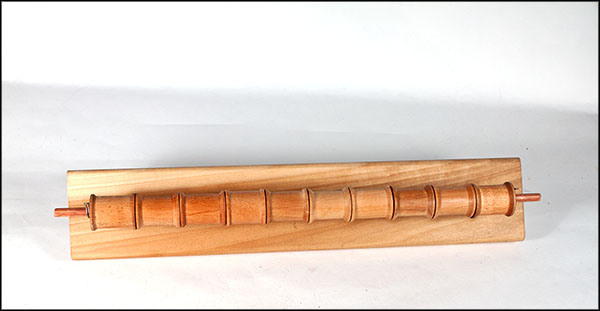
Loryn: One of my first ideas for the spools was a towel holder that would take advantage of the spinning spools to make getting towels on and off easier.
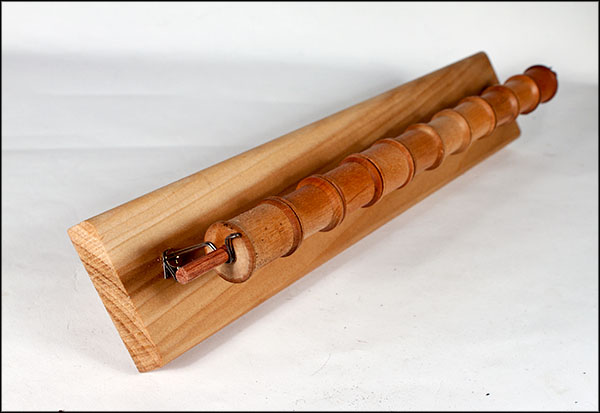
I used a piece of scrap wood left over from the new wood trim I put in my laundry room. My first thought was to use some wire from the garage to hold the spools, but it sagged too much, so I bought a 1/4″ dowel. I had also planned to use two more pieces of scrap wood to hold the wire at each end, but it just looked too big and clunky. I didn’t have any hooks or strapping that would work, and I didn’t want to make another run to the hardware store.
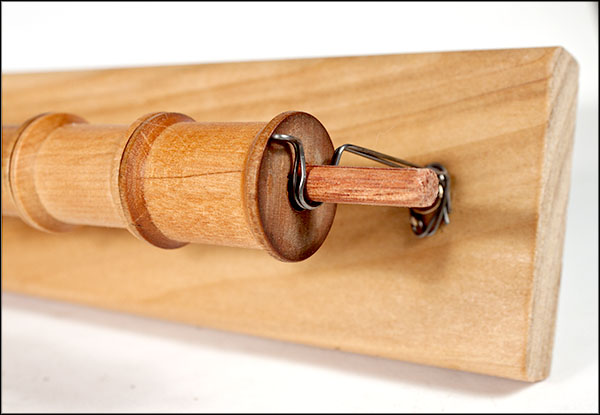
The wire was still sitting on my work table, so I tried bending it into a hook. Doubled, it’s strong enough to hold the dowel full of spools. The same screw that mounts the towel holder to the wall also holds the wire hook on. Simple and efficient! I can see a lot of uses for hooks like that, so expect to see more down the road!
The trim wood I used is poplar, which would normally be painted. I wiped everything down with a little boiled linseed oil to make it look a little more finished. I really like the look of linseed oil, but make sure that you spread your rags out flat to dry in the sun before throwing them away. Linseed oil can spontaneously combust if you wad up soaked rags and toss them in the trash.
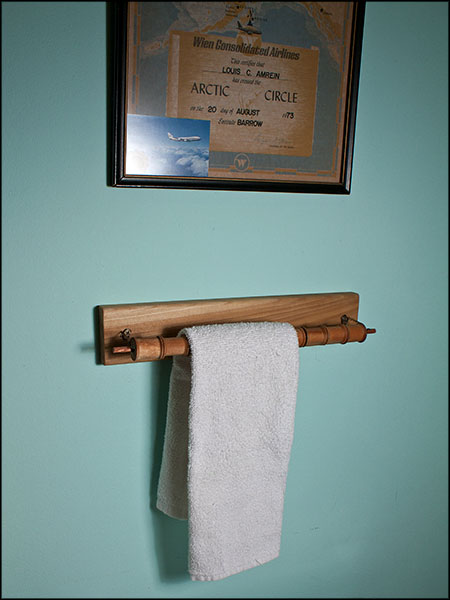
And here it is in my bathroom! I hung it next to the sink to hold hand towels. The wire isn’t heavy enough to hold wet bath towels, but it’s perfect for this use.
So, we posted two weeks ago about our latest activity, the Crafty Challenge. This challenge was to use old thread spools in a craft; any sort or craft. There were no limits and you had two weeks to complete the project. Today we unveiled our projects and here is mine!
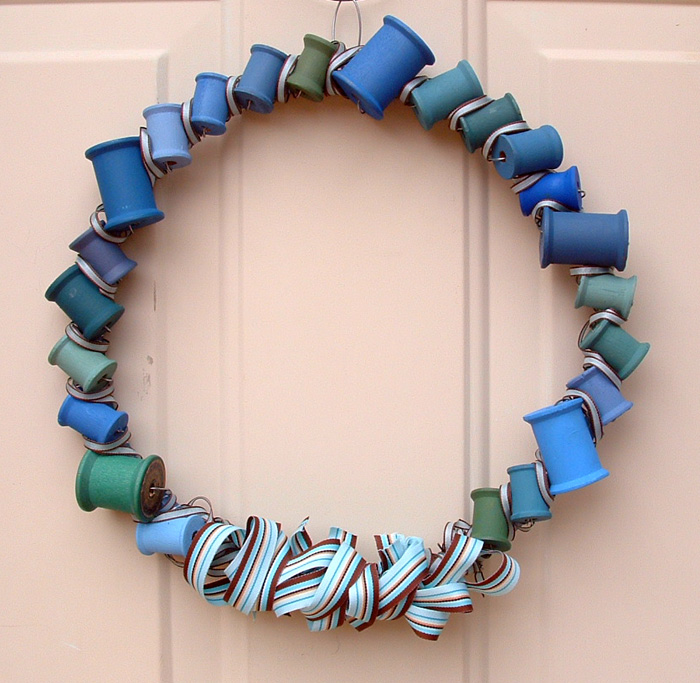
I decided to make a wreath. This is usually Cheri’s forte, but I thought I could do something that was good, clearly not up to her standards (I will have to get some pics of the wreaths she has made for me posted sometime), but pretty.
I have to admit that I procrastinated the whole two weeks away and actually made this in about 2 1/2 hours this afternoon. First, I had to paint the spools. I used some acrylic paint I had leftover from an art class. None of the colors are repeated and in fact one of the spools is not painted at all, it is a lovely green color. You can see it below with the labels still in view.
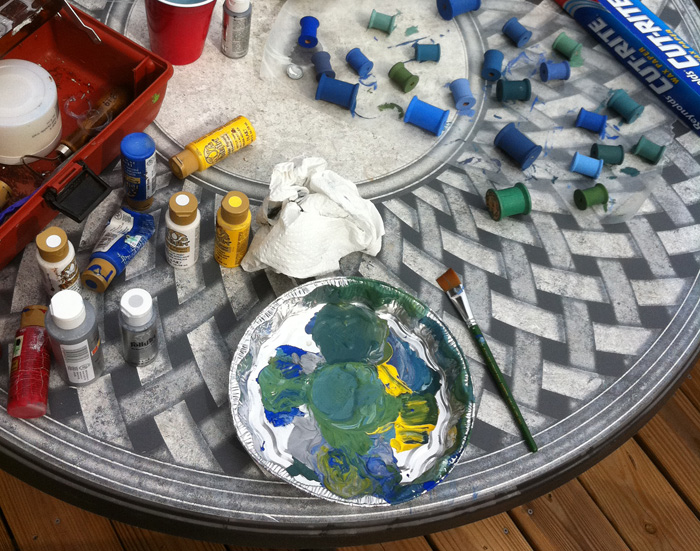
I used some heavy gauge wire and some plastic tubing to make the wreath base. I pulled the wire through the tubing and then wired the ends together. I then made the loop hanger. I covered the tubing with some pretty blue ribbon to hide the base and blend it into the background a little.
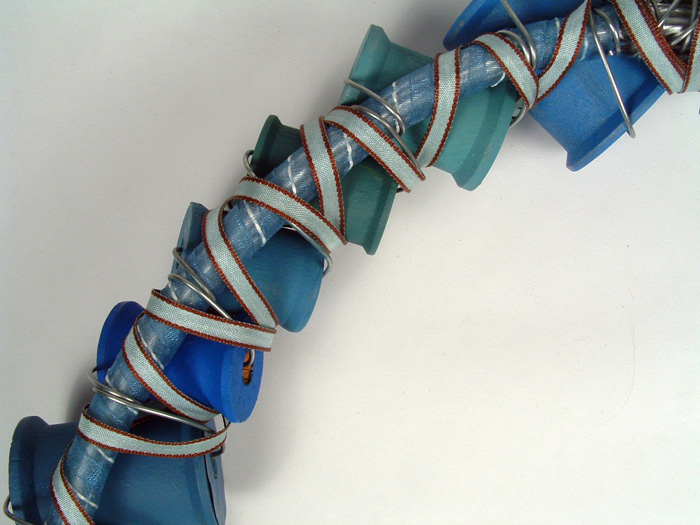
Then, I wired the spools to the base. We actually only received 22 spools for this challenge and I did not have enough to go around the entire base, so I designed a large bow-type decoration at the bottom of the wreath to hide this fact.
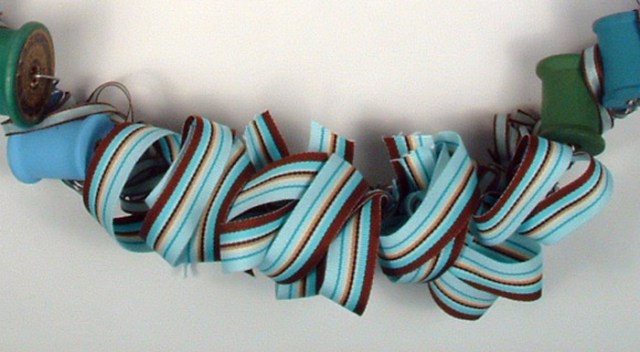
I wrapped the thin teal and brown ribbon all around the spools and then layered it very heavily in the bottom space to give some fullness to the striped bow.
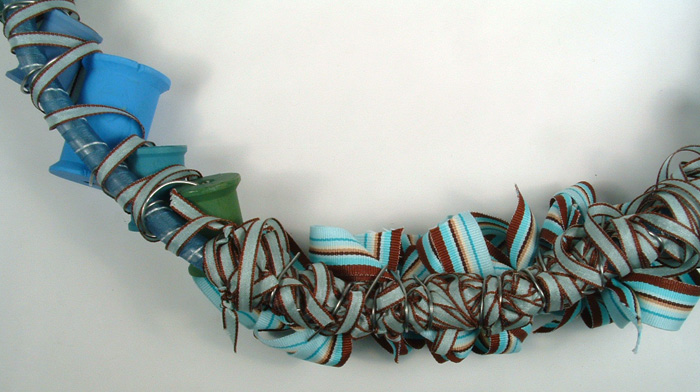
The striped ribbon is cut into several pieces and each curled and then wrapped around the wreath base with some more wire. This gave me a long bow instead of a really large bow.
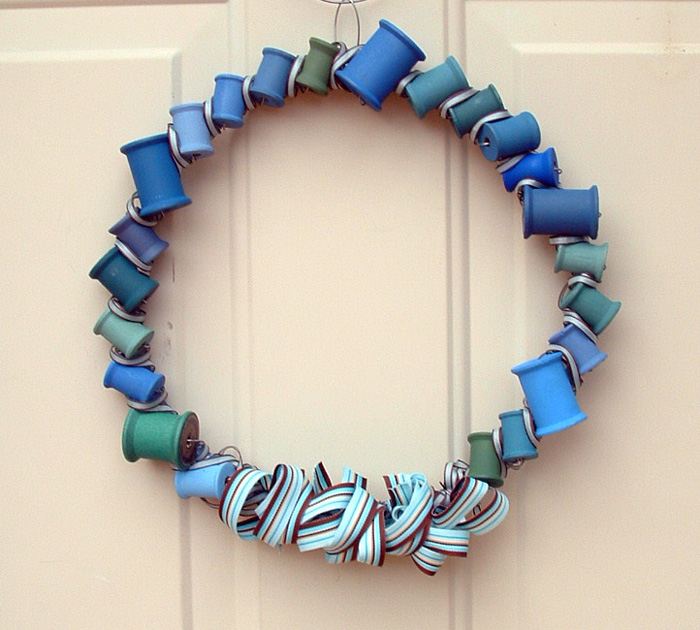
I am really happy with how the whole project turned out. I was so surprised by the variety of each of our finished crafts, so keep on reading! I can’t wait for the next Crafty Challenge (to be announced tomorrow)!

-Cheri

-Cheri

-Cheri

I decided that I wanted to see what different positions I could put the squiggles in. I was amazed at their flexibility. These are done with markers with colored pencil shading.
-Lynne

-Cheri

