
All posts by thecraftysisters
Ornament Advent: Day 21 Christmas Paper Popper
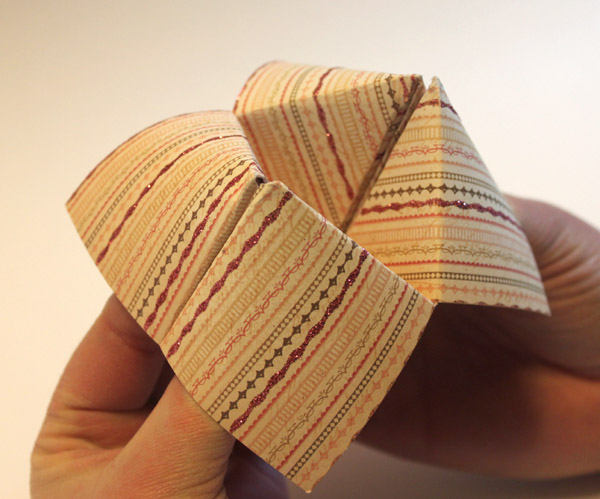
This is another blast from the past. I haven’t made one of these since second grade! We called them Poppers, though some people call them fortune tellers, and others call them “that paper thing that you move back and forth.” For this Christmas-themed one, you get holiday messages inside, rather than the name of the boy who loves you!
If you can’t remember how to make one from your elementary school days, here’s a quick tutorial! To start, cut a square piece of paper. I used an 8″ square piece of double-sided scrapbook paper. It’s very pretty, but a little stiff.
Fold the paper in half, unfold it, and fold it again the other direction. Once you’ve done that, fold each corner into the middle, like this:

Once you’ve folded all four corners (and gotten glitter everywhere!), flip it over, and fold the corners in again. That will give you this:

Once you have all four of these corners folded into the middle, fold it in half, like this:
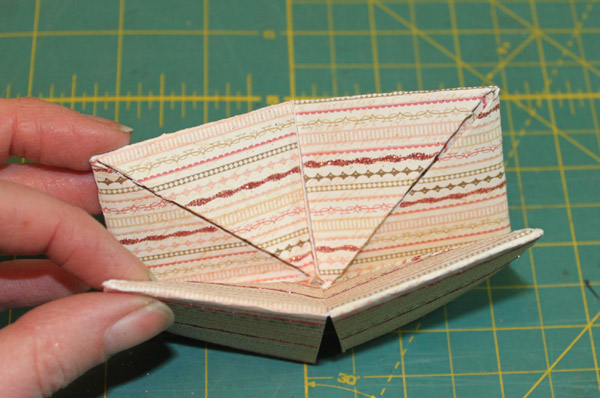
Once it’s folded in half, pop out the corners. Now you can find out the Christmas message in your future, or you can try to catch your little sister’s fingers in it!
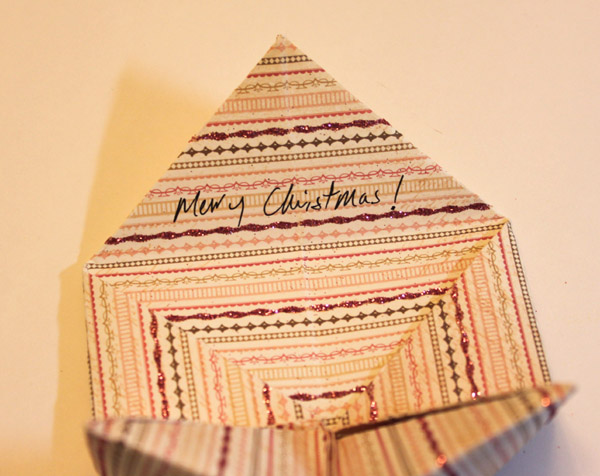
To hang on the tree, put a grommet in one corner. Merry Christmas!
— Loryn
Ornament Advent: Day 20 Wrapping Paper Christmas Tree
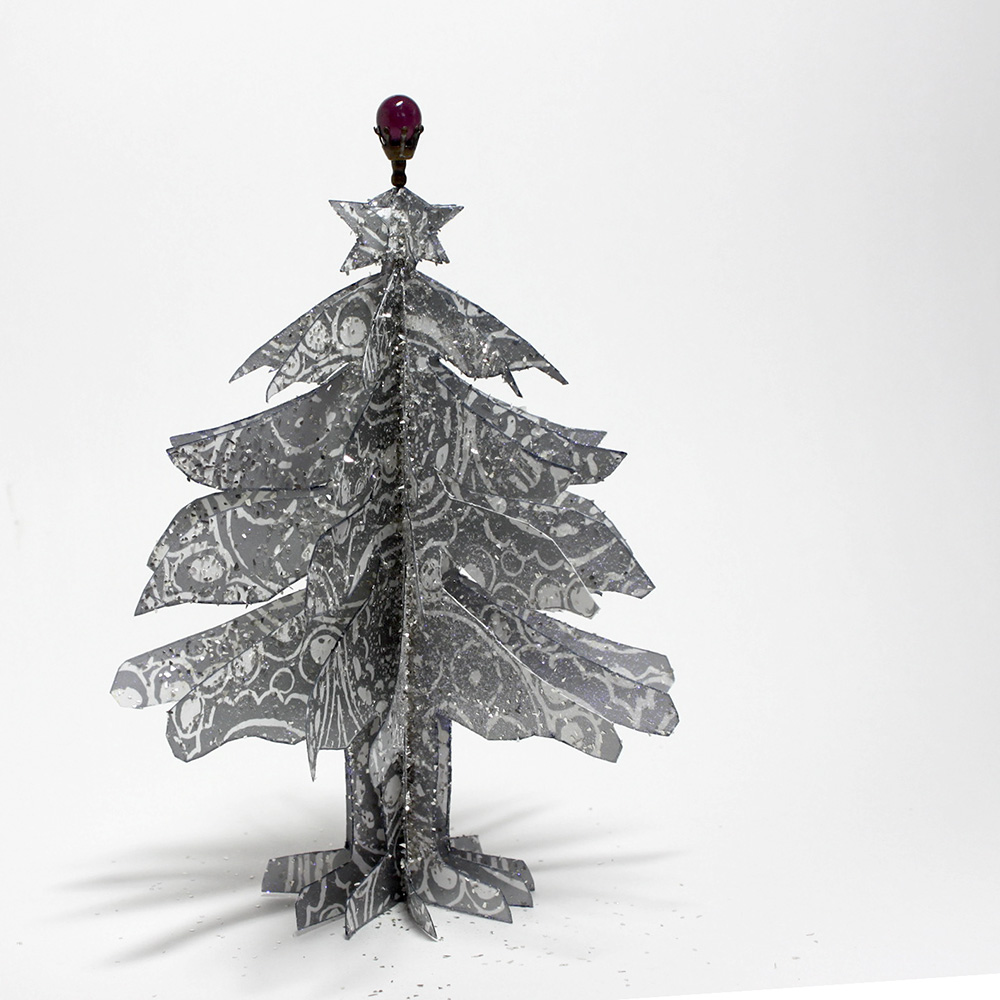
Lynne: I liked using scraps of wrapping paper to make my last ornament and I decided I would try to use up more of the pieces I have lying around. I found this tutorial on design and form with these terrific paper ornaments, but I don’t have that precision in my paper-cutting skills. Thus I drew a very loose, cartoon type tree and used that for my pattern.
You will need:
a 6 x 6 inch square piece of paper for the pattern
approximately 10, 6 x 6 inch square pieces of wrapping paper
a glue stick
When you draw the pattern, draw it full size and then fold it in half. This will be easier to do instead of trying to think of how one half of a tree will look. Don’t worry too much about how it looks. You will be surprised how good irregular lines will look in the finished ornament.
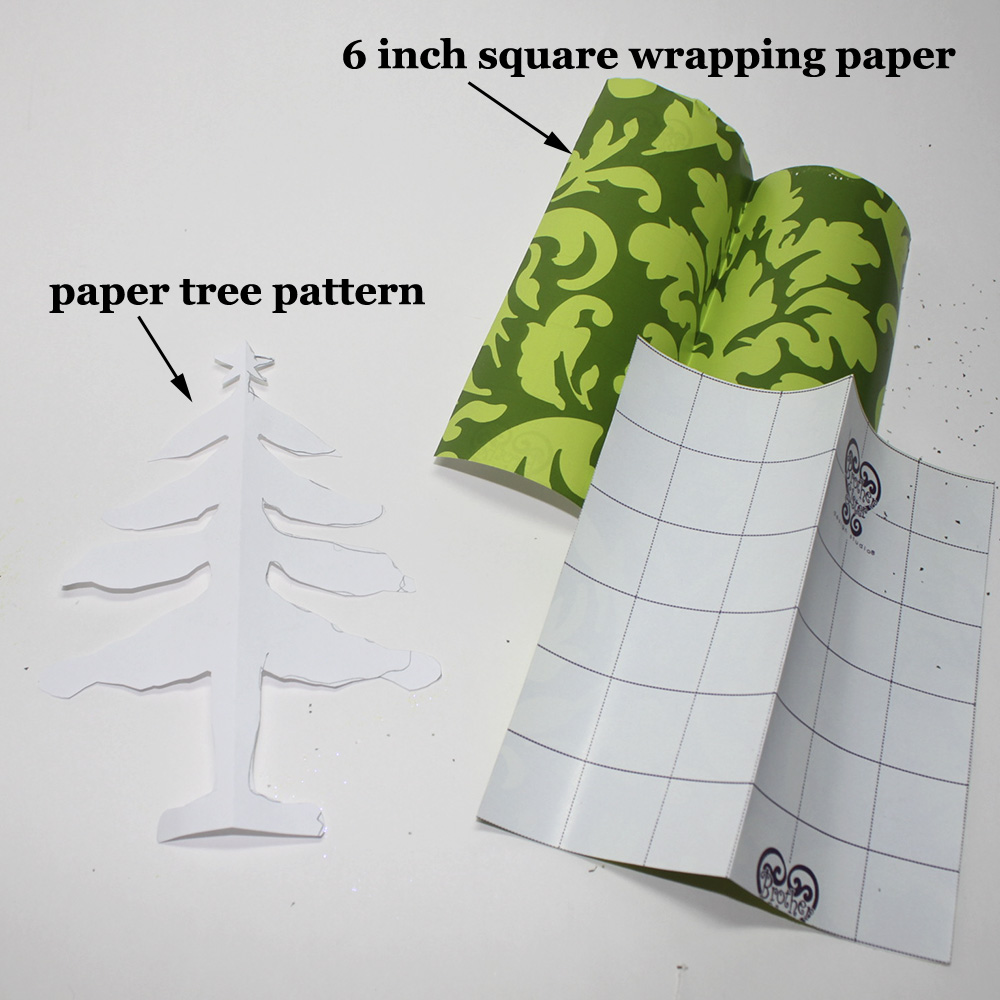
Glue the unprinted sides together and then start gluing to make a stack. Be sure to keep the folded edge straight so everything matches when the ornament is opened. I used a weight for a few minutes to make sure the glue would hold.
I traced around the pattern onto the stack and then began to cut. It seemed that more than three edges were too hard to cut, so cut what you can and then retrace the pattern from what has already been cut. When every edge has been cut, glue the two outside edges together and adjust the 3d figure until it is evenly spaced.
I added glitter and stuck an old hat pin in the top, but feel free to decorate any way you wish. I used a loop of fishing line for a hanger, but these ornaments will stand on their own if you want to use them in a centerpiece.

Happy Holidays and just one more ornament!
Hanging his stocking with care. What a cat!

Link’s Christmas Party. What a cat!
Wrappin presents. What a cat!
Ornament Advent: Day 18 Fortune Cookie Garland

Cheri: My boys and I try to keep a standing date on Saturdays. We like to go and have lunch at a Chinese Restaurant in the small town where we live. I keep the fortunes as a keepsake. This is one of my favorite projects to make with them.
Supplies:
Fortune Cookie Fortunes
Glue or tape
Gold marker
How to:
Color a line around the slips with gold marker to dress it up a bit, and then glue/tape the fortunes into a circle, (make sure the fortune is on the outside). Attach them together and you have a great chain for the Christmas tree. I plan on continuing the chain throughout the year. Merry Christmas!

Filling Santa’s toy bags. What a cat!


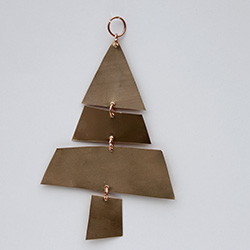
Ornament Advent: Day 17 Copper Christmas Tree

I love copper, as you can see here. I had some of the copper disks left and decided to make a Christmas tree mobile ornament. Just cut your sheet copper into some irregular branch-like shapes, punch holes with an upholstery needle, and assemble with jump rings. After fifteen minutes of work, a cute ornament emerges! It stands about 5″ tall and looks great on the tree!
— Loryn
Waxing the sleigh. What a cat!

