Monthly Archives: March 2014
The furniture moving men. What a cat!

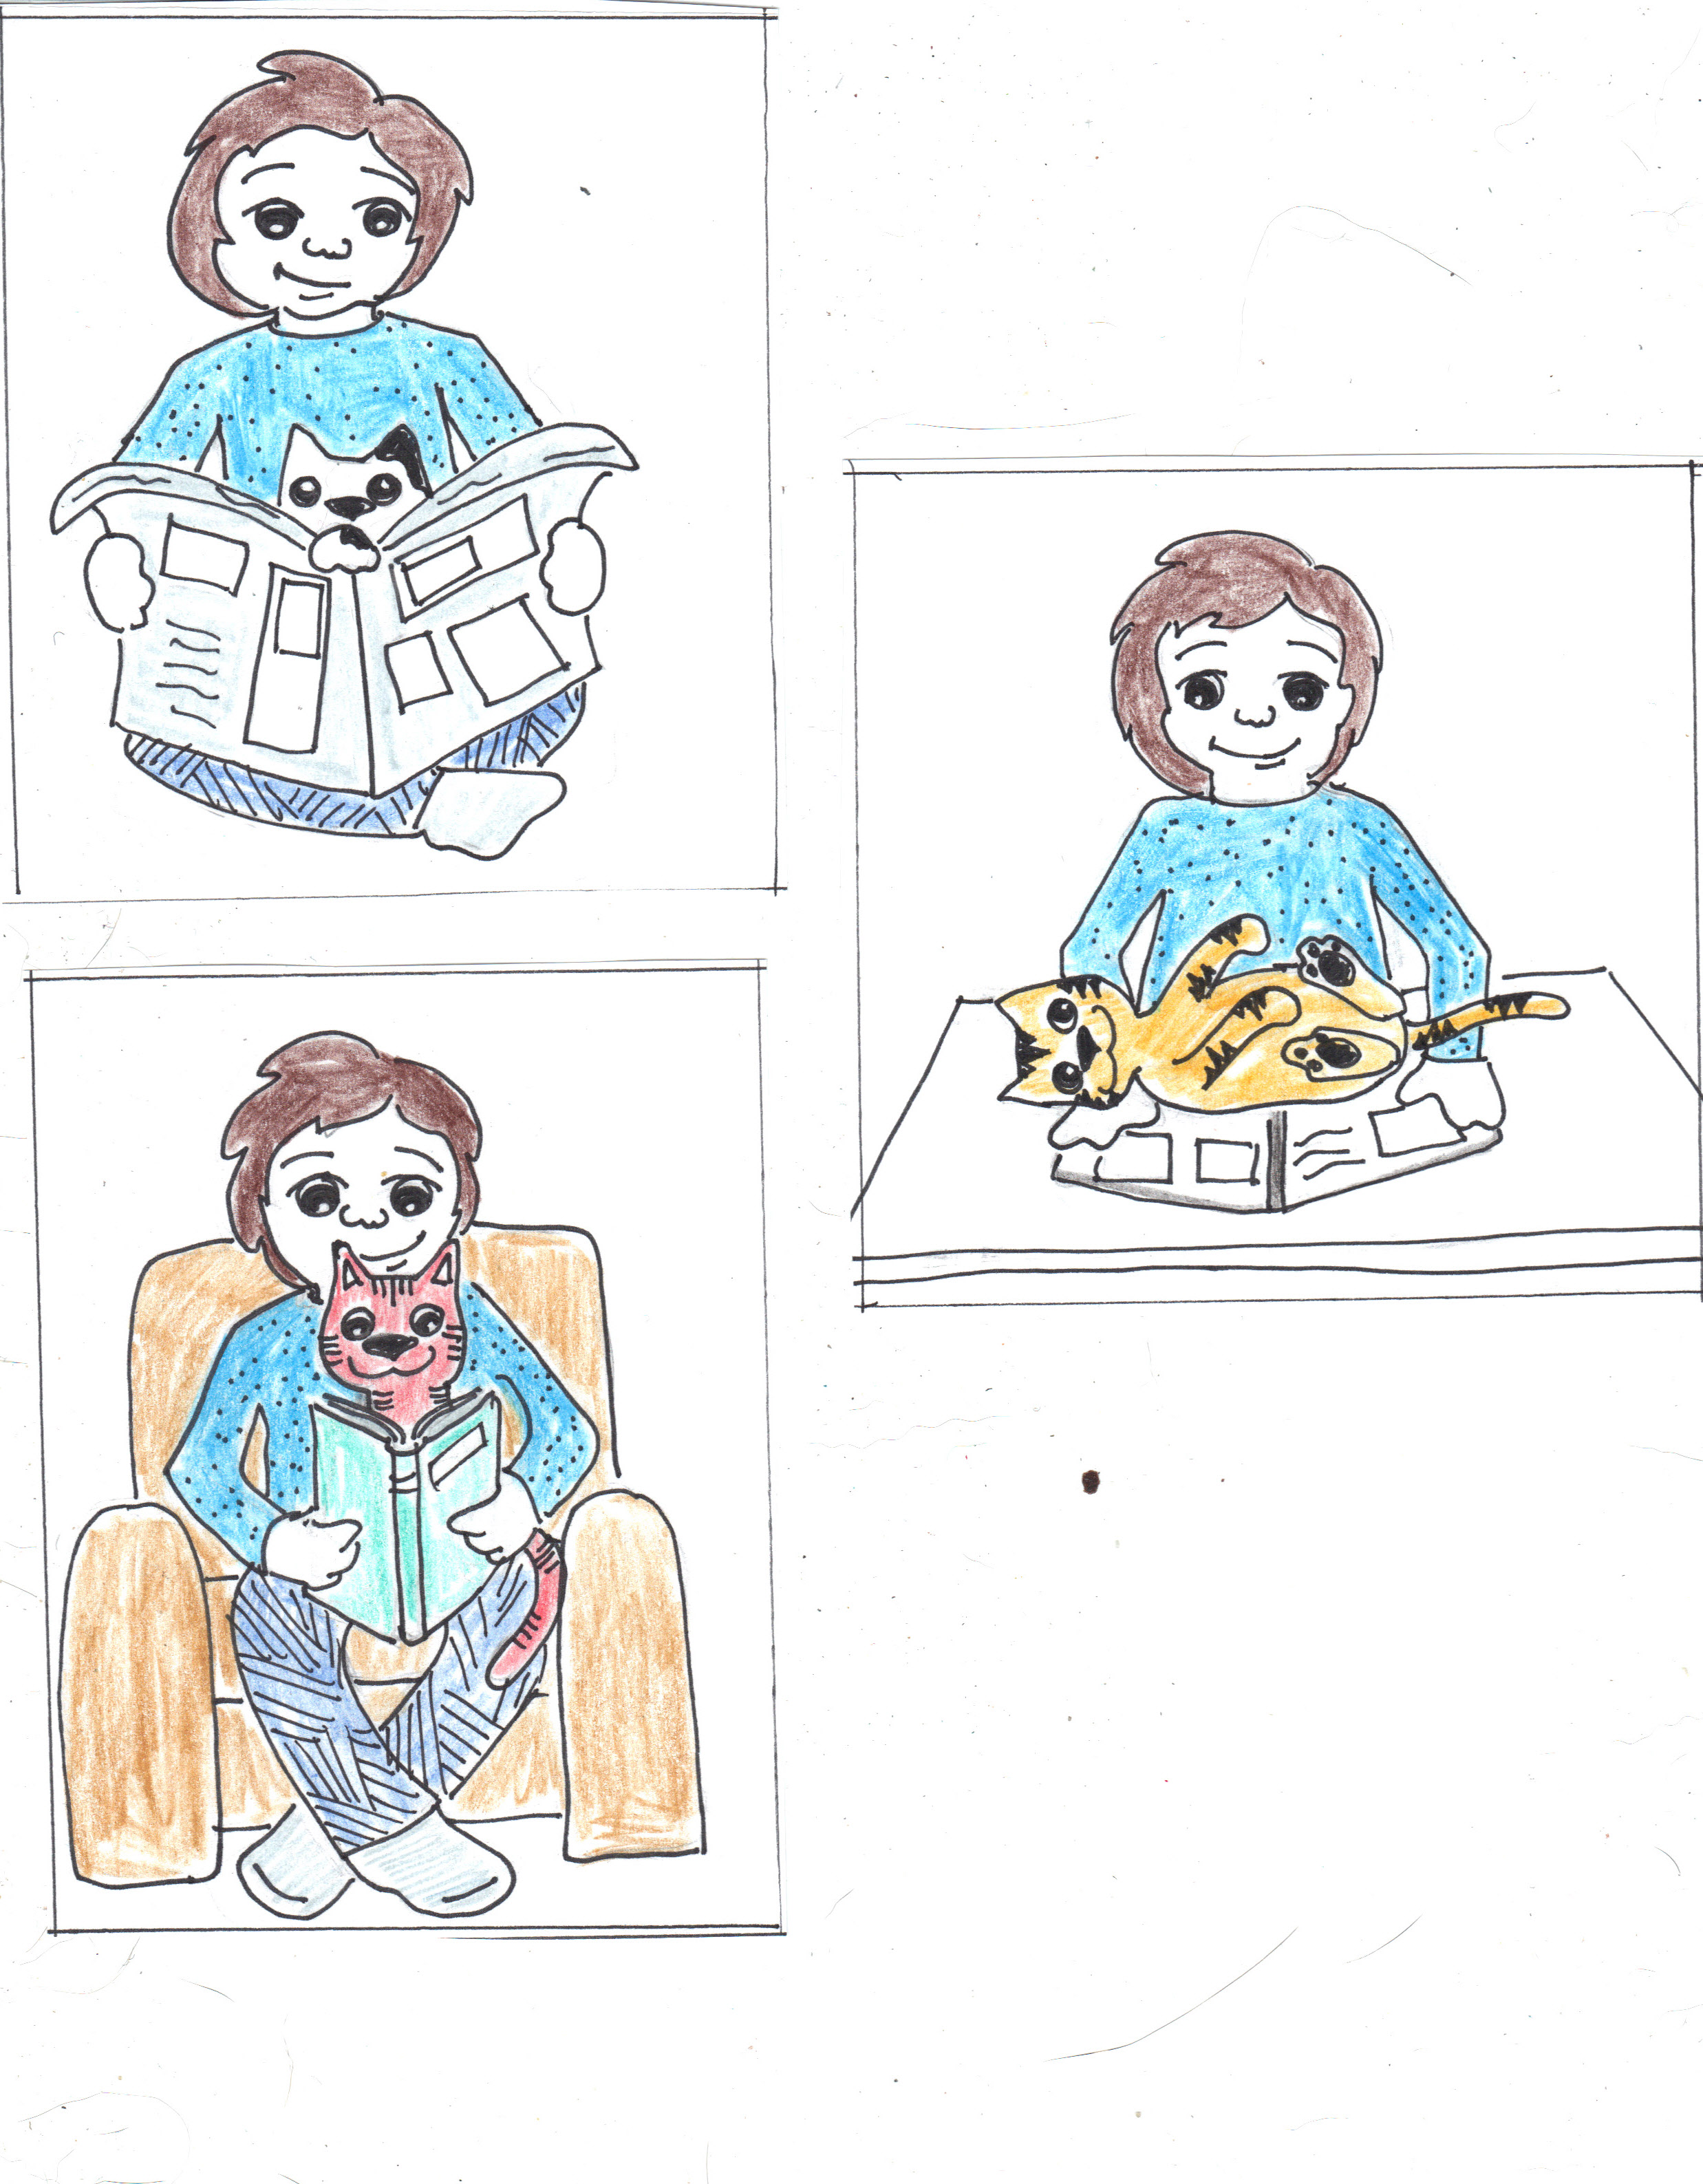
Sunday Catoon. My cats are very literate.
Finally a day worth going out for. What a cat!

Vintage Hardware Organizer Jewelry Box

Whenever I come across vintage metal hardware organizer chests at garage sales, I try to pick them up. I’ve been obsessed with cabinets with lots of little drawers since I read about them in Pippi Longstocking when I was little. These cabinets usually run about $5 at garage sales around here, so they’re a cheap way to fulfill my childhood dream of having lots of little drawers!

They have usually been sitting in a garage for the last 30 or 40 years, so it takes a bit of elbow grease to clean them up. The effort is worth it!

The multiple drawers and dividers are perfect for keeping jewelry stored without tangling. I thought about making velvet liners for the drawers, and maybe I’ll get around to it eventually. The chest does a great job of storing my jewelry.
If you see these old chests at garage sales, don’t hesitate to pick them up. I just purchased two taller ones that I’ll be using in my craft room to hold sewing and office supplies.
—Loryn
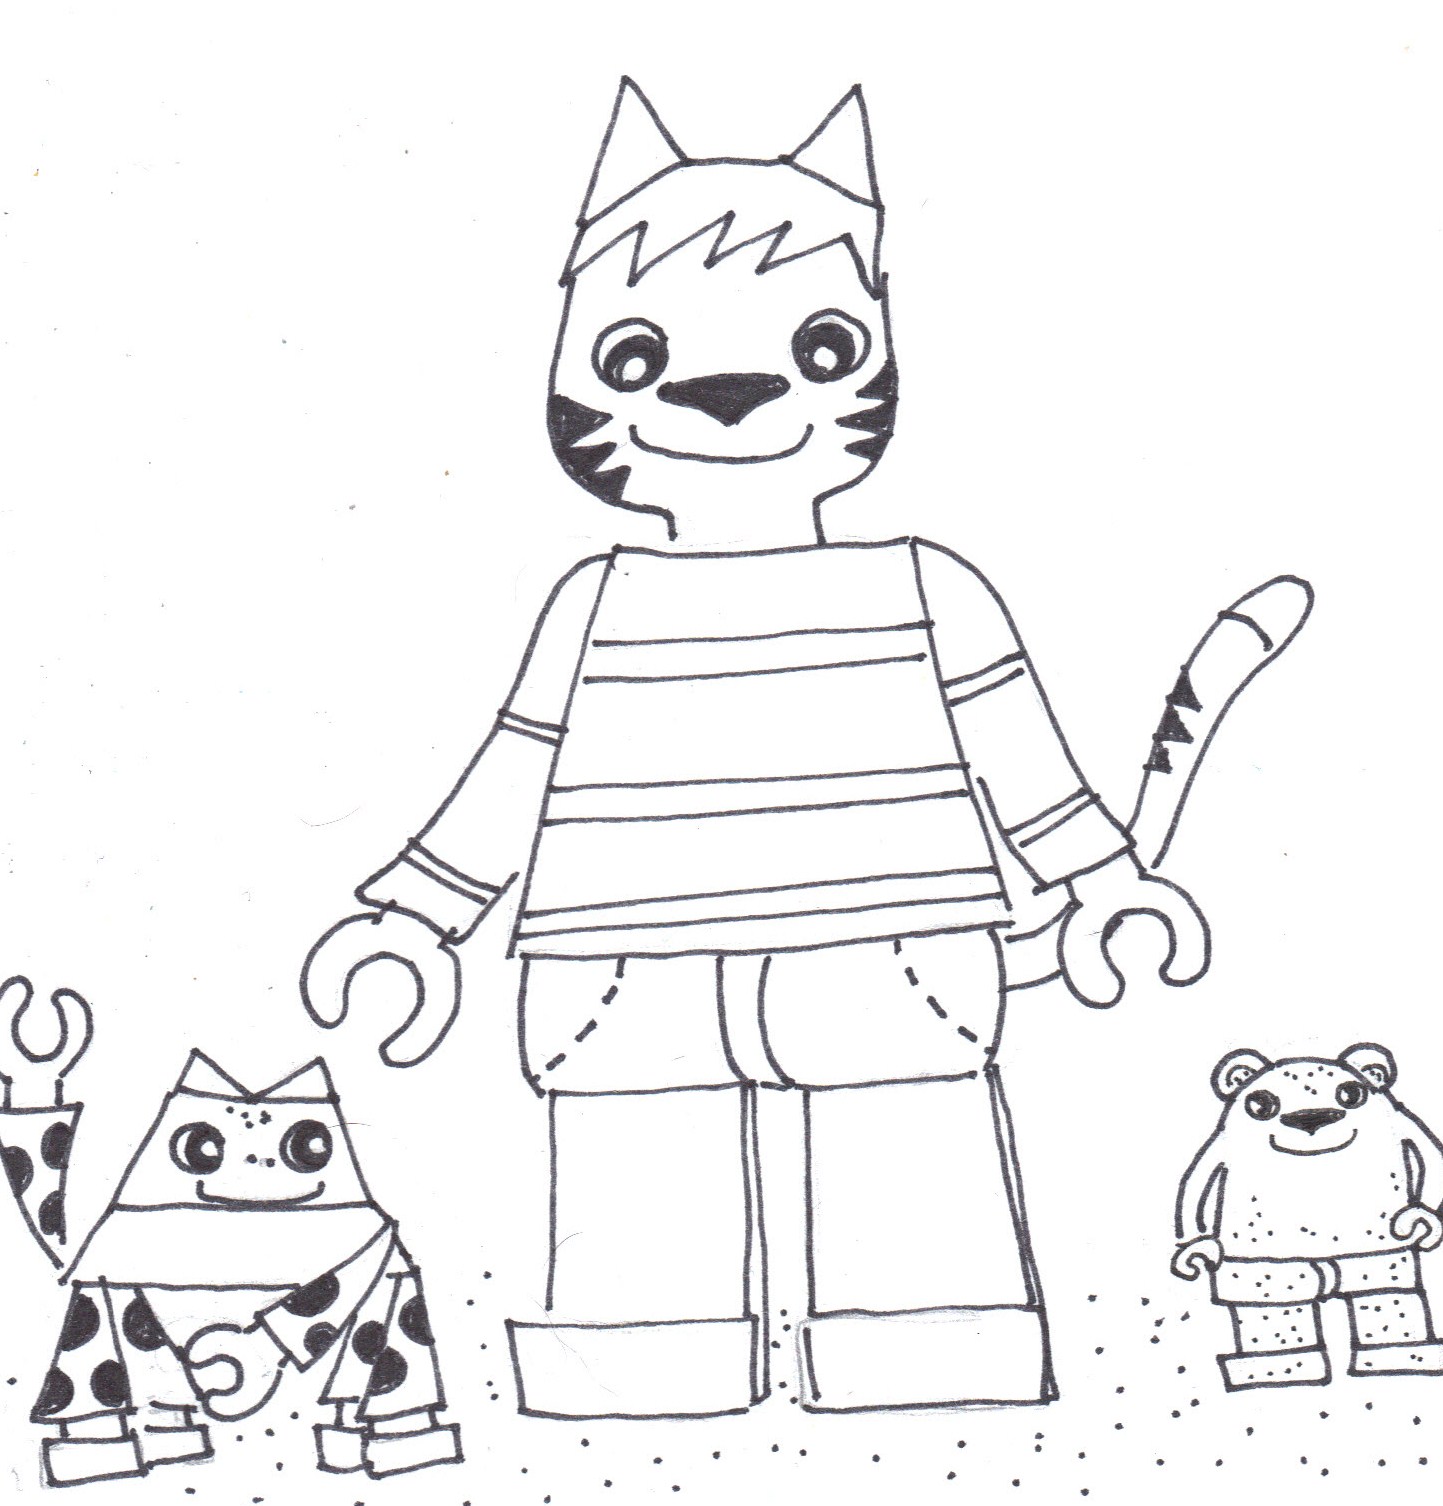
The guys as Legos. What a cat!
Studio Makeover #4: Desks and Shelves
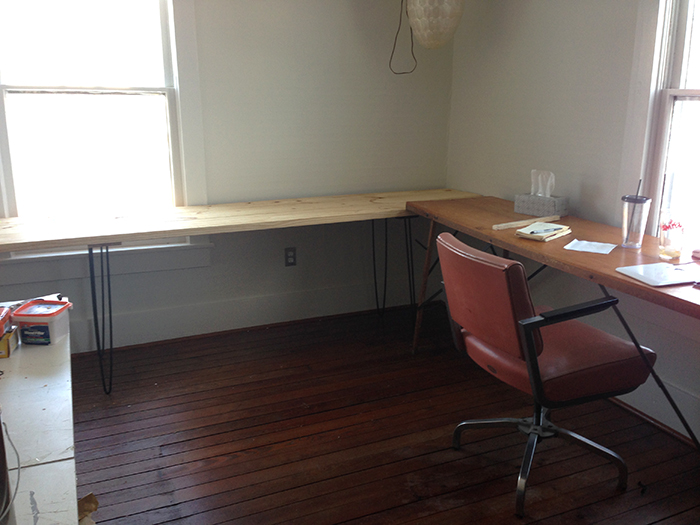
The studio is moving along! Once the walls were finished and the carpet pulled up, I painted the baseboards, put the quarter round back in, and painted the window trim of the two windows. I still have three (!) doors and trim to paint, but I want to get the furniture in place first.
I want a lot of work space in my studio, so I have two big desks. The one to the right is an antique wallpaper table that my mom picked up at a garage sale twenty years ago. It folds down into a long narrow box not any bigger than a couple 2x8s, and I had forgotten about it up in the attic. I stumbled upon it the other day, and I’m glad I did, because it makes a good desk for my laptop and office supplies.
The desk on the left is one that I built. I’m trying to use only things I have on hand, and I happened to have three 12′ long 2x8s that I got for my bathroom remodel and didn’t end up using. I cut them down to 9′ and used some scrap wood to connect them.

The hairpin legs are some I picked up many years ago. They were attached to a horrible piece of hacked up counter top as a makeshift table, so they were very cheap. This is the third desk that I’ve made with them. This one will hold my sewing machine, sewing supplies, and an ironing surface in front of the window.
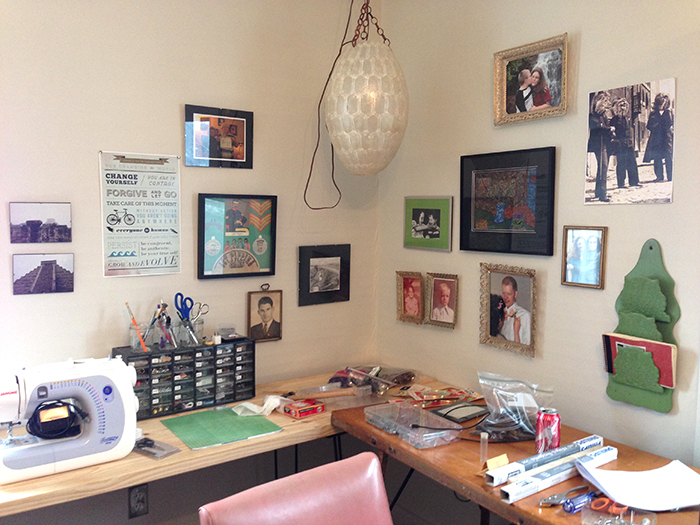
Once I had the desks in place, I immediately started hanging artwork and photos. I’m putting my most personal photos and pictures of my favorite people up here where I can look at them often. As you can see, the desk got messy immediately. My husband claims that even with fifty feet of desk space I still won’t have any clear work area, so I will have to prove him wrong!
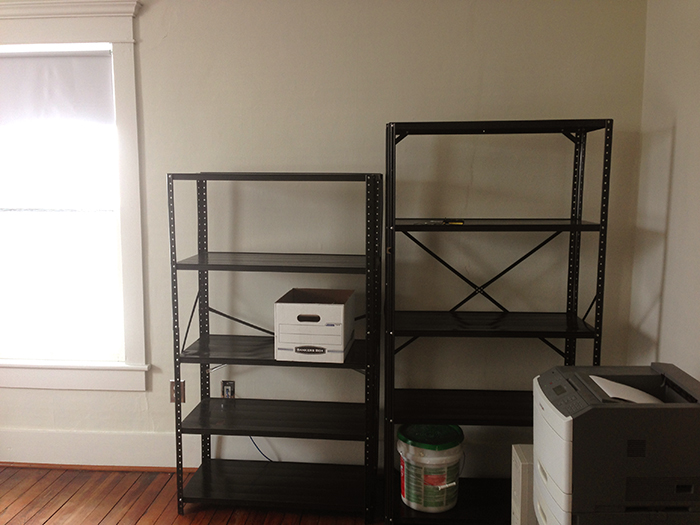
To the right of the desks, I am placing three shelves. These are the metal kind that bolt together. Frankly, they’re a pain, but I had several sets in the garage. Good shelving can be pricey, so I just used what I have. I did make one customization. The shelves are 6′ tall (the one on the right), overwhelm the room, and don’t leave any room for lamps or artwork above. I cut them down to 61″ (the one on the left), which better suits the proportions of the room.
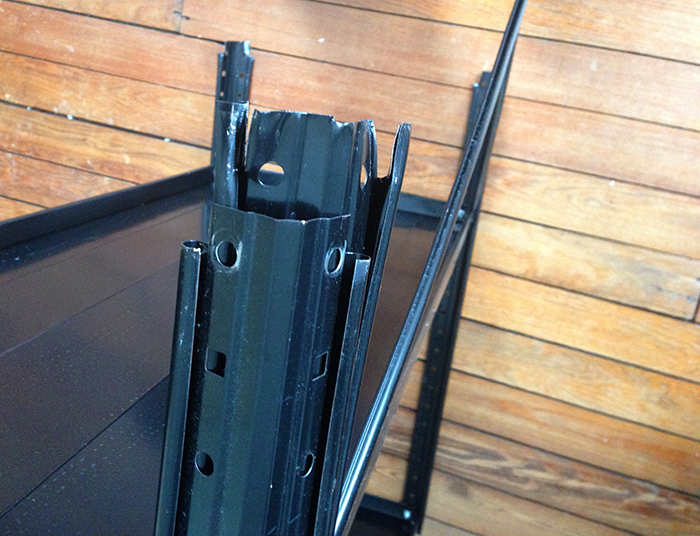
To cut them down, I used tin snips to cut down one of the standards where they attach in the middle. I’ve also cut them down at the top, but this tends to leave sharp edges. I may add plywood to the shelves to make them sturdier, but that’s a project down the road.
My next steps are to built a worktable and bulletin board across from the desks. I also need to figure out lighting, organize storage, and put in a lot of decorative touches!
— Loryn
I think there are two someones keeping Link up. What a cat!
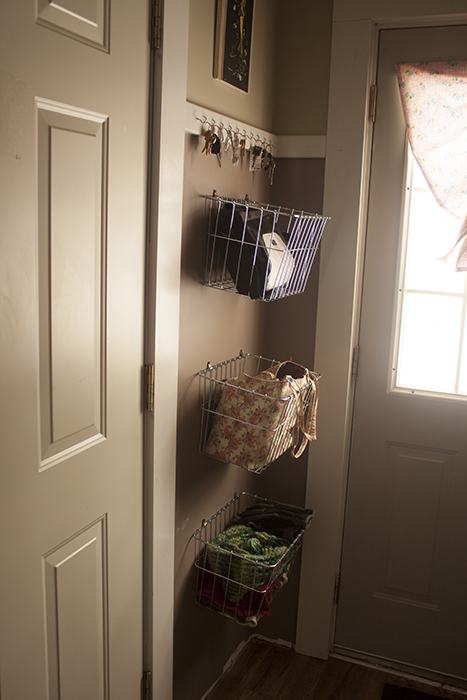
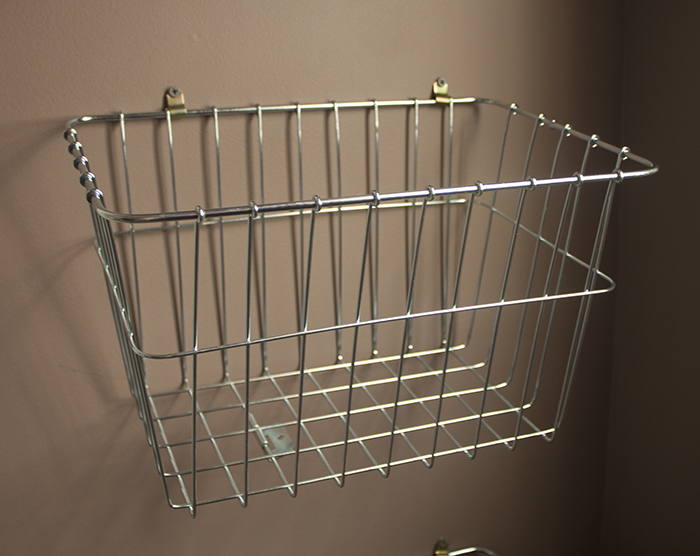
Bicycle Basket Landing Strip

The former back porch of my house is only 6 x 10 feet, and I have to pack a lot of uses into a small space. It has three doors, a window, and the fuse panel, and it serves as my main entrance, coat closet, laundry room, and storage. I have a tiny strip of wall that I wanted to use for bags, keys, hats, and mittens. I looked at a lot of different types of shelves, but I worried about the doors hitting the shelves and sending the contents flying. After several months of searching, I finally found these bicycle baskets. They’re very sturdy, a reasonable price, and easy to hang.
 T
T
I bought three of the baskets, one for my husband (his is pretty high off the ground, but he’s 6’4″), one for me, and one for all our hats, scarves, and gloves.
When we built this wall, I centered two studs so that I would be able to hang shelves of some kind down the road. If you don’t have studs in convenient places, be sure to use wall anchors.
The bicycle baskets are made to go on a rear rack, so they have an attachment bracket at the bottom. This didn’t bother me at all, but you could remove it if it got in the way.
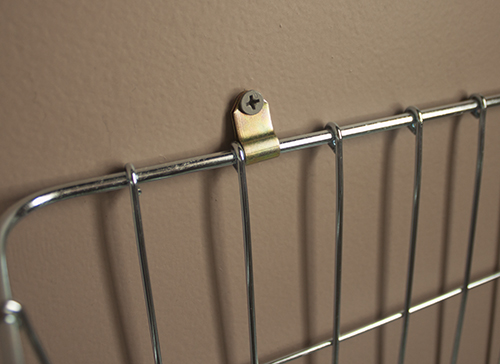
Here’s a close up of the brass hangers I used to attach the baskets. I got them in a large box of picture framing hardware at a garage sale. They look like the clip part of a D-ring hanger, but I haven’t been able to find one to link to (even google image search match has failed me). If you don’t have any odd metal hardware hanging around, I’d use metal strapping or even part of an old leather belt.

I screwed several cup hooks into the wood trim above to give us a good spot for our keys, since we seem to collect them! The baskets have helped me to be more organized. No system on earth could prevent me from losing my keys (or purse … or gloves … or phone) every once in a while, but these baskets have helped!
— Loryn
We mustache you a question. What a cat!