
-Cheri
-Cheri
-Cheri
Loryn’s photography tutorial would be useless if I didn’t actually put it to work. After watching her take photos, thinking about design and white space (which I had a lot of in my previous photos), and considering a photo list of all the shots you need when posting items to be sold, I was set loose with my camera and Photoshop.
I have been on a shell, mother of pearl and pearl kick lately in my jewelry. There are so many varieties of shells and pearls in so many colors and shapes that the opportunities and uses for them are too numerous to name or even demonstrate. I will show some of my tributes to mother nature’s wonder: Mother of Pearl.

These are the three I have completed so far. The pink and white necklaces are both made with pink shell donuts, white quartz round beads, and silver 6/0 and pink 11/0 seed beads. The black necklace is made of black shell donuts, black shell flat round beads, and silver 6/0 and black hex seed beads. I made the hook and eyes out of 18 gauge sterling silver wire.


The difference in my photography before and after is rather dramatic. These are so much more clear and are visually interesting. Previously I had way too much white space and very little actual design. I would just drape the necklace in a circle and shoot the photo. Here I am trying to make the photos a little more dynamic. My camera is better than i remember it being (I haven’t used this one in a long time or all that often when I did use it) and the lights are wonderful (Thanks Loryn for letting me borrow them). My set-up is really pretty small and doesn’t take up a lot of space and being in a rather unused corner helps a lot. It is also really close to my worktable, so no more excuses for bad photos.

And one more shot of my clasps from all three necklaces.

I think it was a very successful tutorial. Let’s all thank my sister Loryn for putting an end to my atrocious affront on humanity with bad photos. Thing of it is, I can appreciate my jewelry work more and see that it really is getting much better and more put-together now that I have some good photographs of it. Of course, I can also see all the flaws and errors much more easily with macro photography. etsy here I come!
–Kristin
Loryn came to B-ton this weekend to help me get started taking jewelry pictures for my etsy shop. Photography class couldn’t start until I had the tools and environment under control. I had to clean up the are and get the photo table set-up. I have an old drafting table which has become my base, the lights are borrowed from Loryn, the camera is my old Fuji Film 3800 FinePix, and I bought a roll of banner paper from Pygmalion’s, the local art store.

Living in an A-Frame house can cause some difficulties in hanging anything from the walls, so to hang my banner paper which would become my photo backdrop, I purchased two closet rod brackets. I hung these from the walls and put a dowel though the roll of paper. This drapes down to the table and provides a great backdrop that I can replace easily and even write and doodle on with no costly consequences. Just cut and roll out another sheet and you are good to go.
Then came the actual tutorial.
—Kristin
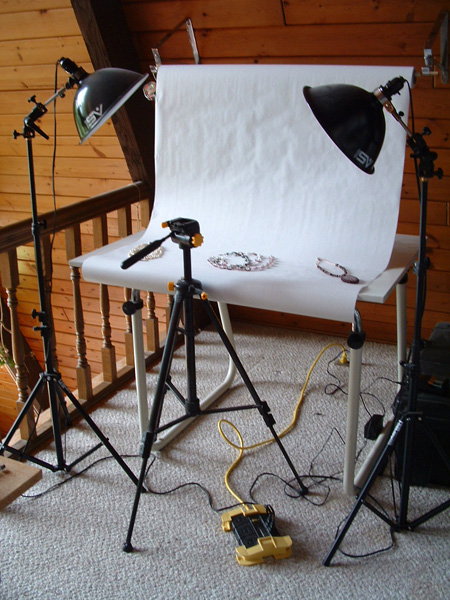
Loryn here. This is what the full photography set-up looks like. After shooting thousands of objects for sale on eBay, I got the best results by having two lights balanced on each side of the object. The tripod is helpful, but not a necessity with Kristin’s camera, which has good image stabilization.
The power strip has to be close at hand (or foot, really), so we can turn the lights off and on easily. The photo lights are 500 watt daylight bulbs. They are very, very hot, and they have a 5 hour lifespan, so you only want them on while shooting. A truly professional set-up would include lights that are slaved to the camera, so they only come on when you press the shutter release. We’re not there yet, if we will ever be.

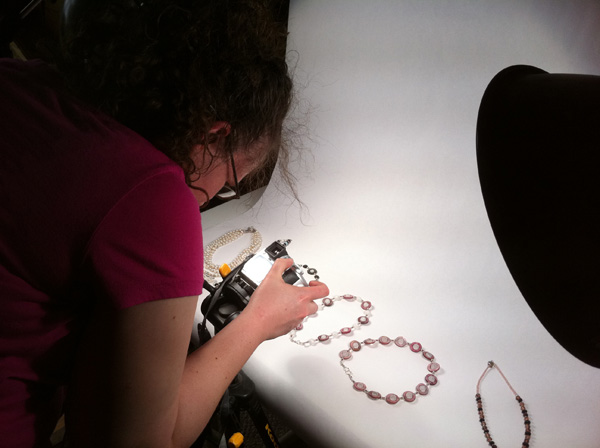
Here I’m trying out different positions for the camera and the jewelry. The camera has a 6X zoom, so it needs to be fairly close to get nice tight macro shots.
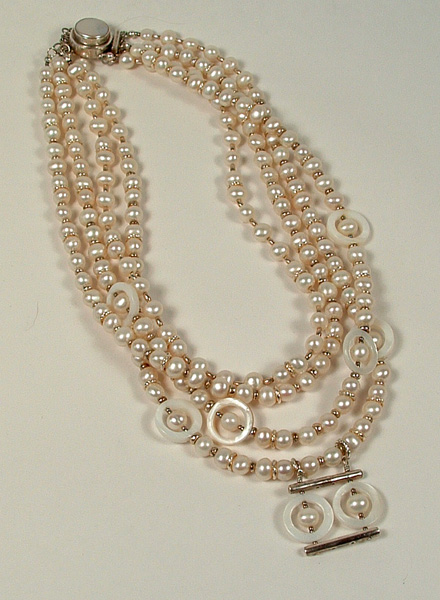
I’ve always thought that product photography is similar to taking portraits. Every object has a “face,” even just metaphorically, and a close up of that face is the shot you want for your thumbnails. Here is the “face shot” of Kristin’s pearl necklace:

Didn’t Kristin do a beautiful job designing this? She let me wear it when I got married, and it looked wonderful with my pink dress.
After the face shot, I pull back for the complete object. With necklaces, the challenge is to get the item to fill most of the frame, instead of a mostly white shot. It’s easier with a multi-strand necklace like this.
After a few adjustments in Photoshop, the photos are ready to go! Check out the next post for more of Kristin’s jewelry!
—Loryn
Woohoo! So, Loryn is coming down to B-Town to visit me this weekend. In fact, she is on her way now. This is the first trip for quite a while that is just for fun (for the most part) with very little on the agenda. Loryn is going to train me in photography 101 with and emphasis in macro photography for my up and coming etsy jewelry business. More on this later.
Anyway, I don’t know if it has been mentioned yet, but Loryn is a vegetarian and I just love to cook for her. It makes for a complete different set of challenges in food preparation. Tastes and food combinations change quite a bit when you take the meat out of a dish. The key I have found is not to approach vegetarian cooking with this idea. You have to think of it as a whole dish, with nothing missing, and build up complex flavors and aromas (not that you shouldn’t do that with all cooking, but I have to focus on it more for vegetarian cooking).
Currently I am experimenting with quinoa. I have never made it before, but I know that Loryn really likes it, so I bought some at Sahara Mart today on my way home. I am making a black bean recipe from allrecipes.com that has very high marks. Right now my house smells wonderful, all cumin and oniony.
I changed the recipe a little (I so rarely follow a recipe exactly that it is more of a statement if I said I DID follow it) and added some red bell pepper and tomatoes. I also made my salsa recipe (listed below) to add as a topper.
Kristin’s Fool-Proof Salsa
Boy, it sure takes me a long time to post a blog. The food is done and Loryn should be here very soon. Here is the finished product:

It tastes very good. I will have to start keeping quinoa in my pantry as a staple from here on out. She’s here!
Bon Apetit!
–Kristin

-Cheri
I love to craft, and I love to draw. There are a lot of creative endeavors that I like to pursue, and since we have started this blog, I have come to the conclusion that I even might like to write. But there are times when I am surfing on the web and I come across something that is so incredible, that is so creative that I am embarrassed. (For example, look at this Sarah Mensinga website.). Those are the times that I ask myself, “why can’t I do that?” “What am I missing, why can’t I create like that?” As I wallow in my own self pity, saying less than savory things to myself, I decide that I will never make another thing. Forget it. No way. My hands will not touch a paintbrush, a pencil, pliers, you name it. I am finished. I am done with that part of my life that gives me so much pain. As I continue to argue with myself, imagining that I am packing up everything to give it to Goodwill, there is a little part of myself that is saying, “stop being a baby, grow up, how are you going to know if you don’t try, you have faced tougher things than this.” And eventually I have to admit that this little part of me could be right. This part of me could probably be right. This part of me is most likely right. Okay, okay this part is right, and I get back to the part of my that I truly love, besides the wonderful art that people create gives me wonderful images to look at and maybe some ideas to try out myself.
-Cheri

Several years ago while I was selling on eBay, I came across an antique Japanese ginger jar full of rose petals, with a slip of paper that said “Rose jar, 1868.” That slip of paper and those petals elevated that object into a story. I wanted to do the same thing with the dried roses from my wedding bouquet.
It took me a while to find just the right container. I would have loved an antique ginger jar, but those are not going for 50 cents at every local garage sale. Mason jars, on the other hand …

Here you can see my bouquet before it dried. The pink and yellow roses are beautiful. My Uncle Bob and Aunt Rita bought the flowers as a wedding gift, and Cheri arranged them. Cheri also made boutonnieres, and I saved my husband’s along with the bouquet. I hope that 100 years from now, the roses and that slip of paper will tell our story.
-Loryn

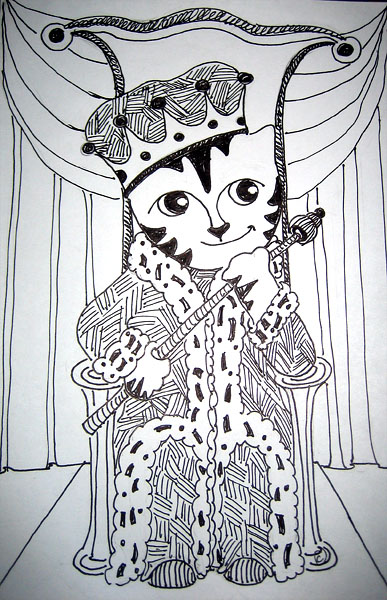
I thought it would be a good idea to let everyone know, that yes, there really is a true Link. Justin brought him home from a summer spent in Indianapolis. It was only a short time before I attached myself to him too. Link is a one in a million cat. We have six cats and a dog. And I love each of them, but Link has this specialness about him. When he looks at you, you can feel how much he truly loves you. It is like, our house is where he was always meant to be. It is so unusual to have a cat that seems to go out of his way to make you happy. Most of the time a cat demands from you, but he is really not like that. Don’t get me wrong, he does have moments of being contrary, and being a bit of a terror. But all in all he is one awesome cat, and he inspired me enough to draw a cartoon of him each day for a year. What a cat!
-Cheri


