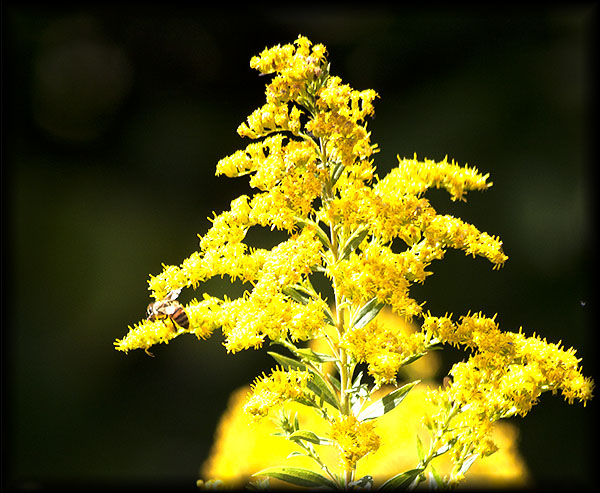
Lynne: This afternoon at the farm, I looked to the north at the fields of wild grasses and was surprised by a mass of yellow. The goldenrod is in bloom. When goldenrod blooms all the insects know that frost is not far behind and all the bees and butterflies and insects can be found with their snouts buried in the pollen.
Since all those creatures were busy with the goldenrod, I thought it would be a good time to get some of those interesting closeup photographs of tiny creatures. I rode out in the Mule (machine type Kawasaki not 4 legged type animal) and stopped near the edge and put my finger to the shutter release. There were so many insects on the goldenrod that I wanted a picture of them all, but these two pictures with the bees show the rich heavy pollen and the bees’ determination to gather it even with a nosey photographer and her camera too close for comfort.
I sneezed for a while afterwards and I blamed the goldenrod, but I found this website, The Great Plains Nature Center, and learned a great deal of information about the flora and fauana of prairies. Goldenrod is not the culprit of fall allergies. Its pollen is thick and sticky to attach itself to the insects that pollinate it. Ragweed is the culprit because it pollinates with the wind by releasing millions of grains of pollen into the air and into your nose. Ragweed is green and fades into the late summer foilage, but goldenrod stands proud and yellow. Guess who gets the blame for allergies.
Next time you see a field of blooming goldenrod, take the time to thank the land owner who is willing to allow weeds to grow. Weeds are only plants that humans have not found a way to make money from, but to the insects and birds those same weeds are their super Walmart and discount shopping mall all rolled into one.
This is an experiment in the uses of blue and yellow to make green. I used yellow as the first layer as I have found that yellow under another color shows more than yellow over a color. I then used a light blue to make the lightest green. I used a dark green and a dark blue for the shadows and then added some black in the darkest places. I added the red tongue as a complement accent to the green.
Hummingbirds posturing in the air. Eventually, the lure of the sugar overcomes all the belligerence.
Hummingbirds seem like such sweet birds. After all, they live on sweet nectar and sugar water, but…they are vicious little buzzers screeching and shoving each other with sweetness only on their beaks and never in their hearts.
The farm is a great place to watch hummers. I have counted as many as 75 of them at a time among the flowers and feeders. The air is loud with the hum of their wings and their shrieks of fury as one of them occupies the space another wishes were his. There is little peace where hummers gather, but then peaceful is not nearly as amusing.
Air traffic control to fliers: "Your are buzzing into the path of oncoming traffic! Evade, evade..."Mid air refueling. It's a tricky business.
Loryn: One of the downsides of owning a 100+ year old house is the 100 years of wallpaper layered on every surface. When I first bought the house, I had grand ideas of removing all of it and skimcoating. These delusions ended after it took a few months to strip four rooms—rooms covered in up to fifteen layers of wallpaper, wallpaper that came off inch by frustrating inch. The house has fifteen rooms total, many of them large Victorian rooms with ten foot ceilings, and even my helpful, crafty family just doesn’t have that much enthusiasm!
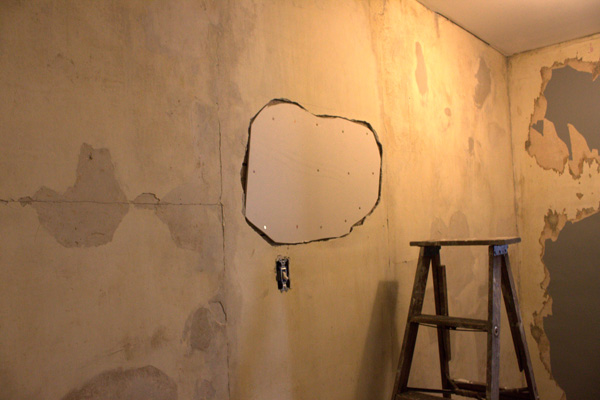
Since then, I’ve started painting over the already painted wallpaper as a compromise to make the house actually livable. There are a few places, though, where the wallpaper is already peeling and has to come off. The end of my upstairs hallway is one of those places. Above, you can see it in progress. I don’t have a before shot, because I started taking the paper down PB (pre-blog).
There are a lot of methods out there to remove wallpaper, and we’ve tried most of them. The top layer of paper scraped off easily, and I just used hot water on the last layers that didn’t want to come up. Since this is antique paper (not vinyl), the water brings it up pretty easily. (That’s easy on a wallpaper removal scale, which ranges from repetitive annoyance to utter misery).
Here it is, ready to begin patching the plaster. Most of the paper on the right wall was adhered firmly, so I’ll be leveling it out with drywall compound, rather than removing it all. Expediency rules! In this shot, you can see the back stairway, and the doorway to the guest room.
The first thing that I needed to do is to patch a large area where the plaster has pulled away from the lath. I’m planning to use this niche to display artwork, so I need flat, sturdy walls.
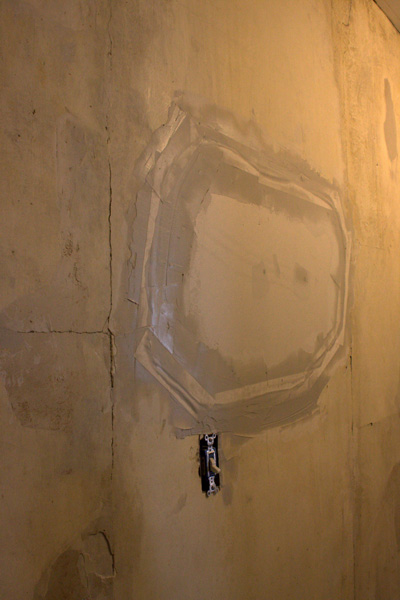
Here is the patch in place. The “proper” way to make this repair would be to cut a square out of the plaster and insert a square patch. I even have a Dremel Multimax that will cut plaster. One small cut in plaster, though, will ruin a $14 blade. Since plaster is hard to cut and drywall is very easy to cut, I’m taking this route! I pulled out the loose plaster with a hammer, and left the lath in place. I made a template by tracing the shape onto brown paper. I used 1/4″ drywall, which matches the plaster pretty well.
And here is the patch again. To fill in the gaps, I used setting compound or “hot mud.” It’s more like real plaster, in that you mix it yourself, and you have limited time to work with it before it sets. It’s good for filling in large gaps, because it doesn’t shrink like drywall compound. Also, it cures much faster, so you can keep working. I usually use 45 minute compound, but you can also get 20 and 90 minute. I also used paper tape over the seams.
Once that was done, I was ready to start using drywall compound for other cracks and to smooth out some old and uneven plaster repairs. Purists use plaster to repair old plaster, but I’m happy enough with the drywall compound, and it saves many steps. Expediency again!
And here it is with the cracks taped and rough spots leveled. I still need to tape the ceiling seams. A previous owner hung drywall on the ceiling in the not-so-distant past. Unfortunately, their finishing job was pretty bad. They embedded the tape, and never used any topping coats, so the seams look terrible. The tape was also on top of all the layers of wallpaper, so I just pulled it off. I’ll end up redoing all of the seams eventually. Tomorrow, I’ll do that seam and put the first topping coat on!
So, why fix this plaster instead of just demolishing it and putting in drywall? Well, I happen to love old plaster. New drywall just doesn’t compare with the substance of original plaster. This wall was in good shape, with two main vertical cracks. Overall, the amount of finishing I’ll do is not much more than I would if I put in new drywall. Plus, not having to haul all the old plaster out and carry in new drywall is a relief to my back.
I’ll be back tomorrow with an update on this project! If you’re interested in learning more, I used the site www.plaster-wall-ceiling-solutions.com to learn all about repairing plaster. His tutorial was very helpful!
Loryn: A really big bulletin board is a great tool for all crafters. Martha Stewart recommends using homosote board wrapped in fabric. It’s reasonably priced and comes in 4×8′ sheets, but I can’t get it without a truck and a 60 mile round trip. Luckily, there is a cheap and easy alternative.
I made this bulletin board using suspended ceiling tiles. They make a great bulletin board surface, can be easily wrapped in fabric, and they cost around $5 for a 2×4′ tile. If you know someone who is remodeling, you may even be able to scavenge them.
I used fabric from my stash to wrap these, and I cut each tile in half to make better use of the fabric. The tiles are so lightweight that I hung them with a finishing nail in each corner. They make a 4×6′ bulletin board from around $15. They’re great to hang over a desk, in a crafting area, or in an entry way for a busy family!