My first post, on pattern drafting, showed you how to make a simple tote bag pattern. This post will cover how to assemble it. I’ll also show how to make french seams, which form a quick, easy seam finish that won’t unravel in the wash.
For these bags, I used a vintage 60s polyester canvas. I normally don’t like poly, but it does work well for an item that will get dirty and need to be laundered frequently. Plan on roughly 1/2 a yard per bag, plus extra for handles. For a four bag set like this, plan on 2 1/2 yards.
First, cut out your pattern, keeping it square and on grain. If this is your first time using a new pattern, I recommend finishing one bag completely before cutting out any of the others, so you can fix anything you don’t like. I made my first bag too small and resized the rest. You don’t want to find this out after you have cut up all your fabric!
For this bag, we’ll be using french seams. Here is a quick tutorial:
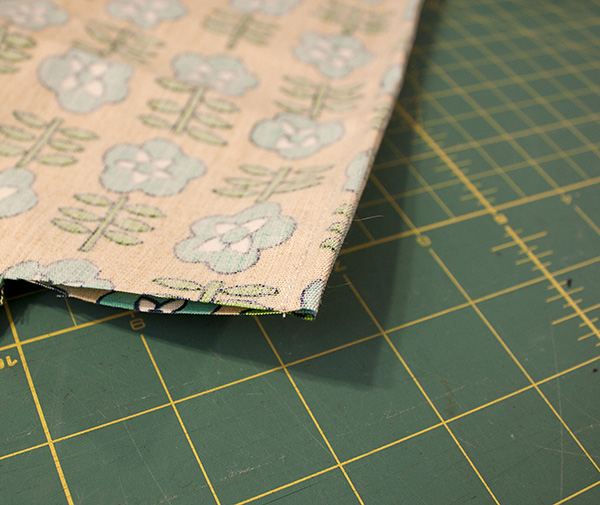
Sew the first seam with the right sides facing OUT. We’ve been so conditioned to always have the right sides facing in that you might have to make a conscious effort to have the right sides facing OUT. Double check before sewing! As you can see in the picture, I’ve sewn a scant 1/8″ seam. If you’re not comfortable with this, cut your seam allowances larger, then sew a 3/8″ or 1/2″ seam and trim it down. In either case, make sure there are no frayed edges that could show through the final seam.
After you’ve sewn the first seam with right sides facing out, fold the seam so that the right sides are now facing in, as seen above. Your first seam and the raw edges will now be trapped inside a second seam.
Sew a second seam with the right sides together. It needs to be large enough to miss the raw edges of the seam inside. As you can see above, it gives a very nice, clean finish!
To sew the bag with french seams, it is fastest to complete step 1, sewing the seam with the right sides facing out, on both sides and the bottom. Turn it wrong side out, and sew the second seam on both the sides and the bottom. When you are finished, it will look like the bag above.
Next you’ll make the corners. Turn the bag so that the right sides are out again, and sew step one of the french seam. Make sure that the seam allowance on the bottom is not twisted.
Turn the bag so that the wrong sides are out, and sew the final seam along the bag bottom corners. Now we’re ready to finish the top.
For these grocery bags, just fold over a simple 1/2″ hem, and you’re done with the body!
All that’s left are the handles. I make mine a little differently. I cannot stand to turn tubes. After years of struggling with frayed, ripped out, misshapen messes that were supposed to be an elegantly turned handle, I gave up and developed my own technique. If you are graced with tube-turning ability, then by all means make your handles that way. But if you’re like me, just make them like this. The sewing police aren’t watching!
The first step is to cut two 20″ long by 4″ wide strips for each bag.
Fold a 1/2″ hem up at each end of the strip.
Then fold the sides in like you would to make a bias strip.
Then fold the strip in so that all raw edges are hidden.
Now pin the handle carefully so that the two edges are aligned, and top stitch all the way around the handle. Not only did you get to avoid turning tubes, but the handle is four thicknesses wide, giving it a nice sturdy feel.
All that’s left is to attach your handles to the bag. For the 18″ wide bag, I placed the handles 5 1/2″ from the outside edge, with 2″ of handle sewn to the bag for strength. Sew an X-shaped design for added reinforcement.
As I mentioned in the pattern drafting post, I made the first bag 14″ wide, which is too small for most groceries. I enlarged the pattern, and made 3 bags that are 18″ wide. It was a serendipitous mistake, because the small bag is perfect for holding the other three bags when not in use, as well as for small shopping trips to get one or two items. These bags are great because you can really stuff them! For my small household, three will accommodate a big shopping trip. For a large family, six would probably work better for you. Happy sewing!
–Loryn


Very nice pattern. A friend is doing something similar using recycled feed bags as she runs a stables. Thanks!
Merci pour ce très chouette patron ! 🙂