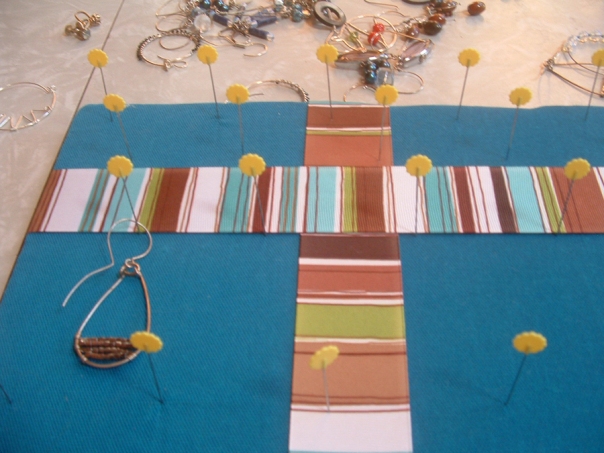
I had an old earring display that I made several years ago that had some really bad fabric on it. I was in a hurry at the time and just wanted somewhere to hang my earrings. I decided that it needed to be updated. I also figured in the process that I would show you how it is made. I have a larger version of the earring display on the other side of my sink where I hang my necklaces. It is done in the same new fabric, but does not have the ribbon embellishment.
Materials:
Ceiling Tile (cut to size needed, I used a utility knife to cut my tile)
Fabric (enough to cover ceiling tile)
Ribbon (or any embellishment)
Scissors or Rotary Cutter
Staple Gun
Pins

I ironed my fabric and rolled it for dust, lint and pet fur. The fabric has been sitting out for a while and needed a quick lint-rolling.

I left about 2 inches of extra fabric on each edge to wrap around my tile board.

I stapled the sides of the board first. It really doesn’t matter if you do the sides or top/bottom first.

I folded the corners like you would a present. I am sure there are fancier or neater ways to do this, but I like the end result.

Fold up the bottom edge and hold to staple.

Repeat this same procedure for the other three corners, then staple the rest of the top/bottom fabric.

I decided that I wanted to have a bit of embellishment to my display, so I chose some ribbon I had left over from a previous project and cut it to fit my tile board.

Once I had decided on my placement, I used my cutting mat to make sure my ribbon would be level and even on my board.

I stapled the two vertical ribbons to the board and then added the horizontal ribbon in the same manner.

And here is the board all ready to go. I just need to add the pins and earrings!

I had been working in the loft at my craft table, but as all the pins and earrings were downstairs, the project shifted to the dining table.

I used a wide earring and a long earring to help decide the placement of my pins. I have a lot of earrings and needed to be able to display long and short earrings.

Now the display is ready to go. I pushed it in place and hung my earrings!

If you cannot tell, the earring display is in the over the toilet shelf. I have more necklaces hanging all over the shelf itself as my other necklace display is already full, another project?
I like the color, I have lots of stained pine in my house (a LOT of it) and the more color I can add, the happier I am. As I cannot paint, I will add color wherever possible.
I am really happy with my finished Tile Board Earring Display!
Happy Creating!
Kristin

Good idea! Thanks!